


Miriam (Afterimage)Build and Guide

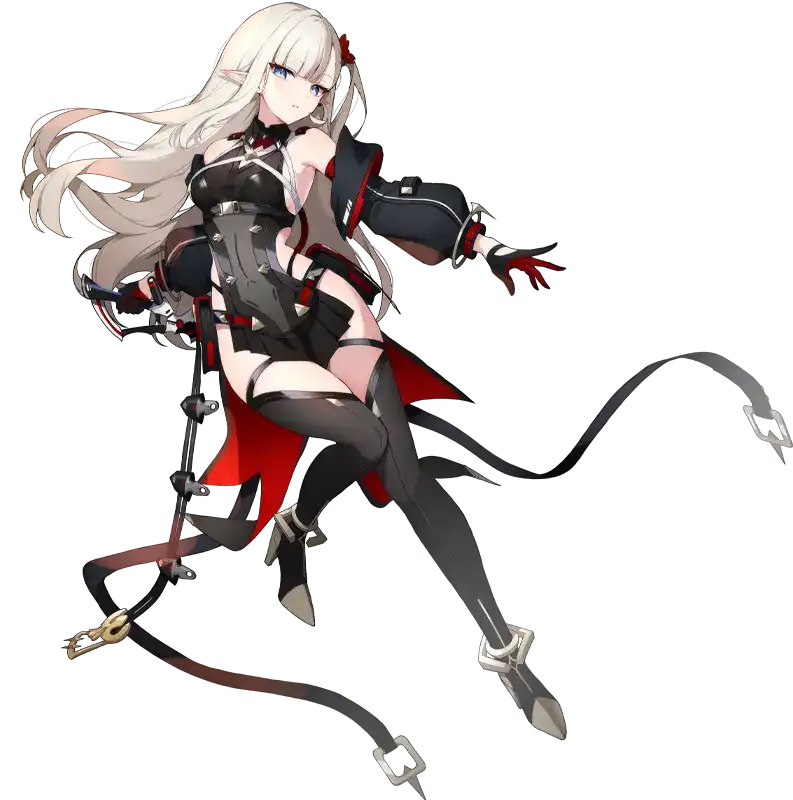
Miriam (Afterimage) is a Epic rarity character from the Striker class who belongs to the Fairy faction and who uses the DEX gear type.


To learn more about Miriam (Afterimage) check the sections below. Use the tabs to quickly switch to the kind of information you're looking for.
Profile
Artifact
Review
Build
Lore & Love Story
Profile
Blink Strike
Type: Damage - Single
Momentarily overloads her combat suit, releasing a flurry of slashes at the enemy with the highest ATK to deal damage equal to 400% of ATK.
Permanently increases her Speed by 30%.
All sub skills consume 500 Mana and deal additional damage equal to 100% of ATK.
Damage changes to 500%. Speed increase changes to 35%, and additional damage changes to 150%.
Damage changes to 600%. Speed increase changes to 40%, and additional damage changes to 200%.
Detonating Spear
Type: Damage - AOE
Deals damage equal to 400% of ATK to the nearest enemy, while also dealing damage equal to 300% of ATK to all other enemies within 3m.
Stuns all hit targets for 1 sec and pushes all enemies within 3m away from the main target.
This attack cannot be evaded.
AoE damage changes to 320%, and damage to the target changes to 500%.
AoE damage changes to 340%, and damage to the target changes to 600%.
Surging Pierce
Type: Damage - Single
Charges toward the enemy with the lowest HP, dealing damage equal to 220% of ATK and cancelling 2 positive effects from them. Special effects are activated based on her deployment position.
<Front Row Boost> - Decreases total damage received by 10% for 6 sec and grants a shield equal to 120% of ATK after 6 sec.
<Back Row Boost> - Damage changes to 240%.
Damage changes to 230%. Front Row Boost - Total damage received decrease changes to 20%. Back Row Boost - Damage changes to 260%.
Damage changes to 240%. Front Row Boost - Total damage received decrease changes to 30%. Back Row Boost - Damage changes to 280%, and the attack is guaranteed to land as a critical hit.
Dagger Blink
Type: Damage - Single
Throws an exploding dagger to the nearest enemy, dealing damage equal to 220% of ATK and stunning them for 2 sec. Special effects are activated based on her deployment position.
<Front Row Boost> - Taunts all enemies within 3.5m and decreases their ATK by 10% for 4 sec.
<Back Row Boost> - Damage changes to 280%.
Damage changes to 230%. Front Row Boost - ATK decrease changes to 15%. Back Row Boost - Damage changes to 300%.
Damage changes to 240%. Front Row Boost - ATK decrease changes to 20%. Back Row Boost - Damage changes to 320%.
Line Reversal
Type: Buff
<Front Row - Suppression Specialization> - Begins battle with a permanent shield equal to 180% of ATK, gaining an extra permanent shield equal to 40% of ATK for every 10 hits received. Also decreases the Physical/Magic Resistance of all enemies within 3m by 15%.
<Back Row - Assault Specialization> - Increases total damage received by 10% while also permanently increasing damage dealt by 30% and Speed by 30%.
<Front Row - Suppression Specialization> - Shield HP at the beginning of battle changes to 190%, extra shield HP changes to 45%, and Physical/Magic Resistance decrease changes to 20%.
<Back Row - Assault Specialization> - Damage dealt increase changes to 35%.
<Front Row - Suppression Specialization> - Shield HP at the beginning of battle changes to 200%, extra shield HP changes to 50%, and Physical/Magic Resistance decrease changes to 25%.
<Back Row - Assault Specialization> - Damage dealt increase changes to 40%.
N/A
Type: Passive
Level 1: X
Level 7: X
Missing name
Type: Sub
Level 1: X
Level 7: X
Artifact
The Seventh Bullet (Afterimage)
Type: Defense
Normal attack deals Burn damage equal to 60% of ATK.
It also deals Burn DoT equal to 40% of ATK every 2 sec for 4 sec.
Burn damage changes to 80% and Burn DoT changes to 50%.
Burn damage changes to 100% and Burn DoT changes to 60%.
Burn damage changes to 120% and Burn DoT changes to 70%. Upon taking fatal damage, that damage is negated, her damage dealt decreases permanently by 30%, and she returns to her team formation and recovers 50% HP. Instantly triggering "Surging Pierce."
Burn damage changes to 140% and Burn DoT changes to 80%.
Burn damage changes to 160% and Burn DoT changes to 90%.
Burn damage changes to 200% and Burn DoT changes to 100%. Damage dealt decrease from taking fatal damage changes to 10%.
Review
Damage dealer
Debuffer
We have reworked our tier list owing to multiple meta shifts and how we rate characters. As such some of the reviews (especially of older characters) might not match the tier list ratings. Please prioritize the ratings given over provided Review. We will be working on updating all reviews, but it is a time-consuming endeavor.
Last Updated - August 11, 2025
Miriam (Afterimage) is a Fairy DEX Assassin that can swap between her 2 modes based on where she is placed in the formation. Placed on the front line, she’s a fairly tanky disruptor, and on the backline she’s an all-out glass cannon.
Passive: Line Reversal – Miriam gains different effects based on where she is placed in the team.
Front Row: Miriam gains a shield at the start of the battle, regaining a shield every 10 hits. She also lowers the Resistances of all enemies within 3m of her.
Back Row: Miriam gains 30% Damage dealt and 30% Speed, but takes 10% more damage.
S1: Surging Pierce – Miriam dashes to the enemy with the lowest HP, dealing damage and dispelling 2 buffs. Front Row: Miriam takes less damage for a short duration and gains a shield afterwards. Back Row: Attack deals more damage with guarantee to crit.
S2: Dagger Blink – Miriam attacks the closest enemy, dealing damage and stunning. Front Row: Miriam taunts all enemies within 3.5m of her and decreases their ATK. Back Row: Attack deals more damage.
Main: Detonating Spear – Miriam deals damage to the nearest target and AOE damage to all enemies within 3m, stunning them. Knocks away all enemies besides the main target. This attack cannot be evaded.
Ultimate: Blink Strike – Miriam attacks the enemy with the highest ATK. Gains Limiter Removal - +40% Speed. All subskills consume 500 mana and deal additional damage.
Artifact Skill: Emergency Blink – Miriam’s normal attacks deal additional Burn damage and apply a 4 second Burn. (at L+ and higher) Upon taking fatal damage, negates that damage, and she returns to her formation and recovers HP. Miriam permanently deals less damage for the rest of the fight, and her next action is changed to S1 – Surging Piece.
Miriam presents players with the pretty elf assassin equivalent of the Trolley problem – do you want to play funny tricks on the enemy or just kill them where they stand? Unlike most other dual mode characters, Steampunk Miriam is actually competent with both modes. Miriam’s base kit is very good at immediately going after a squishy backline DPS and either killing the target ASAP or disrupting them long enough for your other souls to finish the job. And if that is not enough, Miriam’s artifact at Legend+ gives her a one-time “Resist Death” and lets her make a second attempt. Miriam is certainly a strong and versatile unit and will likely be a battlefront staple moving forward.
Miriam’s kit also functions very well against most raids. Her taunt, resistance shred, attack reduction and constant burn application allow her to excel against the Dark Knight, Charite, and Gaia raids as a support. She can also have a go at being a powerful DPS herself with tons of additional bonus damage, a whopping 70% speed buff and damage dealt buffs, although it remains to see if she will excel in that arena.
Synergies and Weaknesses
Miriam is quite starved for Crit Rate and ATK buffs and would really appreciate support from her allies in that department. She is also quite squishy outside of her shield and frankly small Damage Reduction and it doesn’t take much to put her down if she gets focused, especially as a melee Assassin. Defensive supporters like Eve and Wheri, give Miriam enough longevity to finish the job, while tanks like Claire and Honglan (Peerless) help draw attention away from Miriam.
Her small burn and debuff package also makes her an excellent slot in for the already burgeoning Burn comp; with easy access to Burn Amp and even DoT Damage amp from Rebecca.
Investment
Miriam already has access to her base utilities at lower ascensions. We’ve tested her at Eternal+ Ascension and Epic+ Artifact, and while her Front Row mode is competent enough at that stage, to maximise her Back Row mode, we always recommend Origin Ascension and Legend+ Artifact minimum to unlock her Resist Death skill on her Artifact.
Further investment on her Artifact and Ascension will greatly improve Miriam’s personal DPS.
Conclusion
Players who went deep on the Nia banner are being treated to dessert at this point, being presented with an excellent Assassin soul that can play support alongside their Nia or be the carry DPS for a 2nd team. She is an excellent pickup for many players, both new and old with a month-long banner alongside her own dedicated event.
Pros
Versatile kit; can function well on her own and really shines with synergistic team building.
Runs well against a good variety of content.
DPS mode has a lot of powerful self buffs.
Immediate access to the backrow.
Very cute.
Cons
Fairly squishy.
Starved for Crit Rate and ATK buffs.
Most of her skills are double-edged, either consuming more mana or taking more damage.
Lore & Love Story
The answers below are the correct ones you have to pick to achieve the True Ending (in the order you have to do so).
This character does not have a Love Story.
Personal information
Combat information
Hobby and other information
Build
Comments:
Depends on which mode is more commonly used.
Comments:
Et+ works for Front Row mode, Origin+ recommended to maximise Back Row mode.
Comments:
L+ unlocks Miriam's Resist Death effect. Origin lowers the Penalty of said skill amd increases her Personal damage.
Comments:
Depends on mode. Front Row = Speed, Back Row = CDMG/ ATK