
Note
This is not an exhaustive list of teams this deck can be used in, merely examples pooled from the Teab Database to reference as a launch board.
Standard Sereniel
Sereniel Hyper

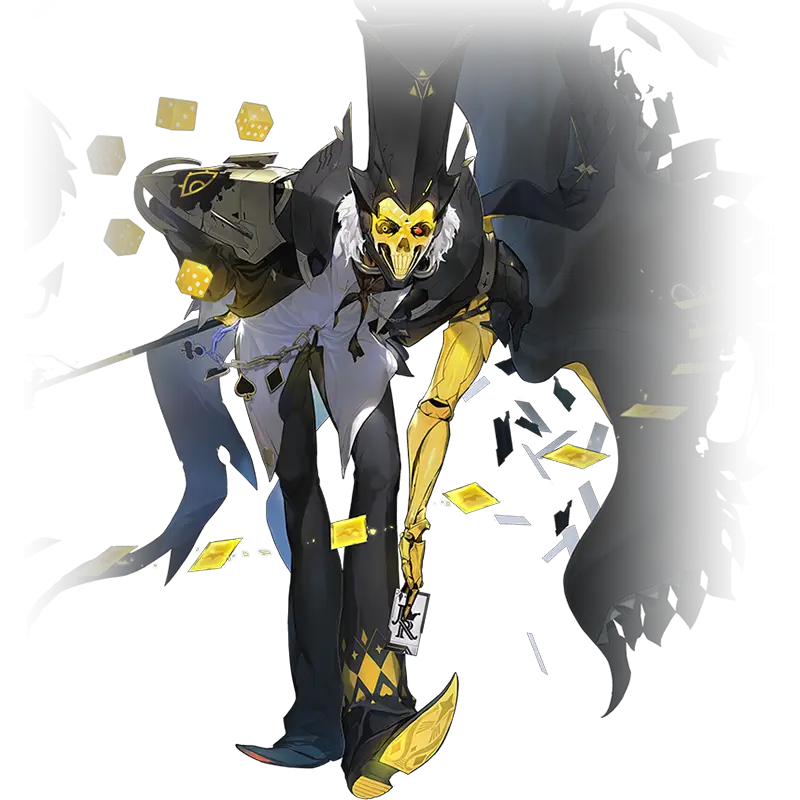
Best Build Guide
 Instinct
 Controller
Last updated: 01/September/2026
Check all the starting cards & the EGO Card available for Cassius

Card
 Attack

Wild Card
Attack

Mana Field
 Skill
Skill
Show Effects
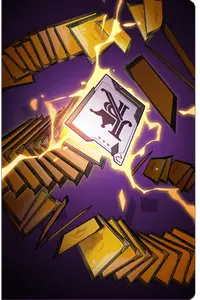
Pop Eyed Popper
 Upgrade

Death Trick
Ego Skill
Show Effects
Check all the epiphany cards available for Cassius

Devil Dice
Attack

Shuffle
Skill
Show Effects

Dice Trick
Attack

Joker
Skill
Epiphany cards are special evolutions for the cards you can obtain while playing the roguelike mode. Only some cards in the character's deck can get Epiphany effects. Since there's quite a lot of them, we don't display them by default — press the button below to show them.
Check all the generated cards available for Cassius
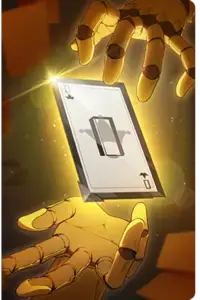
Quest: Triple 0
Upgrade

Quest: Triple 1
Upgrade

Quest: Straight
Upgrade

Quest: Full House
Upgrade
Triple 0
Attack
Show Effects
Triple 1
Attack
Show Effects
Straight
Skill
Show Effects
Full House
Skill
Show Effects
Empowered Triple 0
Attack
Show Effects
Empowered Triple 1
Attack
Show Effects
Empowered Straight
Skill
Show Effects
Empowered Full House
Skill
Show Effects
High additive buffing.
One of the best users of 4p Glory Reign, as Cassius is able to generate [Exhaust] Quests to activate its full effect quickly.
Extremely high sustain in many gamemodes (Tower, Great-Rift, FSO, etc.) because of the strength of Morale reduction and Fortitude generation.
Generates strong draw.
Inexpensive to build via Sortie Editing (Common Epiphanies cheaper to reroll).
Pop-Eyed Piper forces the player to choose between either [Initiation] OR ‘Choose Quest’, when both are the most important features–this creates a problem where Cassius’ Turn-1 can be extremely inconsistent without abusing rewinds/restarts.
Introduction for Cassius isn't available yet. It will be added soon.
Quests: Cassius’ Pop Eyed Popper upgrade randomly starts one of four Quests, which last until the end of battle. These Quests can be completed just by playing cards and they grant free Quest Cards with decent effects.
Triple 0: Play 3 cards that cost 0 AP.
Deals a base 200% damage, +40% per Attack Card used this turn, up to a maximum of 4.
Triple 1: Play 3 cards that cost 1 AP.
Deals 150% damage, heals for 150% and also draws 1 card.
Straight: Play 3 cards that cost 0, 1 and 2 AP each.
For 1 turn(s), gain 2 stacks of Morale, Resolve and Fortitude and draw 1 card.
Full House: Play 1 card from each Combatant.
Draw 1 card and will decrease the stress of 1 random ally by 2.
Full House is the best option here—if you’re lucky enough to get it, mainly because its activation condition is extremely easy to fulfill and getting a free Draw 1 so easily is great.
Triple 1 technically has a stronger quest reward than Full House, offering damage, a heal and a draw, but unfortunately, it’s far harder to complete, making it a much more niche quest to aim for.
Triple 0 is very difficult for Cassius to complete on his own, as all of his cards cost ≥1 AP at base; Dice Trick can be discounted to 0…but only if you complete 2 Quests first, creating a catch-22 situation. If you don’t have the right teammates, this Quest can brick for the entire fight. The Quest Card works as a nice single-target finisher after spamming a lot of 0-cost attacks.
Straight is also a difficult Quest to complete, as playing 2 AP cards isn’t something you can do particularly often unless you have access to AP generation. Because both Morale and Resolve affect card multipliers, you want to complete this Quest at the start of your turn to take full advantage of its effects. Quest progress carries over between turns, so we recommend leaving the 0-cost or 1-cost card until last so you can complete the Quest at the start of a turn.
Reduced Morale: Reduced Morale causes enemies to lose a -20% damage multiplier per stack of Reduced Morale they have. This is especially effective at mitigating damage from enemy Consecutive Attacks.
Fortitude: Fortitude provides a -20% damage taken buff per stack of Fortitude you possess.
Resolve: Resolve grants +20% to Shield amounts gained per stack of Resolve.
Decks not named in this section are generally not recommended to be bought. This does not mean they have no use ever or are not viable, but that our opinion is there are better uses for currency because they are too niche or easy to make with minimal save data editing tools.
[Dice Trick] - This deck, coincidentally named Dice Trick, focuses on using the Dice Trick card in order to generate 12 Morale a turn (+1 per Quest generated from Pot-7) in order to easily net enough Morale to near the cap. The main draw of this deck is it utilizes an extremely rare Divine (Draw 1 Card of this unit), making it more worth taking than most preconstructed decks because of the expensive nature of editing this normally. Moreover, decks that are purchased are able to be edited, so it’s possible to remove 1 Dice Trick and make slight edits to optimize its use of Faint Memory (Save Data Points), if needed.




Pop Eyed Popper IV
Upgrade
Devil Dice
Attack
Shuffle
Skill
Show Effects
Dice Trick
Attack
Persona
Attack
Show Effects

Reorganize
Skill
Show Effects
Cassius’ access to strong neutral Morale epiphanies has made him a go-to additive buffer for many units. This deck utilizes neutral Morale epiphanies, in conjunction with various neutral cards and his innate Pop-Eyed Popper Quest generation for further buffs.
This is not an exhaustive list of teams this deck can be used in, merely examples pooled from the Team Database to reference as a launch board.
Diana Hyper
Hugo Driver (All)
Fei Hyper
Heidemarie Hyper
Farming zone: Season 3 (Any)
Mana Field
Skill
Show Effects
Pop Eyed Popper IV
Upgrade
Devil Dice
Attack
Shuffle
Skill
Show Effects
Dice Trick
Attack
Joker
Skill

Gear Bag
Skill
Show Effects
Reorganize
Skill
Show Effects
Persona
Attack
Show Effects

First Aid Kit
Skill
Show Effects
This is a variation of the Generic Buffer Cassius deck, which uses Sereniel's extremely high AP output to play higher cost cards and not need cost-reduction Divines on Cassius.
This is not an exhaustive list of teams this deck can be used in, merely examples pooled from the Teab Database to reference as a launch board.
Standard Sereniel
Sereniel Hyper
Farming zone: Season-3 (Any)


Pop Eyed Popper IV
Upgrade
Devil Dice
Attack
Shuffle III
Skill
Show Effects
Dice Trick V
Upgrade
Show Effects

Faceless Woman
Upgrade
Show Effects
Gear Bag
Skill
Show Effects
Persona
Attack
Show Effects

 Passion
 Passion Instinct Passion
 Order Instinct Order
 Instinct Instinct
 Order Order Instinct
 Instinct Instinct Passion
 Void
Void
 Justice Instinct
 Instinct
 Instinct
 Passion
 Void Order Instinct
 Passion Passion Instinct
 Void Instinct Instinct Order
 Void Instinct
 Order
Order Instinct Instinct
 Instinct Instinct Passion
 Passion Passion Instinct Instinct Instinct PassionNyxE0
 YuriE4
 ArwenE4
 AlyssaE4
 YvonneE4
HP%
HP%
DEF% = HP% > EGO Regen
DEF > DEF% = HP > HP% > EGO Regen
3-1: Grants a 30% chance to Draw 1 to both of Cassius’ Basic Attacks. 30% isn’t enough to count on, but it can help a little bit early in your run if you draw poorly. It’s not as impactful as some other Combatants’ 3-1s can be.
5-1: Increases his Basic Attacks’ damage. Makes them a little better to play in conjunction with 3-1, but you’ll likely still end up removing them from your deck.
7: Incredible. Getting Morale and Fortitude for a turn every time you complete a Quest makes Cassius an even more potent support. You already want to complete Quests early in a turn, but this makes it even more important if you want to take advantage of Morale.


Introduces Desire Cards. Desire Cards are cards that primarily exist to give a strong passive buff from meeting certain Desire Thresholds (3/5/7) which can only be done by having multiple ally decks also made in Season-4.
For Desire Threshold, it’s common to run 1 Claim / 1 Survival / 1 Inquiry for use in a variety of builds on supports; however, it's also common to just do 3 ‘X’ to meet effect easier or do 2 'X' / 1 Inquiry (to keep Sample Collection as Card Effect). This is extremely dependent on ally desire cards and individual team building goal.
’X’ refers to a ‘Placeholder for Specific Desire Threshold Goal’, i.e. if you are building your team for 7 Claim then you might do 2 Claim / 1 Inquiry.
Introduces Persona Cards and Engravings. Persona Cards are powerful cards that introduce new playstyles or ways of buffing/debuffing. Engravings are effects that can be applied to both the Persona Cards and Equipment, functioning near identically to Refinements of Season-2 but with new effects.
The most common Card Engraving to take is [For each Lux Engraving, +15% Damage Amount to ally Attack Cards for 1 turn] or [Attunement: Decrease Cost by 1 until used].
The most common Equipment Engraving to optimize for is the stacking [When Action Count of enemies is increased by allies, +50% Damage Amount to Ally Attack Cards for 1 turn (1 time per turn)] and [When a card of this unit is activated, 30% to increase Action Count of all enemies by 1 (1 time per turn)], but it's possible to use a variety of other options for a specific set-up (like Discard [Quietus] Engravings when playing high [Quietus] builds or Umbra Engravings just to meet the threshold for certain Persona cards).
Introduces Refinements, effects on Equipment that allow one to get additional Equipment effects for no Faint-Cost (post-S2), and God’s Hammer, a powerful effect that gives a random copy of any other Equipment effect on-top of current Equipment but costs 10 Faint Memory and is only gained from the Boss.
At the start of battle, Draw 1 Exhaust card(s) of this unit.
At the start of the turn, if an Exhaust card is in Draw Pile, have a 30% chance to Draw 1 Exhaust card(s).
If Damage is completely blocked, at the start of the next turn, increase Damage Amount of allies by 10% for 1 turn (1 time per turn).
When Drawing an Exhaust card of this unit through an ally ability, activate immediately (1 time per turn).
Because God’s Hammer is completely RNG at the end of the run, we do not have a specific recommendation since the player has very little control over the decision. Supportive options are recommended for supportive units (like Tentacle or Harp effects).
Introduces Forbidden Cards, powerful cards that create new synergies and can only be acquired once per run (can be duped at one event or via save data editing).
Forbidden: Gesture of Freedom. Permanent Cost-Reduction to 1-card, can be manipulated.
Forbidden: Eternal Hunger. +Draw, ++AP (Ally Reliant)
Forbidden: Portrait of Fury. ++Draw
Forbidden: Guidance of Futility. +++Survivability
Pop Eyed Popper
Upgrade
Pop Eyed Popper I
Upgrade
Show Effects
Pop Eyed Popper II
Upgrade
Show Effects
Pop Eyed Popper III
Upgrade
Show Effects
Pop Eyed Popper IV
Upgrade
Pop Eyed Popper V
Upgrade
Devil Dice
Attack
Devil Dice I
Attack
Show Effects
Devil Dice II
Attack
Show Effects
Devil Dice III
Attack
Devil Dice IV
Attack
Devil Dice V
Attack
Devil Dice I: 3-in-4 chance of a Draw as 3 of the Quest Cards have a Draw effect, but why gamble on the odds when you can guarantee it?
Devil Dice II: One of the best Draws in the game *for one-turn*, as [Retrieve 3] counts down by 1 with every use until the card becomes a Base Devil Dice effectively. Amazing for OTK, especially with Cost Reduction, but not especially strong outside of it.
Devil Dice III: This can be an amazing Draw card, as it could scale up to a theoretical 10-draw per card (if there were 10 targets), but it's conditional for multi-target bosses or multiple enemies. Much lower value outside of AOE.
Devil Dice IV: This one is especially great with other forms of Draw or if you need a way to get cards out of hand, since it can help to cycle cards. In well-optimized decks, it’s typically not going to net you much value over other options, but can be great in certain scenarios where bosses create Status Ailments in hand, for example.
Devil Dice V: The go-to Devil Dice with no Divine Epiphanies, as it is base 0-cost. It has access to +1 AP Divine and Divine Vulnerable (AOE), as well, making it an all-around amazing card.
Neutral: Target Neutral Epiphany: Morale 2.
Cassius has access to high-value Neutral Epiphanies alongside his ability to draw off Quests, combined with the card itself. Devil Dice with Neutral Morale +2 Epiphany can enable him to give +11 Morale (+3 from Quests) off of just Quests and Devil Dice alone.
Divine: Which Divine Epiphany to go for will depend on what your team needs and which Epiphany you chose, but here are the main ones to look out for if you have spare Save Data: +1 AP (Devil Dice III), -1 Cost Reduction, Vulnerable 2.
Shuffle
Skill
Show Effects
Shuffle I
Skill
Show Effects
Shuffle II
Skill
Show Effects
Shuffle III
Skill
Show Effects
Shuffle IV
Skill
Show Effects
Shuffle V
Skill
Shuffle I: Because Shuffle’s primary value comes from Turn 1 re-draw, changing it to [Exhaust 2] tends to be situational. It could end up being an effectively dead card you can’t afford to play if you didn’t factor the context for it well.
Shuffle II: This Epiphany is a pure Upgrade off the base version, allowing you to keep certain cards in hand rather than re-drawing the entire hand entirely.
Shuffle III: Incredibly strong draw, you just leave it in hand until all other cards are played and get 5 draws from it and a free deck re-shuffle.
Shuffle IV: Because of its base 0-cost, this can be a great option if AP is tight. Its effect is situationally very beneficial, allowing you to manipulate up to 5 cards at the top of your draw. and it has strong synergy with other effects that allow you to interact with the top of the Draw Pile, like Nia’s G Chord.
Shuffle V: This loses the [Exhaust] tag and can potentially net you a ton of draw, but more often than not, it’ll be equivalent to 3 Discards – unless you are playing with a ton of high-cost cards or some way to guarantee high-cost cards into the top of the Draw Pile.
Neutral: Target Neutral Epiphany: +1 AP.
Neutral Epiphanies on Shuffle have similar or better effects to Divines on it and will not cost you faint, e.g. there is a 1 AP Neutral Epiphany it can get which effectively makes it free to use without needing a Cost Reduction Divine.
Divine: Which Divine Epiphany to go for will depend on what your team needs and which Epiphany you chose, but here are the main ones to look out for if you have spare Save Data: -1 Cost Reduction, Vulnerable 2, 1 AP (Echo V).
Dice Trick
Attack
Dice Trick I
Attack
Dice Trick II
Attack
Dice Trick III
Attack
Dice Trick IV
Upgrade
Show Effects
Dice Trick V
Upgrade
Show Effects
Dice Trick I: This increases the damage of Dice Trick, but Dice Trick damage is still not great and more utility-based effects would likely be preferred.
Dice Trick II: This increases Dice Trick damage and turns it into an AOE, but similar to Dice Trick I, it probably isn’t worth taking damage on this card over Supportive alternatives that still do only a little less damage.
Dice Trick III: This starts at base 0-cost, which, with certain Divine Epiphanies like Vulnerable or AP, can allow it to be used more fluidly in Turn 1 when it can be hard to reduce the cost of Dice Trick. The damage is hard-capped, not at any significant bonus over other options, though.
Dice Trick IV: This offers a non-negligible amount of additional healing and is certainly an option for a healing-based build, but it being locked to [Unique] and Quests being hard-capped makes him often not the ideal choice for a healer.
Dice Trick V: This is an amazing option for an additional +1 Draw ¾ of the time after Turn 1, since 3 out of 4 quests have a Draw feature.
Neutral: Target Neutral Epiphany: +1 AP, Draw 1, Morale 3.
Dice Trick has Neutral pool for 2-3 cost cards, but it effectively becomes 0-cost quite fast. This allows you to get effects like +3 Morale/Fortitude, +1 AP, +1 Draw, etc. on a 0-cost card for no Faint cost.
Divine: Which Divine Epiphany to go for will depend on what your team needs and which Epiphany you chose, but here are the main ones to look out for if you have spare Save Data: Vulnerable 2.



Pop Eyed Popper I: In content where you can quickly reset, this can be equal to or better than Pop Eyed V, as both of them usually warrant resetting for the feature that the other gives. However, it can be vastly worse than Pop Eyed IV in scenarios where resetting takes a long time, such as when Cassius is used in second-phase content, where resetting requires you to go through the first phase once again.
Pop Eyed Popper II: [Retain] is added as a tag and the quests no longer [Exhaust] themselves, which can be situationally useful when you would like to keep a card for a future turn, but in well-built teams will often be the equivalent of no Upgrade at all.
Pop Eyed Popper III: This Epiphany still contains the RNG elements of the base card, but it has the benefit of upgrading your quest cards to be noticeably stronger. The only reason it isn’t recommended as resetting for its ideal conditions can be extremely time-consuming and not worth it for most players.
Pop Eyed Popper IV: Being able to choose your quest is an incredible QoL improvement and will save you a vast amount of time that you would need to reset for the others. Thus, it is our top recommendation.
Pop Eyed Popper V: Never take this unless you truly love to gamble.
Neutral: The Neutral versions of this do nothing to improve the card itself and the benefits of whatever Neutral Epiphany you get will likely be outweighed by RNG elements you introduce by not taking an Epiphany that offers more consistency or buffs.
Divine: Which Divine Epiphany to go for will depend on what your team needs and which Epiphany you chose, but here are the main ones to look out for if you have spare Save Data: Morale/Resolve.