Foreword

Special thanks to Gordan who worked tirelessly on this guide and Liriell who helped him.

Mane's Bulletin
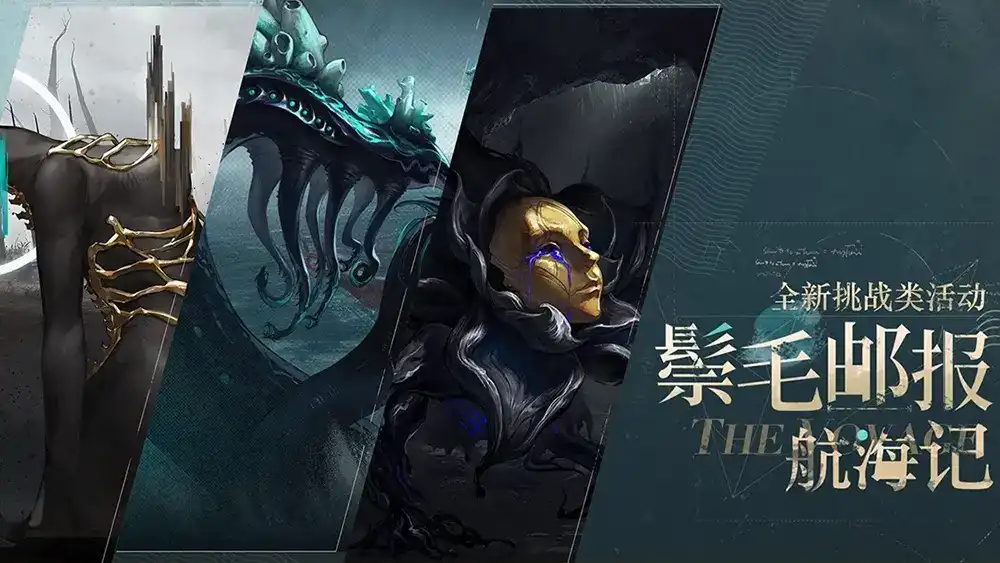
In Patch 1.4 “Prisoners of the Cave”, we are introduced to a new side-event that takes place within each update cycle. This is called “Mane’s Bulletin”, and it will serve as an additional layer to Reverse:1999’s endgame content alongside the biweekly Limbo rotation and the UTTU stages that appear during the second phase of each event.

Mane’s Bulletin is a raid-boss event that pits a team of 4 of your characters against a big bad, providing you with various rewards depending on the total damage done over the course of the fight and, once you unlock a special difficulty on each boss, based on how much damage you do during said mode.

As the team you’ll be fighting these bosses will consist of 4 characters, you have a lot more room to play around with team compositions. An extra character means an extra carry, utility or healer slot, and it also means one more AP, which ends up making a big difference.

The side content runs for both the first and second phase of the patch version, with a new boss unlocking in week 2, 4 and 6, for a total of 3 bosses over the duration of the event. Mane’s Bulletin, like UTTU, will be a “permanent” game mode that appears during every new update.

On each boss, your total damage dealt will be recorded, with a set of rewards at certain damage intervals. Furthermore, once you’ve beaten every difficulty of a boss, you will unlock their Endless mode. As the name implies, the boss has an infinite amount of HP on this difficulty, with this being mostly a stress test of how well you can deal with the mechanics of the boss while outputting as much damage as you can.

The ranks for Endless mode range from C to SSS, with each rank offering a set of juicy rewards in the form of materials and shop currency. To note is that to get all the major materials from this difficulty, you only need to hit S-rank, not SSS-rank, as that is mostly just for people to flex their characters or skill at the game.

  • C - 25,000
  • C+ - 50,000
  • B - 120,000
  • B+ - 200,000
  • A - 280,000
  • A+ - 360,000
  • S - 450,000
  • SS - 650,000
  • SSS - 850,000

In addition, while this guide offers a small team building guide that ‘ensures’ good Endless Mode tiers (assuming they are played correctly), there is no way for us to list all of the teams that function in this content, so they serve as more of a guideline than a strict limitation. We encourage you to analyze the Raid mechanics and conceptualize your own teams.

With that out of the way, version 1.4 brings us our first iteration of Mane’s Bulletin, and also our first trio of bosses to tackle.

Darkness of the Abyss

Raid Boss

This cute little fellow is the Darkness of the Abyss (henceforth we’ll call it “Gorgon”), and it serves as the boss that spearheads the Mane’s Bulletin gamemode. Its Afflatus is Mineral, so you are advised to utilize Star oriented teams while dealing with it; specifically 37 is good against this boss, and we’ll go into why.

When it spawns it’ll spawn to “Tentacles of the Abyss” alongside it These will be important for an upcoming mechanic. You may also notice that the boss has a [Eureka] bar instead of a Moxie bar; this will serve as your primary indicator of what kind of mechanics Gorgon will perform.

  • In this fight, Star characters gain +20% to their stats.
  • Gorgon passively takes +75% DMG from Genesis. This makes 37 an extremely appealing unit to run as Carry, and some even consider her the only unit that can directly attack Gorgon. Instead, most other characters will be relegated to dealing with the Tentacles as killing those deals damage to Gorgon itself.
  • At the end of a round, Gorgon cleanses itself of all debuffs. Initially you may have considered using a Plant team with Jessica and Sotheby for the Genesis DMG from [Poison], but they lose viability due to this gimmick.
    • In addition, if Gorgon goes undamaged for a round, it applies a layer of [Sturdiness] to itself, so make sure to at least tickle it every round especially if you’re trying to set up for damage.
  • [Frostbite] is the main mechanic for this fight.
    • Every 2 rounds, Gorgon targets the two characters with the highest percentage of HP left and inflicts 2 stacks of [Frostbite] on them. When this reaches 5 stacks, the target is inflicted with [Freeze] and takes massive damage when [Freeze] ends.
    • The Gorgon’s Ultimate will inflict 5 stacks of [Frostbite] immediately.
    • [Frostbite] stacks can be removed by taking active actions twice in one round.
  • The Tentacles will also occasionally inflict [Frostbite], so temporarily taking down one of the two Tentacles will help mitigate the danger of [Freeze].
  • When Gorgon reaches max [Eureka] it will enter into a special shield phase. If the shield isn’t taken down within 3 rounds, Gorgon will dispel all buffs on your team before hitting them with an AoE nuke and inflicting [Freeze]. This sequence deals a dreadful amount of damage, so it’s advised to break the shield over trying to survive this mechanic.
  • In Endless Mode, after casting their Ultimates, Gorgon/Tentacles gain an undispellable buff that reduces incoming damage, so it is imperative that you either time your damage correctly or prevent a majority of the Ultimates from going out utilizing things like [Silence] or Moxie reduction.
    • The Tentacles may also apply a layer of this buff on themselves and the boss with one of their skills.
  • Also in Endless Mode, 4 stacks of [Frostbite] will be applied per attack instead of 2.

In terms of dealing with this fight, you have a few options when it comes to team composition. Usually you’ll be running a Star oriented team, with some unique picks here and there. Consider the following compositions:

STAR TEAM
Carry
Carry / Support
Support
TEAM EXPLANATION

This is a full Star team, drawing utmost use out of the Afflatus advantage against Mineral. It also features 37 and Voyager, both of which have major or continuous sources of Genesis DMG to exploit the +75% Genesis DMG Taken passive of Gorgon.

  • 37 is naturally there to provide strong Genesis DMG as well as a bit of offensive coverage using her Ultimate “Realm of Numbers and Geometry” to apply stacks of +DMG Dealt to all allies. Due to Gorgon taking increased Genesis DMG, 37 is the only character that can reliable deal damage
  • Depending on your Portrays on 37, you will be using Lilya as your Main Carry (if you have 37 at P0-1) or as a Support (if you have 37 at P2+). The reason for this being that Lilya’s “Crosswind Takeoff” skill has an Extra Action feature, which helps 37 stack her [Eureka] to trigger the [Supplementary Formula] attack.
  • Contrary to some belief, Voyager’s [Counter] effect sadly does not count as an Extra Action, and therefore does not help 37 stack up [Eureka]. However, Voyager does inflict consistent 2-target [Confusion] and applies [Sturdiness], which helps with triggering crits as well as keeping up the defense as you run late into Endless mode.
  • Tooth Fairy is the obvious pick for a Healer here. Absurd Crit-based debuffs, the uptime of which can be basically permanent due to the added AP (at P2) from 4-man content. Powerful healing with “Lullaby”, and decent single-target damage and some cleansing using “Song for the Bad Tooth”.

For other options:

  • Charlie - Due to the additional team slot being able to dedicate itself to another Crit-oriented Support character like Voyager, Twins Sleep (or Ezra Theodore by 1.5) it is a lot easier to make Charlie crit despite her disastrous Crit Tech.
  • Regulus - Given that Regulus is a defensive damage dealer with access to crit conversion, she’d naturally fit in well as fulfilling both the Carry and Support role. Moxie reduction works on the Tentacle mobs and [Riot and Roll] is one of the best defensive buffs when you’re knee-deep in an Endless run.
  • Baby Blue - A more niche pick for a Support but potent if you’re running something like 37 / Regulus / Tooth Fairy. The extra AP allows you to set up debuffs more easily with Baby Blue without impeding on your Carry.
  • 6 - While not available until the second phase of the patch, 6 on his own is a staple Support especially for Mane’s Bulletin. He can be used in pretty much every team due to the versatility of his buffs, debuffs and access to semi-on-demand [Incantation Empowerment] for your Carry.
  • Ms NewBabel - Finds a spot in 37 teams, especially in the Gorgon fight specifically. Gorgon and its mobs deal Reality DMG, something that NewBabel excels at protecting your team against. Unlike Voyager’s [Counter], NewBabel’s Ultimate does count as an Extra Action, allowing you to quickly charge 37’s [Eureka].
  • Healers - As a rule of thumb, very few healers are restricted to particular teams, as their main role is to keep the team alive. It is also not uncommon for Endless teams to feature 2 healers, one occupying a Support slot.
BEAST / MINERAL TEAM
Support / Healer
TEAM EXPLANATION

This team focused around Melania’s Portray 2. Despite being at an Afflatus disadvantage against Gorgon, Melania’s consistently growing single-target damage output and ceiling of that damage output is so great that it practically overshadows the advantage bonus. Plus, due to how independent she is, she can be paired up with 3 powerful Supports and still cover the potential damage lost from not having a second Carry.

  • Melania is practically made to function in Mane’s Bulletin; extended fights with a single-target are her specialty as she can comfortably stack [Fixed Plan] to ramp up her damage without worrying about killing her opponent too quickly. Do note that, despite Gorgon not having Moxie, Melania can still “steal” Moxie from it to charge her Ultimate.
  • Pickles here, while not having to provide his AP-generosity in this setting, allows for an easy time setting up with his long-lasting +DMG Dealt buff from “Thus Spoke Pickles” and desire to AFK every other turn. It is also way easier for him to proc the condition for the extension of his buff due to having extra room to act and not act.
  • Medicine Pocket is picked because their single-target +DMG Taken debuff synergizes well with Melania. In addition, since Melania is at an Afflatus disadvantage and will take additional damage from the boss, MP’s on-demand [Studiness] helps a lot to cover the outgoing damage from Gorgon.
  • Tooth Fairy is another obvious Healer here. Absurd Crit-based debuffs, allow Melania to run a Crit Resonance build and still provide good damage. Solid healing with “Lullaby”, and decent single-target damage and some cleansing using “Song for the Bad Tooth”.

For other options:

  • Kaalaa Baunaa - In the Mineral variety of this team, Kaalaa Baunaa is the obvious pick when it comes to single-target damage in a setting where AP is generally easier to come by. Her incredible damage ceiling, synergy with Pickles/Tooth Fairy and self-sustain all make her a great potential pick for Gorgon.
  • Necrologist (P1-5) - Among the more surprising options, Necrologist finally finds her niche, and can replace both Pickles and a Healer in the Mane’s Bulletin environment. While usually AP-Greedy, this trait’s severity is dampened by the additional +1 AP from 4-man content. Keep in mind that if you use Pickles and Necrologist together, you will have to be more careful about the timing of their Ultimates, as they overlap.
  • Shamane - A somewhat surprising but not unwelcome pick considering the usage of Tooth Fairy in this team, Shamane made his name as one of the most flexible debuffers in the game with a separate niche as a Crit-oriented semi-Carry. In case you’re using Necrologist over Pickles, consider Shamane in order to keep Melania/KB’s damage optimized while fitting neatly into the rest of the team.
  • 6 - While not available until the second phase of the patch, 6 on his own is a staple Support especially for Mane’s Bulletin. He can be used in pretty much every team due to the versatility of his buffs, debuffs and access to semi-on-demand [Incantation Empowerment] for your Carry.
  • Healers - As a rule of thumb, very few healers are restricted to particular teams, as their main role is to keep the team alive. It is also not uncommon for Endless teams to feature 2 healers, one occupying a Support slot.

Marsh Creation

Raid Boss

This lady we call “Marsh Creation” (from here on out, just “Marsh”) and it’s the second boss of the 1.4 Mane’s Bulletin. You may remember this lovely lady from one of the story chapters. Its Afflatus is Beast, so the standard is to run Mineral oriented teams around, and Kaalaa Baunaa is considered the best Carry in this fight.

Unlike Darkness of the Abyss, Marsh doesn’t have any mechanics that are as specific, and it generally stays true to its fight in Chapter 2 (with some added spice).

  • In this fight, Mineral and Beast characters gain +20% to their stats.
  • [Shield] effects in this fight also reduce damage taken by a certain amount, making shield based supports quite a bit stronger.
  • Every 2 rounds Marsh will enter a [Counter] state. Trying to attack it while in this state will inflict [Corrosion] on the attacker, a hard hitting DoT effect. This is especially dangerous in Endless runs where the damage this deals can scale pretty dramatically. If Marsh isn’t in the [Counter] state, it takes +40% DMG.
  • At the end of the round, Marsh also applies 2 random buffs from a set of buffs on itself. While attacking, for each [Stats Up], [Status Pos] or [Counter] it carries, it will deal +10% damage. This makes characters who can consistently dispel these things extremely valuable.
  • The buffs can be dispelled by using a rank 2 or 3 Health/Counter/Buff card.
  • With one of its skills Marsh grants itself extra Reality DEF and, if it already has this buff, it increases its Mental DEF instead. The lower Marsh goes on its HP bars, the higher these buffs become, so dispelling is an important part of the fight.
  • In Endless Mode, when Marsh attacks characters that aren’t in the [Shield] or [Counter] state, it deals +20% damage. This makes having characters that can routinely apply both of these statuses extremely valuable to mitigate the already high outgoing damage.

The teams are a bit more restricted in this fight, as the Mineral Afflatus doesn’t have many solidly offensive units under its belt at the time of this release. Luckily, Kaalaa Bauna has been added to the roster by this point, and thus she serves as the standard Carry for this fight.

Kaalaa Baunaa TEAM
Carry / Support
Sustain
TEAM EXPLANATION

This team focused around Kaalaa Baunaa. Unsurprisingly, the addition of an extra AP greatly helps to mitigate most if not all issues KB has in terms of cycling abilities and getting enough actions to charge her Ultimate. In addition, the extra team slot allows for some wildly varied and powerful team compositions.

  • Kaalaa Baunaa proves extremely potent when given more lenient circumstances in the form of +1 AP, allowing her to easily stack her [Planet]s and Ultimate in quick succession. In combination with a load of [Saturn] layers, KB can output some terrifying numbers.
  • Pickles is here to provide extra turns for KB to cycle her Ultimate and provide that potent +DMG Dealt buff to the team. Additionally, Pickles is one the few characters capable of dispelling [Counter] effects, which can be of great help in a pinch if you don’t happen to have access to a rank 2/3 Health or Counter spell. Additionally, Pickles’ single-target damage is surprisingly high with “Thus Spoke Pickles” and “Nihilism Abuse” under the effect of [Clarified Topic].
  • Med Poc’s single-target +DMG Taken debuff synergizes greatly with KB’s single-target damage plus they have access to that quick on-demand [Sturdiness] that really helps in the Endless stages past S rank.
  • Balloon Party makes an appearance here as a healer with access to rank 2/3 Counter spells. In addition, as the fight enters its later stages, Lost HP-based healing becomes more potent as attacks from the boss start hitting harder and harder.

For other options:

  • Sonetto - An old reliable, Sonetto serves as a potent buff Support that you can always fall back on. Her +DMG Dealt and -DMG Taken buffs provide offensive and defensive coverage at the same time, giving an extra protective edge over someone like Pickles at the cost of his dispel.
  • 6 - While not available until the second phase of the patch, 6 on his own is a staple Support especially for Mane’s Bulletin. He can be used in pretty much every team due to the versatility of his buffs, debuffs and access to semi-on-demand [Incantation Empowerment] for your Carry. This especially helps KB, as the amount of [Planet]s she stacks depends on the rank of the spell used.
  • Necrologist (P1-5) - A might surprising option for Pickles’ slot, Necrologist provides the biggest +DMG Dealt buff in the game at Portray 1 (40%) and 5 (50%) and with the extra AP in 4-man content, she doesn’t impede much on KB’s rotation. Note that she cannot dispel [Counter], so you’ll have to rely on other ways to remove that mechanic.
  • Tooth Fairy - Surprisingly not used over Med Poc in this team, but not by much of an edge. The idea is that, with how hard Marsh tends to hit, more value is put on Med Poc’s [Sturdiness] compared to Tooth Fairy’s healing output; mitigating the incoming damage *> trying to heal it up.
  • Healers - As a rule of thumb, very few healers are restricted to particular teams, as their main role is to keep the team alive. It is also not uncommon for Endless teams to feature 2 healers, one occupying a Support slot.
MELANIA/KAALAA TEAM
TEAM EXPLANATION

This team focused around both Melania and Kaalaa Baunaa, and is, as you might guess by looking at the composition, focused on taking highly aggressive actions utilizing two ramping single-target Carries to quickly and consistently raise the score.

  • Melania is the queen of Mane’s Bulletin, with a kit that perfectly synergizes with the game mode’s extended single-target fights with high amounts of HP. She can quickly ramp her [Fixed Plan], stacking up to turn her Ultimate into a fast-charging nuke. She semi-synergizes with KB in this regard, who cannot generate her own Moxie as easily and requires more actions.
  • Joining in the ramping game is Kaalaa Baunaa, who utilizes the extra AP to rapidly cycle her own Ultimate through her actions, quickly stacking up [Full Moon] to provide herself with even more damage and even a way to upgrade her own cards with [Incantation Empowerment II].
  • Due to using 2 Carries, there is less space for the conventional Support. As such, Tooth Fairy is picked here to provide some offensive Crit-based debuffing with [Confusion], -Crit DEF and -Crit Resist. Additionally, with the lack of potential defensive Supports, her incredibly high healing output helps keep the team alive
  • Medicine Pocket’s single-target +DMG Taken debuff synergizes greatly with both Melania and KB’s single-target damage plus they have access to that quick on-demand [Sturdiness] that really helps in the Endless stages past S rank. Especially when no defensive buffer is available, the [Sturdiness] carries the defensive coverage of this team even harder.
  • This is a risky team, and you’ll often have to save your Health cards to time them with Marsh’s [Counter] state for dispelling purposes, which in turn results in a fragile but highly potent composition.

For other options:

  • 6 (P1-5) - While not available until the second phase of the patch, 6 is a staple pick for Mane’s Bulletin. In this instance, he isn’t utilized as a Support as much as he is a Carry; the ludicrous damage modifier on it, that only gets increased by available debuffs and [Eureka] stacks, can work quite well the more Portrays you have him on.
  • Ms NewBabel - Is a potential pick if you do not have access to much else in the way of sustain. Generally, mitigating damage is considered better than healing in Mane’s Bulletin the later you run in the Endless mode, and pairing NewBabel together with Med Poc provides powerful defensive coverage.
  • Healers - As a rule of thumb, very few healers are restricted to particular teams, as their main role is to keep the team alive. It is also not uncommon for Endless teams to feature 2 healers, one occupying a Support slot.

Gold in the Cave

Raid Boss

This goofy goober we call “Gold In The Cave” (from here on out, just “Gold”) and it’s the third boss of the 1.4 Mane’s Bulletin. It isn’t seen anywhere else. Its Afflatus is Spirit, so the standard is to run any type of team into it, though 6 does absolutely excel at this fight due to his Afflatus Advantage.

  • Allies gain +30% DMG Dealt and heal the lower HP% ally for 10% Max HP after casting an Ultimate. So utilizing characters that can cast their Ultimate often will help you pump more damage as well as stay alive.
  • Allies gain +1 Moxie and 20% DMG Heal for 2 rounds every round if the boss has at least 2 [Stats Down], [Neg Status] or if mobs are under the effect of [Control], which greatly benefits a number of debuff Supports and especially 6, who has Afflatus advantage as well as debuffs.
  • When Gold isn’t under the effect of [Stats Down] or [Neg Status] its DMG Dealt is increased by 15%, and if it has 3 or less of them its Pen Rate is also increased by 15%. This encourages the player to inflict debuffs frequently and often, so look for characters with consistent cards that apply these.
  • Before being attacked by an Ultimate, Gold loses its unique buffs, further enhancing the useability of characters that can cast their Ultimate frequently.
  • If any of Gold’s unique buffs reach 5 stacks, their [Disarm] effect is extended to 2 rounds instead of 1.
  • In Endless Mode, at the end of the round, Gold inflicts a layer of [Dispersion] on all enemies. This is a layered debuff that decreases their Incantation Might, and the layers only disappear when the character casts an Ultimate.
MELANIA/KAALAA TEAM
Support
TEAM EXPLANATION

This team focused around both Melania and Kaalaa Baunaa, though the latter can be swapped out for characters such as A Knight. This composition capitalizes on 6’s release and excellent usage in this fight to, in combination with a set of powerful Carry characters, rush the boss into the high tiers.

  • Melania is the queen of Mane’s Bulletin, with a kit that perfectly synergizes with the game mode’s extended single-target fights with high amounts of HP. She can quickly ramp her [Fixed Plan], stacking up to turn her Ultimate into a fast-charging nuke.
  • Joining in the ramping game is Kaalaa Baunaa, who utilizes the extra AP to rapidly cycle her own Ultimate through her actions, quickly stacking up [Full Moon] to provide herself with even more damage and even a way to upgrade her own cards with [Incantation Empowerment II].
  • 6 can be used in pretty much every team due to the versatility of his buffs, debuffs and access to semi-on-demand [Incantation Empowerment] for your Carry. This especially helps in this fight, as frequently casting Ultimates on the boss keeps their buffs (and damage) lowered. In addition, his sheer application of debuffs allow him to solo most of the mechanics in this fight.
  • A mighty surprising option for the healer slot, Necrologist provides the biggest +DMG Dealt buff in the game at Portray 1 (40%) and 5 (50%) and with the extra AP in 4-man content. In this fight specifically, where Crit isn’t necessarily needed, Necrologist’s [Prayer] buff and dispel helps keep this team afloat in the later stages of Endless Mode.

For other options:

  • A Knight - With the release of the “Balance, Please” psychube, A Knight enjoyed a great upgrade to his damage output. In addition, with this boss having ads and 6 commonly in its comp, A Knight is one of the few characters who can ramp their Ultimate extremely quickly while providing extra support in the form of his [Rousing Morale] on-kill.
  • Shamane - In case you’re lacking 6 and a consistent debuffer, Shamane can accomplish much the same with his consistent debuffing and generous single-target output. In addition, his [Nature’s Blessing] effect synergizes with the mechanics of this fight that require you to cast your Ultimate often.
  • Bkornblume - For much the same reason that Shamane is effective, Bkornblume is effective (especially when running A Knight). She doesn't get access to her Ultimate as frequently as Shamane does, so there’s that to take into consideration.
  • Tooth Fairy - Surprisingly not used over Necrologist in this team, but not by much of an edge. Tooth Fairy is a staple healer when it comes to Reverse 1999, though she doesn’t excel in this team as much as Necrologist does.
  • Healers - As a rule of thumb, very few healers are restricted to particular teams, as their main role is to keep the team alive. It is also not uncommon for Endless teams to feature 2 healers, one occupying a Support slot.
PLANT TEAM
Support
TEAM EXPLANATION

A team focused around the Plant Afflatus and Druvis’ reintroduction into the meta following Jessica’s release. The team is focused around consistency, funnily enough, providing a healthy mix of offense and defense while easily maneuvering around this fight’s mechanics.

  • Jessica is here as the only 6-star Plant Carry and also a [Poison] inflictor in order to keep Gold from gaining its +15% DMG Dealt and Pen Rate buffs. The single target nature of Mane’s Bulletin and extra AP with a 4th person allows Jessica to more easily cycle her Ultimate to keep [Poison] inflicted.
  • Joining at her side are An-an Lee and Bkornblume. An-an provides consistent hybrid buffing split between offense and defense, card upgrading for Tuning and AP-friendliness. Bkornblume instead keeps the boss debuffed, outputs high single-target damage and is surprisingly tanky under the effects of her Insight 3 in this team especially.
  • Druvis may seem like an odd pick here, considering that Gold cannot be controlled. Druvis, however, provides something else here: consistent teamwide healing through her [Circle of Life] effect and surprising amounts of damage through her Insight 1.

For other options:

  • Sotheby - Applicable here if you are focusing on a more damage oriented variant of this team. Trading Druvis’ sustain or An-an’s buffing for Sotheby does mean Jessica has an easier time maximizing her single-target damage, but you’re losing out on defensive cornerstones that are important in Endless Mode.
  • Necrologist - Can also be used here, though in place of An-an, to provide a greater +DMG Dealt buff and trade the -DMG Taken buff for [Prayer]’s revival effect. To note is that Necrologist will lose out on Druvis’ [Circle of Life] effect which may make her squishier than you intend her to be.
  • 6 - 6 can be used in pretty much every team due to the versatility of his buffs, debuffs and access to semi-on-demand [Incantation Empowerment] for your Carry. This especially helps in this fight, as frequently casting Ultimates on the boss keeps their buffs (and damage) lowered. In addition, his sheer application of debuffs allow him to solo most of the mechanics in this fight.

Hypothesis of Exhibition

Raid Boss

These critters we call Hypothesis of Exhibition, Iverson Inc. or simply “Exhibition”. Its Afflatus is Plant, so you are advised to utilize Beast oriented teams while dealing with it; specifically Spathodea is good against this boss, and unfortunately Melania isn’t, due to his high Mental DEF stat.

There are a total of 4 types of enemies in this fight:

  1. The actual boss, called the “Strange Doctor”. This is the guy you want to hit to increase your score.
  2. The big robot, called “Futurism”. This is going to be the main annoying ‘mechanic’ enemy you’ll be dealing with.
  3. A small robot with electrical wires called “Test Bot 1”.
  4. Another small robot with a red light on its head called “Test Bot 2”.
Field Hazards [Endless Mode]
  • In this fight, Beast and Plant characters gain +20% to their stats.
  • After allies cast their Ultimate, they gain 2 layers of [Rousing Morale]. In addition, after actively casting Buff, Debuff, Heal and Counter incantations, the caster gains 1 layer of [Rousing Morale].
  • After enemies cast their Ultimate, all enemies gain 2 layers of [Sturdiness].
Mechanics [Endless Mode]
  • Man Behind The Scenes - When the “Strange Doctor” enters combat, at the beginning of each round, he enters the [Behind the Scenes] state. At the end of the round, if “Futurism” is in the [Daze] state, purify its [Daze] and grants 3 stacks of [Energy], then, fall into the [True Body Revealed] state for 1 round.
    • → [Behind the Scenes]: When taking Reality DMG, DMG Taken -75%.
    • → [Energy]: Energy required to keep machinery running.
    • → [True Body Revealed]: When taking Reality DMG, DMG Taken Reduction -75%.
    • and cannot enter the [Behind the Scenes] state.
    • What this means is that while “Futurism” is present on the field and healthy, the “Strange Doctor” takes massively reduced Reality DMG. This may sound like an invitation to bring Mental DMG units, but the boss has high Mental DEF, so it’s worth it to try and dispel it by throwing “Futurism” into the [Daze] state. This dispels the “Strange Doctor” DMG Reduction for a turn so you can deal big damage.
  • Limitations of the Mortal Body - At the beginning of the round, if there are no friendly units present, fall into the [True Body Revealed] state for 3 rounds. → [True Body Revealed]: When taking Reality DMG, DMG Taken Reduction -75% and cannot enter the [Behind the Scenes] state.
    • This is the other way to get the “Strange Doctor” to break his -DMG Taken effect and also for a longer time. Essentially, you’ll be cycling between breaking [Behind the Scenes] and triggering this effect to optimize the [True Body Revealed] status up-time.
  • Like the other Raid Bosses, when maximum [Eureka] is reached, the boss enters a [Shield] phase for 2 rounds before casting its Ultimate. If the [Shield] is broken, they are knocked out for a round and lose all their [Eureka].
  • [Buff] Card - Increases all allied DMG Dealt for 2 rounds. Grants “Futurism” 1 stack of [Energy] and increases its Moxie by 1.
  • [Debuff] Card - Mass attack. Deals Reality DMG to the 2 enemies with the highest HP and reduces their Incantation Might for 1 round. At the end of the round, if no “Test Bot 2” is present, summon a “Test Bot 2” (the maximum number of creatures on the field is 4 including “Strange Doctor” and “Futurism”)
  • Fully Charged - After “Futurism” enters combat, gains 2 stacks of [Energy]; after being attacked, remove 1 stack of [Energy]. If there is insufficient [Energy] (essentially if there’s no [Energy]) after being attacked, “Futurism” falls into the [Daze] state.
    • → [Energy]: Energy required to keep machinery running. This makes “Futurism” your primary target besides “Strange Doctor”. If you read back, when “Futurism” is in the [Daze] state, the “Strange Doctor” enters [True Body Revealed] for 1 round, helping you actually damage him as you slowly lower “Futurism” its health until it dies (which works towards the Limitations of the Mortal Body passive of “Strange Doctor”).
  • Circuit Corrosion- At the end of the round, consume 1 stack of [Energy]. If “Futurism” is in [Burn], [Poison] or [Corrode] state when attacking, DMG Dealt -25%.
    • Pretty simple to understand. Every round “Futurism” consumes [Energy] to ‘stay working’ and it deals decreased damage while under the effect of typical Damage Over Time effects, which is what makes Spathodea and Jessica teams particularly potent.
  • [Ultimate] Card - Mass attack. Deals Reality DMG to all enemies. This attack enjoys extra Penetration Rate.
  • [Attack] Card - Mass attack. Deals Reality DMG to the 2 enemies with the highest HP. This attack enjoys extra Penetration Rate.

This ad does not share the anti-Control passive of the “Strange Doctor” boss.

  • “Test Bot 1” DMG Taken is set to 1.
  • [Ultimate] Card - Mass attack. Deals Reality DMG to all enemies. Grants 2 stacks of [Energy] to “Futurism”.
  • → [Energy]: Energy required to keep machinery running.
  • [Buff] Card - Mass buff. Applies [Rebound] to all allies for 1 round.
  • → [Rebound]: When the carrier is attacked, reflects a part of the DMG Taken back at the attacker. If the carrier is not under the effect of [Burn], [Poison] or [Corrode], grant “Futurism” 1 stack of [Energy].
    • Due to its DMG Taken being set to 1, it is effectively impossible to take down properly. Instead, mitigate its most problematic effects (i.e. constant granting of [Energy]) by keeping it inflicted with Damage Over Time effects.

This ad does not share the anti-Control passive of the “Strange Doctor” boss.

  • “Test Bot 2” DMG Taken is set to 1.
  • [Ultimate] Card - 1-target attack. Deals Reality DMG to the enemy with the highest HP. In addition, the caster's HP -100%.
  • [Debuff] Card - Mass debuff. Inflicts [Bleed] on all enemies.
    • The slightly less problematic one of the two Test Bots seeing as it doesn’t provide anything dramatic or annoying to the boss itself. Keep in mind that, as a tradeoff, it deals considerable amounts of damage later on in Endless Mode, so keep this in mind.

This ad does not share the anti-Control passive of the “Strange Doctor” boss.

In terms of dealing with this fight, there are 2 core teams running in this fight. One is focused on Spathodea (or Centurion) while the other is centered around Jessica and [Poison]:

Beast TEAM
Carry / Support
Sustain
TEAM EXPLANATION

A team focused around the Beast Afflatus and Spathodea’s blitz into the Raid meta following her release. This team is focused around high single-target damage, with some interesting additions from one (or more) unlikely faces.

  • Spathodea blasts onto the scene with her extremely high single-target damage. This may impede Melania for some players, but where Spathodea deals intermittent bursts of high damage, Melania is way better at doing high damage consistently, which offers both carries an equal niche depending on the damage type you need. Her “Ignition Point” buffs allow her to constantly stack [Rousing Morale] through the stage hazard and her consistent application of [Burn] helps with keeping incoming damage low.
  • Joining at her side are An-an Lee and 6. An-an provides consistent hybrid buffing split between offense and defense, card upgrading for Tuning and AP-friendliness. 6 can be used in pretty much every team due to the versatility of his buffs, debuffs and access to semi-on-demand [Incantation Empowerment] for your Carry, which Spathodea scales exceptionally well with.
  • Medicine Pocket is used here because Tooth Fairy actually really struggles in this fight due to her bad Afflatus match-up. In addition, a well-built Spathodea really doesn’t need Tooth Fairy’s help to Crit, and without Crit Conversion, she is only benefitting from the 15-25% Crit DEF shred that TF provides. On the other hand, Medicine Pocket provides a +DMG Taken debuff that always helps, consistent healing and [Sturdiness] on top of a bit of Control when applicable.

For other options:

  • Centurion - Can also be used here, and can SSS the fight, however she will need either Ulu to inflict a constant stream of [Burn] on all enemies or a [Poison] applicant to keep in line with the fight’s mechanics.
  • Dikke - Semi-odd due to her Mental DMG kit, her healing output is somewhat decent and her kit doing partly Genesis DMG helps with actually poking through that high Mental DEF stat. She essentially gets away with it because she’s a healer, not a Carry.
  • Tooth Fairy - While we did advise against using Tooth Fairy in this fight due to the bad matchup, she can still be used if your Spathodea is refusing to Crit and her high healing output will help the later on you go in Endless Mode.
PLANT TEAM
Support
TEAM EXPLANATION

A team focused around the Plant Afflatus and around consistency, funnily enough, providing a healthy mix of offense and defense while easily maneuvering around this fight’s mechanics.

  • Jessica is here as the only 6-star Plant Carry and also a [Poison] inflictor in order to up the DMG Dealt reduction on “Futurism” and prevent it from gaining [Energy] from “Test Bot 1” (this is important the further you go into Endless Mode as things start hitting very hard).
  • Joining at her side are An-an Lee and Bkornblume. An-an provides consistent hybrid buffing split between offense and defense, card upgrading for Tuning and AP-friendliness. Bkornblume instead provides Reality-based debuffs and can also inflict [Silence] with her Ultimate. This doesn’t have much effect on the boss itself due to its Anti-Control passive, but it works on the mobs for if you need to mitigate [Energy] or incoming damage.
  • Sotheby is here as a second [Poison] applicant to help Jessica maximize her damage and also optimize the [Poison] up-time on “Futurism” and “Test Bot 1 / 2”. Her healing isn’t the greatest especially at lower levels, but making the DMG Dealt reduction on “Futurism” is absolutely worth it

For other options:

  • Necrologist - Can also be used here, though in place of An-an, to provide a greater +DMG Dealt buff and trade the -DMG Taken buff for [Prayer]’s revival effect. In addition, her semi-on-demand dispels can help get rid of annoying [Rebound] buffs from [Test Bot 1] if you are low on health.
  • 6 - 6 can be used in pretty much every team due to the versatility of his buffs, debuffs and access to semi-on-demand [Incantation Empowerment] for your Carry.
  • Shamane - Is a viable pick here due to his matching Afflatus, universal DEF debuffs and decent damage output.