
Game Modes
In addition to exploring the overworld and doing missions, Wuthering Waves also offers a number of other game modes for the player to enjoy as well.
Resource / Boss Stages
Throughout the overworld in Wuthering Waves, you will encounter a number of dungeon type entrances or special fields that you can enter to farm resources and materials to progress your account. However, Waveplate (stamina) must be expended in order to obtain the rewards for completing these stages.
The different stages are:
Simulation Field
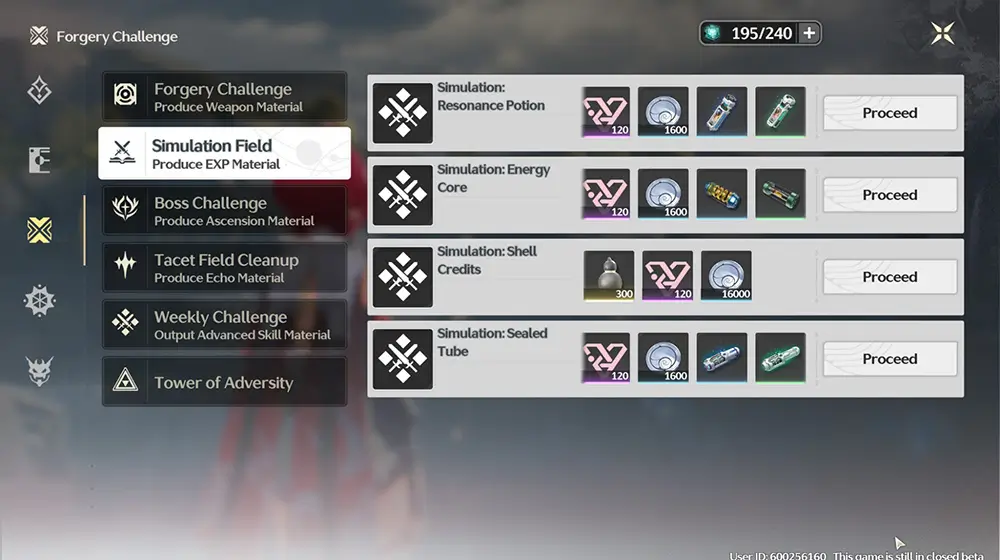
These are your basic resource stages and provide one of the following material depending on which Simulation Field you are farming:
- Simulation: Resonance Potion - Resonator EXP Material
- Simulation: Energy Core - Weapon EXP Material
- Simulation: Shell Credits - Shell Credits (in game money)
- Simulation: Sealed Tube - Echo EXP Material
It costs 40 Waveplate to do one Simulation Field.
Forgery Challenge
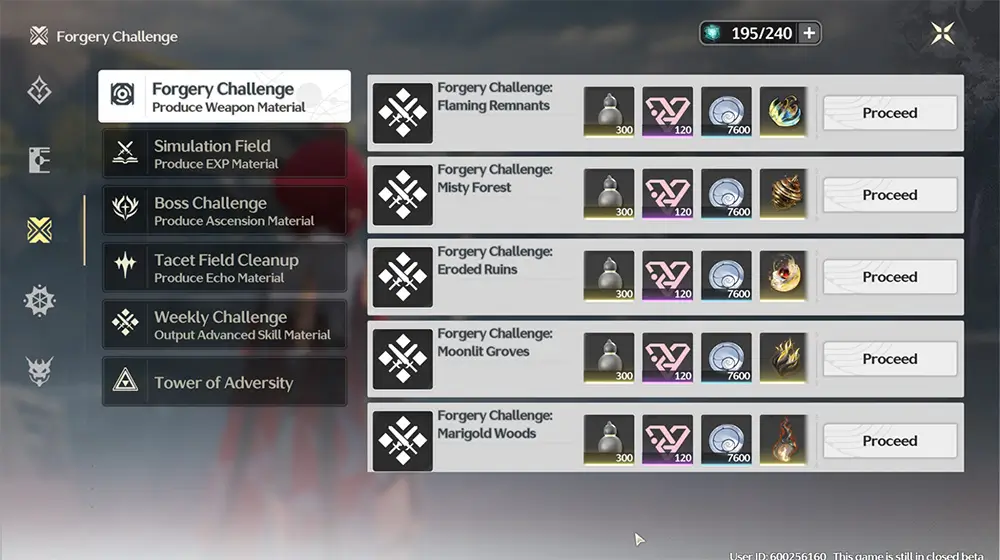
These stages reward Weapon Ascension/Forte Upgrade materials. There are 5 stages that drop different materials in correspondence with the 5 different Weapon types, so make sure to check your Resonator page to see which one you need.
It costs 40 Waveplate to do one Forgery Challenge.
Boss Challenge
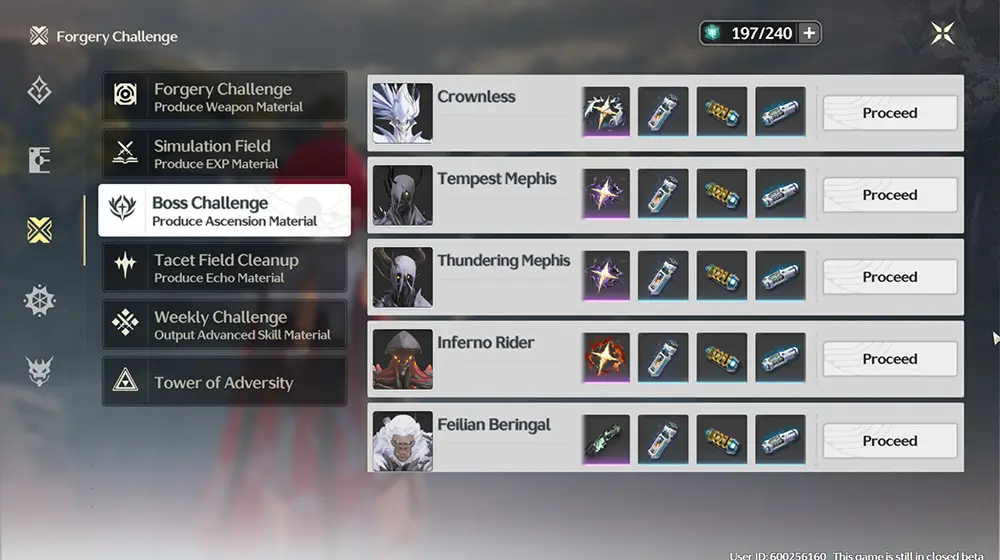
These are Bosses that reward Resonator ascension materials. Each boss drops a different ascension material, so make sure to check your Resonator page to see which one the Resonator you are ascending needs.
Those bosses restart 3 minutes after being killed.
It costs 60 Waveplate to claim rewards from Boss Challenge one time.
Tacet Suppression
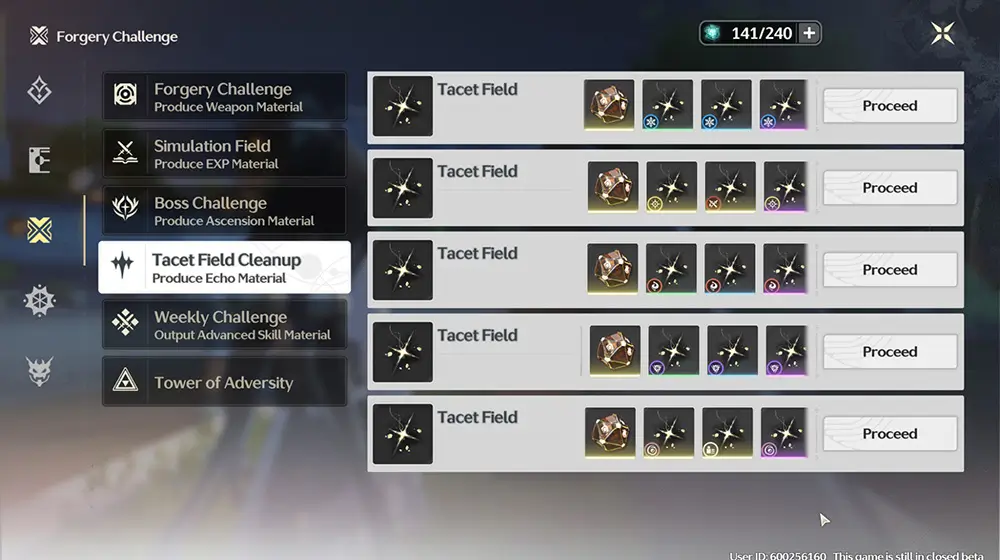
These fields reward Echo Tune-up materials, Echoes, and Echo EXP materials. Each field reward Echoes with different Sonata(Set) Effects so make sure pick the ones with the Sonata Effects you want.
It costs 60 Waveplate to claim rewards from Tacet Field Cleanup one time.
Nightmare Purification
There are 2 kinds of Nightmare Purification, Nightmare Nests and Grim Nightmares. Nightmare Nests reset once every day and let players defeat up to 36 Tacet Discords from a 3 piece Sonata Set. Grim Nightmares are unlocked after a certain amount of Dream Patrol's in the area, and allow players to fight a Nightmare Boss, which feature a different Echo drop compared to the original boss.
It costs 60 Waveplate to claim rewards from Tacet Field Cleanup one time.
Weekly Challenge
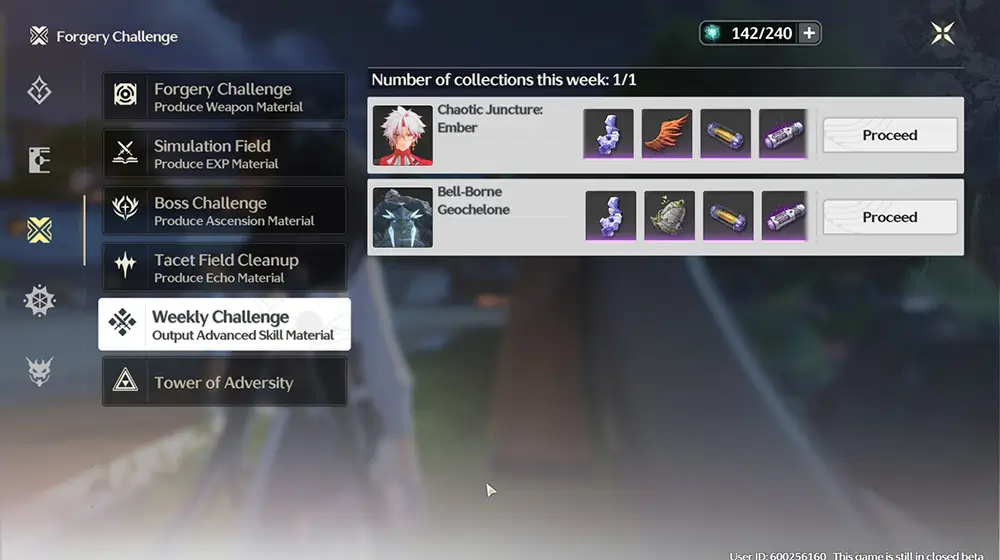
These are weekly bosses that reward special Forte upgrade materials, standard weapon molds (used for weapon crafting), Weapon EXP materials, and Echo EXP materials.
You can only claim rewards from these bosses once a week.
It costs 60 Waveplate to claim rewards from Weekly Challenge once.
Tacet Discord Nest

There are 2 kinds of Nightmare Purification, Nightmare Nests and Grim Nightmares. Nightmare Nests reset once every day and let players defeat up to 36 Tacet Discords from a 3 piece Sonata Set. Grim Nightmares are unlocked after a certain amount of Dream Patrol's in the area, and allow players to fight a Nightmare Boss, which feature a different Echo drop compared to the original boss.
Tower of Adversity
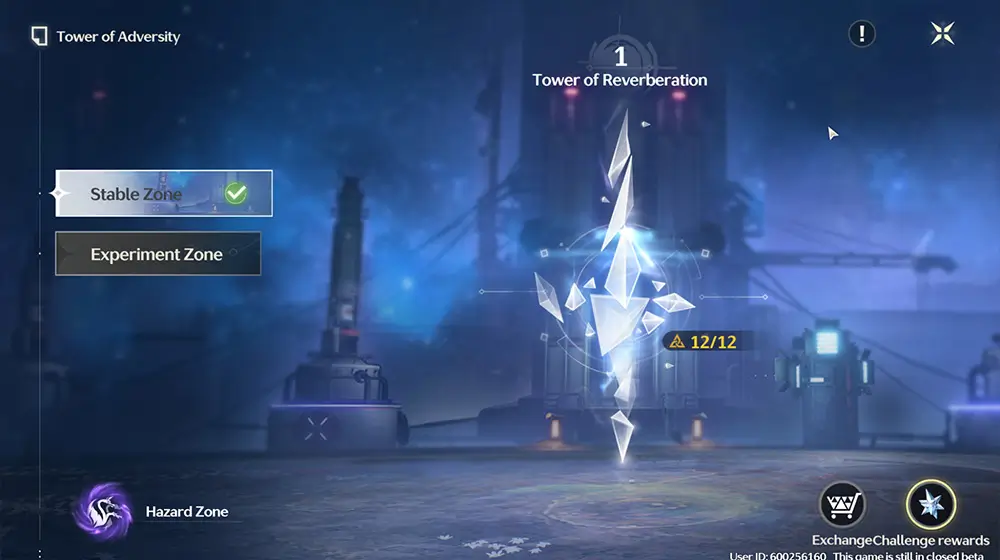
Tower of Adversity is a game mode where the objective is to defeat a group of enemies as fast as possible. After completing a Tower of Adversity stage you will be awarded between 0 to 3 crests for that stage depending on how long it took you to defeat the enemies in that stage. The more crests that you are awarded, the better the rewards you receive.
It is a more challenging game mode with the final stages being considered as end game content.
Tower of Adversity is divided into three parts: Stable Zone, Experimental Zone, and Hazard zone.
- Stable Zone consists of 4 stages and provides a one time reward of Astrites upon completion.
- Experimental Zone consists of 8 stages and also provides a one time reward of Astrites upon completion.
- It is not possible to clear all stages using the same Resonators due to Vigor limitations (explained below).
- Hazard Zone consists of 12 stages and reward Astrites upon completion.
- Hazard Zone stages are more challenging than other zones.
- Hazard Zone stages reset periodically, allowing the player to complete them again for additional Astrites.
Basically, this mode is the Wuthering Waves equivalent of Abyss from Genshin Impact or Memory of Chaos from Honkai: Star Rail.
Vigor

Vigor is a stamina system unique to every zone in the Tower of Adversity.
- Each Resonator starts with 10 Vigor.
- Each stage in a zone has a Vigor cost requirement. Selected Resonators' Vigor will be reduced by the stage's Vigor cost upon completing the stage.
- Resonators that don't have enough Vigor for a stage cannot be selected for that stage.
Whimpering Wastes
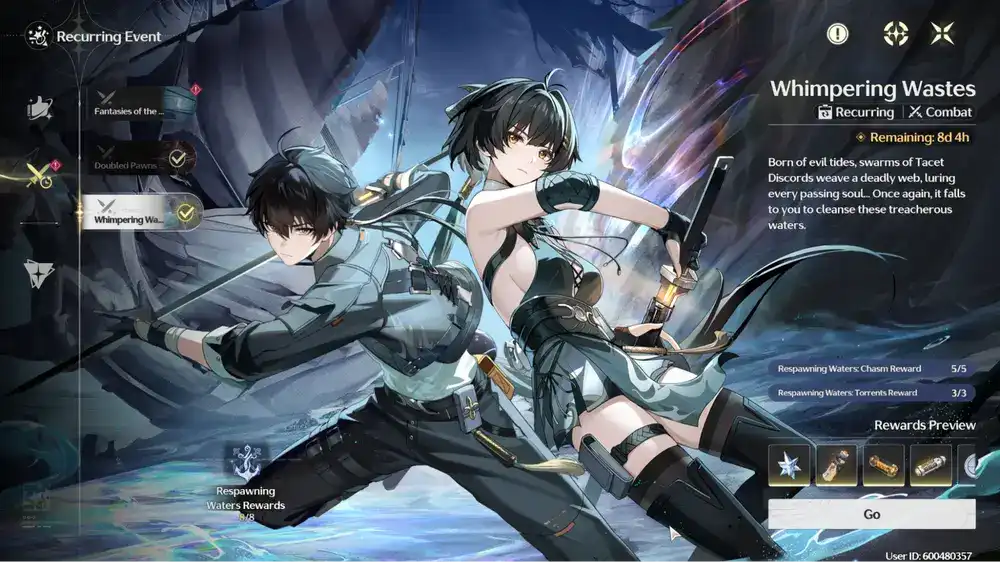
Whimpering Wastes focuses primarily on defeating a near infinitely spawning horde of enemies. After defeating a stage you will be awarded a letter based rank depending on the score you got, with the score being dependent on how many enemies you defeated within the 2 minute time limit. While the ranking itself does not decide your rewards, your score does, which means that in a roundabout way you do want to have a high rating.
Whimpering Wastes is divided into 3 zones. Each zone combines the total score you obtained throughout its individual stages to determine the amount of rewards you will obtain.
- Forbidden Waters consists of 6 stages.
- Forbidden Waters requires a total of 9600 points to obtain full rewards.
- Forbidden Waters does not reset and thus gives rewards only one time.
- Respawning Waters: Chasm consists of 5 stages.
- Respawning Waters: Chasm requires a total of 15000 points to obtain full rewards.
- Respawning Waters: Chasm does reset and thus gives rewards every time the gamemode resets.
- Respawning Waters: Torrents consists of 1 stage, meaning you are not able to compensate for bad performance on one stage with good performance on another.
- Respawning Waters: Torrents requires a total of 4500 points to obtain full rewards.
- Respawning Waters: Torrents does reset and thus gives rewards every time the gamemode resets.
Whimpering Wastes requires a total of 2 teams to be used at the same time, thus forcing each character in use to have their own gear. This conflicts with Tower of Adversity, where only one team is used at a time.
Tokens
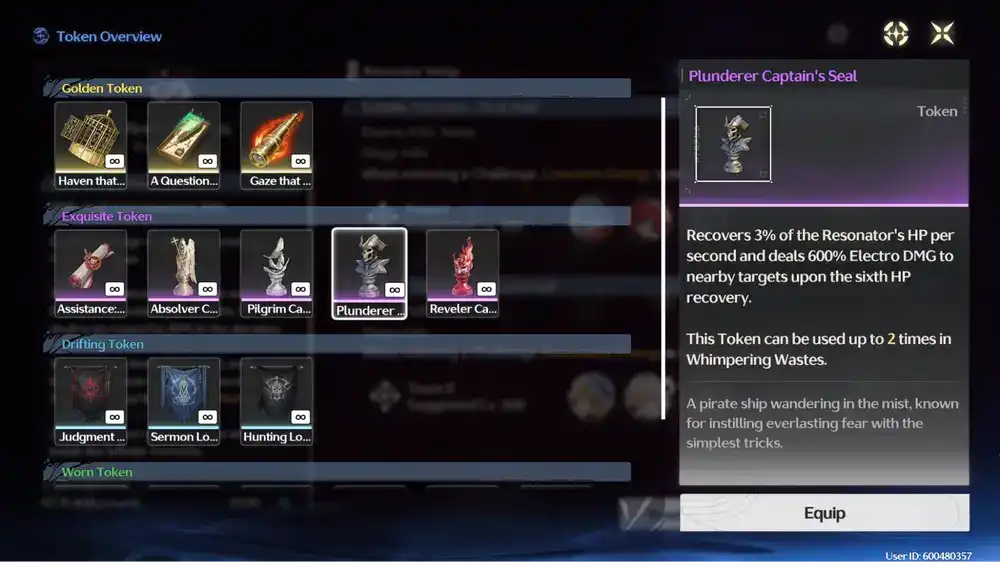
Whimpering Wastes also gives Tokens to aid you in battle. Each one of your 2 teams can select 1 token at a time, and these tokens do not have to be the same one. Each Token costs 1 charge to use at a time, with the amount of available Charge being tied to each Zone. So if you fully consume a token within Respawning Waters: Chasm, you will be able to use it again in Respawning Waters: Torrents. There are 4 classes of Tokens: Worn, Drifting, Exquisite and Gold. Gold tokens will change during each reset, while all other tokens will stay the same.
To keep up with the Honkai: Star Rail comparisons, this is best compared to Pure Fiction.
Doubled Pawn Matrix: Pilot
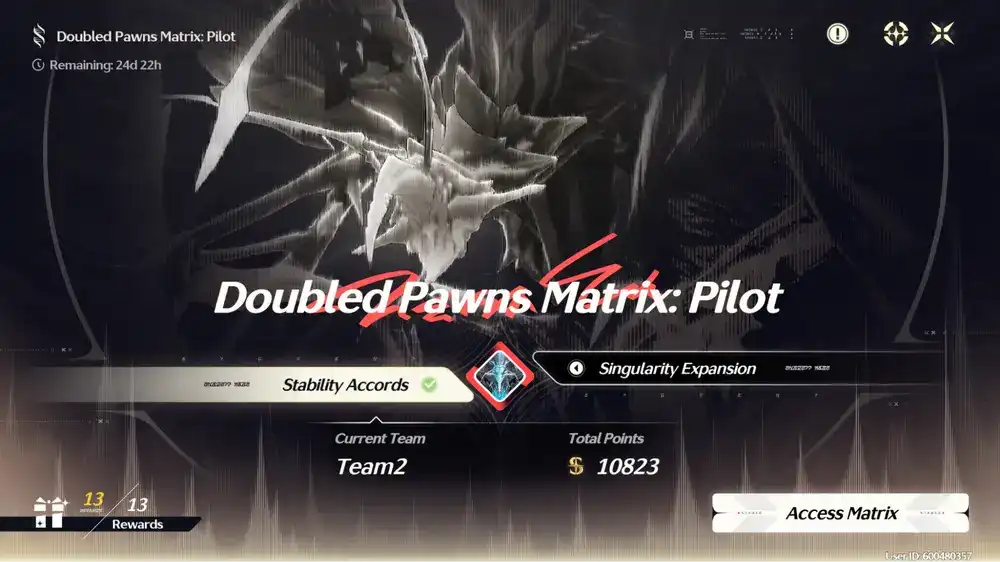
Doubled Pawn Matrix (or DPM for short) is an endgame gamemode entirely focused on defeating as many bosses as possible using a theoretically infinite number of teams. The player will be able to select a team of Resonators to deal as much damage as possible while fighting Boss enemies, within a 2 minute time limit. Each team will gain a certain score depending on how much damage they dealt, which decides the rewards the player will be able to obtain.
DPM has 2 modes, Stability Accords and Singularity Expansion.
- Stability Accords goes up to a maximum of 4 boss fights.
- Stability Accords requires a total of 10.000 points to obtain all rewards, which equates to defeating all 4 bosses.
- Stability Accords only gives you a maximum of 3 teams at a time, meaning you must defeat all 4 bosses with just 3 teams.
- Each character has 1 Vigor, except for universal supports (Baizhi, Verina, The Shorekeeper, Buling, Mornye), who have 2.
- Stability Accords will reset with each Version update.
- Singularity Expansion has an infinite amount of Rounds.
- Singularity Expansion requires a total of 21.000 points to obtain all Asterite rewards, while requiring 58.000 to obtain every reward.
- Additionally, you must use 4 teams that get an individual score of 5000 to obtain all Asterite rewards, with this going up to 6 teams for all rewards.
- Singularity Expansion allows you to use as many teams as physically possible to obtain as much score as you can.
- Each character has 1 Vigor, except for universal supports (Baizhi, Verina, The Shorekeeper, Buling, Mornye), who have 2.
- After defeating each boss, the challenge will progress into the next round. This does not change the gameplay of the mode, rather it simply increases the HP of boss enemies
- Since score is determined by damage output and not the percentage of HP that has been dealt to the boss, higher rounds will still give a similar amount of score as lower rounds.
- Singularity Expansion will reset with each Version update.
DPM is by far Wuthering Waves's hardest Endgame Content to fully complete, requiring 4 well invested teams for just the Asterite rewards alone.
Tactical Hologram
Tactical Holograms are 1-time boss challenges with increasing levels of difficulty.
- Wuthering Waves consistently adds more Hologram Challenges every update.
- Clearing these boss challenges for the first time will reward you with various Echo related materials and Drill Data Sets.
- You can use these Drill Data Sets in store to obtain more Echo related materials and Astrites!
Here's a video showcasing the mode:
Fantasies of the Thousand Gateways

Fantasies of the Thousand Gateways is a roguelike gamemode where the player will select a team of 3 Resonators to explore a dreamscape filled with enemies. When the player first enters, they are prompted to select a Sigil, which will buff things from Echo Skill DMG to Intro Skill DMG. Attacking enemies will grant Dreamscape energy, which can grant an enhanced state based on your Sigil.
After completing a challenge, players will obtain Metaphors and Dream Fragments. Metaphors will grant the player buffs to their stats or Sigils, while Dream Fragments can be used in the store to purchase specific Metaphors.
Fantasies of the Thousand Gateways will grant weekly rewards based on the score obtained, and each week players will be able to claim the equivalent of 2 Tacet Suppression runs for free.