
Combat Basics
Arknights: Endfield has a few features that make it very distinguishable and unique when compared to other ARPG gachas in terms of combat. First and foremost, although the familiar switching mechanic is present, you have up to four characters on the field at all times. Second, the entire team shares the same three SP bars, and you must make tactical decisions on how to spend it. Third, there's a combo system, where characters need to synergize with each other and rely on the player's decision-making in order to trigger the combos. Last but not least, characters will automatically consume Tacticals, up to 3 per battle. These craftable items bring different kinds of regen and buffs that may also affect how you approach combat and team composition.
It goes without saying that all these elements to combat are reliant on adaptability to each situation. Although there are optimal ways to use certain skills and ultimates, most of the decisions in battle should be guided by strategical thinking and knowledge of the character kits as well as enemy moveset.
In this guide, we will go through all the essentials of combat, explaining the meaning of keywords, how to read the UI, the numbers behind the most crucial features, and tips to improve your own performance.
Basic Attack Sequence (BATK)
Clicking or holding the attack button executes the controlled character's Basic Attack sequence. Each character has unique effects and metrics for their Final Strike and Finisher. The Basic Attack Sequence (BATK) is not interrupted by the use of skills, combos, or dodging. It is interrupted if the controlled character gets hit, uses an ultimate, or walks away.
Final Strike
While being played as the main operator the final attack of their basic attack sequence is treated as a final strike which will deal considerable stagger and also recover SP. The amount of SP recovered depends on the character, but as a general rule, the longer the basic attack sequence takes to use the more SP will be recovered.
Still, keep in mind that off-field operators final hit is still considered a final strike - it just doesn't give stagger or SP. This is relevant for some weapon effects.
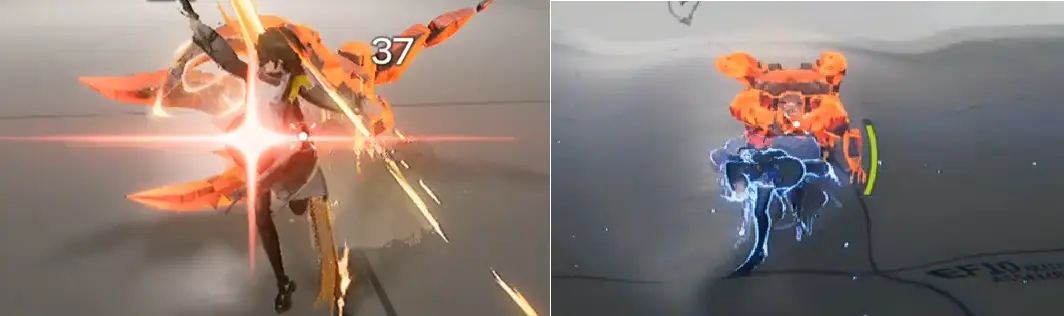
Finisher

After stunning an enemy by maxing out their Stagger bar a Finisher can be used to deal massive damage and recover SP. The amount of SP recovered varies wildly depending on the enemy you've stunned, usually corresponding to how difficult it was to stun them. A boss type enemy can recover 100 SP per Finisher while smaller easier to stun enemies may only yield 25. Also, while executing a finishing move, the enemy stagger bar does not reduce.
Stagger

The controlled operator's Final Strike and most skills deal stagger to enemies hit. Once the Stagger meter is full, the enemy becomes Staggered. Such enemies cannot perform actions and take more damage for a short duration.
On elite class enemies (they can be lifted/knocked) the stagger multiplier in testing proved to be 30% more damage during its duration. In the case of elite class and bosses, they have stagger nodes as well. Stagger nodes aren't as powerful in effect as a fully filled stagger bar, but will still interrupt the enemy.

A story boss appears to have around 300 stagger, Elites have 100-120 stagger.
Dodge
The controlled character can also dodge up to two times in quick succession. A perfect dodge recovers a bit of SP for the team. Playing risky pays off! To execute a Perfect Dodge, watch out for a red flash coming from enemies' attacks, and press the dodge button at the right timing.
Skills
Aside from BATK and Dodge, all operators also have a Battle Skill, Combo Skill, and Ultimate.
Battle Skills don't have a cooldown, and instead cost SP. The natural skill point regeneration will yield 100 skill points roughly every 12.5 seconds equating to about 8 skill points regenerated per second. SP can be additionally recovered through several other means: Final Strikes, Finishers, Perfect Dodges, certain Combo Skills, Tacticals, etc.

Sometimes enemies will enter a charging state. This state is easily recognizable by the red circle around them. While in this state, enemies can be interrupted if they're hit by a Battle Skill, Combo Skill, or Ultimate within that window. To fully interrupt an enemy Skill Casting, deal Stagger to them. In some cases, a white circle will precede the red circle. Hitting the enemy during the white circle window won't interrupt them. Wait for the red circle instead.
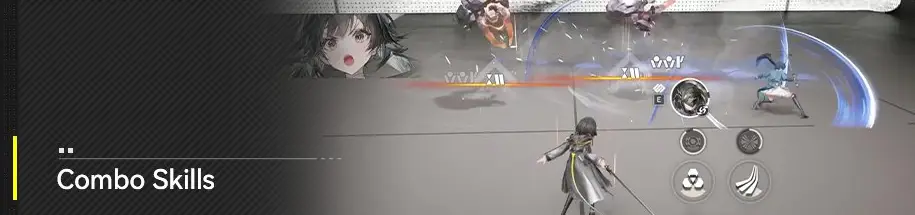
Combo Skills don't cost SP, but instead have a cooldown and specific conditions in order to be triggered. The cooldown bar can be seen as a gray bar above the HP bar in the UI.

Ultimates
When battle skills and combo skills hit the enemy, your operator/s gain Ultimate Energy. Operators with max Ultimate Energy can cast their ultimates by long-pressing their battle skill button.
Energy can be gained via two sources each of which function differently:
- Battle Skills: 6.5 Energy per use for the whole team;
- Combo Skill: 10 Energy per use for the operator that triggers it.
Ultimate Gain Efficiency
A stat often found on weapons and gear that increases the energy gain from Battle Skills and Combo Skills by an equivalent percentage, E.g. with 100% additional Ultimate Gain Efficiency a character would gain 13 energy from battle skills and 20 from Combo Skills.
Ultimate Energy Cost Reduction
A stat almost exclusively found on character Potentials that reduces the total energy they require in order to activate their Ultimates. E.g. a character with an Ultimate cost of 100 and a cost reduction of -15% will have a final energy cost of 85.
Non Active Operators and Operator Switching
Non-Active Operators
Other operators not being controlled will automatically perform basic attacks. Their battle skills, combo skills, and ultimates must be manually cast.
- Enemies will completely ignore non-active operators and will only attack and pursue your active one. Also, non-active operators take reduced damage from all sources.
- All non-active operators will periodically use their basic attack sequence but will often pause in between attacks. In the event an enemy is obstructed by an ability they deploy or terrain there is a high likelihood all non-active operators will completely stop attacking until the obstruction is clear.
- Final Strikes from non-active operators do not generate skill points, inflict stagger or count for the purpose of satisfying combo skill requirements.
Switching Operators
You can switch operators at any moment during a battle. While not required, there are a few instances in which this can be useful.
- Take advantage of it to manage your team's HP. Since enemies tend to ignore non-active operators, they will often have their HP full, or won't die as easily.
- You can switch operators to reach a Final Strike more quickly, depending on their weapon.
- In some cases, when an Ultimate or Skill requires precise casting or positioning, switching is also a good idea.
- If you have access to both melee and ranged operators, you can switch to adapt to certain enemy mechanics, e.g. switch to a ranged operator to deal with enemies with flamethrowers or when there are DoT puddles near the target.
Main Stats & Attributes
Attributes are "special stats" typically acquired from operator passives, weapons, and gear and which are the primary driving force in gear choices and role specialization in combat. There are 4 attributes and each of them have an inherent passive they grant:
- Strength: 5 Base HP per 1 point
- Agility: Physical Resistance per 10 points (has diminishing returns)
- Intellect: Arts Resistance per 10 points (has diminishing returns)
- Will: 0.1% Treated Received Bonus per 1 point
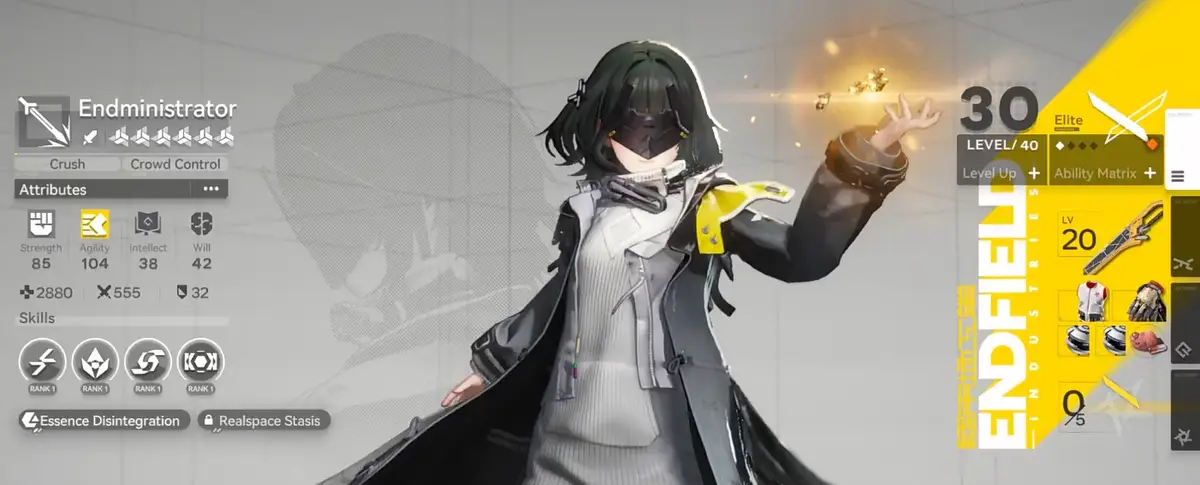
Each character also has a favored "Main" and "Secondary" attribute they gain additional bonuses from, E.g. Endmin has the Main attribute of Agility and the Secondary attribute of Strength. The additional bonuses stacking these stats grant are always the same:
- Main Attribute Bonus: 0.5% Attribute ATK% per 1 point
- Secondary Attribute Bonus: 0.2% Attribute ATK% per 1 point
Attribute ATK% is an incredibly powerful offensive stat that scales separately than standard ATK% making favoring an operator's Main and Secondary Attributes almost always the correct choice. If that wasn't enough many operators also gain additional scaling for their abilities based on how much of their Main or Secondary attributes they possess.
Attribute Boosts
Attributes can be boosted in two different ways:
- Direct Boosts: Flat amounts gained from levelling up, weapons, passives or gear.
- Percentage Boosts: Percentage increases that multiply your total attributes which can usually be found on gear.
Maximizing your total attributes is one of the best ways to increase your total attack and therefore damage output.
Attack
Unlike the main stats of HP and Defense which are simple to understand and calculate Attack is far more complicated, here is how it works:
- Base Operator/Weapon Attack: This stat is limited exclusively to the base ATK provided by weapons and operators and nothing else.
- ATK% Bonus: All non-attribute mentions of ATK% bonuses stack additively together but separately from Attribute ATK meaning they multiply together making it a stronger stat than you might expect.
- Fixed ATK: Some weapons and gear grant flat amounts of attack via their effects. This isn't base attack, but a different type called Fixed ATK which isn't as strong and fits differently in the Attack formula.
- Attribute Attack%: Another layer of Attack multiplication that can only be gained by stacking an operator's Main and Secondary stats.
- Attack = ( ( Base Operator Attack + Base Weapon Attack ) x ( 1 + ATK% Bonus ) + Fixed ATK ) x ( 1 + Attribute Attack% )
Video
You can also watch this video for Combat Overview: