


Goblin Nest
Introduction
The boss of Goblin Nest, Shuro Barot, serves as a simple introduction to dungeoning in Blue Protocol while still having enough mechanics for each role to be engaging and require effective teamwork. Make sure to bind your extra action button before attempting, especially if you’re a tank or healer.
- Shuro Barot, while easy, definitely requires the party to know the fight. Shuro’s main mechanics are Military Formation and Spark of the Storm. During Military Formation, locate and slay both wind-marked Goblins and elect one (two players in difficult+) the job of looting the Wind Shield/s they drop. After, quickly move into the non-red space in the Goblin formation you created by killing two of them.
- Note: On the first formation, you can also stand close to the edge of the arena to avoid the Goblins' charge.
- After Military Formation, ensure the Wind Shield holder/s correctly reflect Shuro Barot's Storm Core towards him.
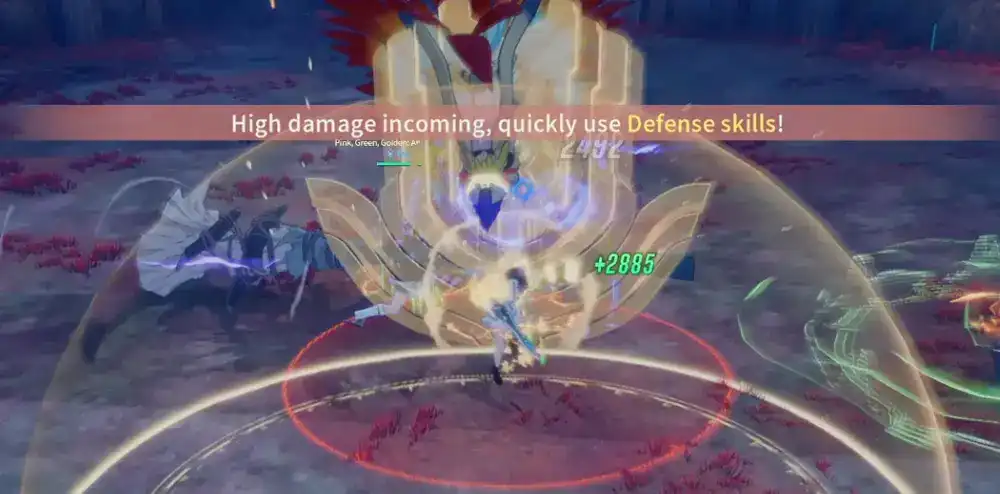
- Tanks must be on the lookout and save cooldowns for when they are marked with a red circle. Otherwise, Shuro’s Lightning Strike is likely to one-shot them unless they are overgeared/levelled.
- Dodge and avoid Shuro Barot’s area-based mechanics to reduce healing burden and prevent deaths.
Loot
| Difficulty | Ability Score Needed | Drops | Rarities | Item Lvl |
|---|---|---|---|---|
| Normal | 1870 | Gloves + Earrings + Weapon | Epic | 40 |
| Difficult | 3880 | Gloves + Earrings + Weapon | Epic + Legendary | 40 |
| Master | 12340 | Gloves + Earrings + Weapon | Epic + Legendary | 60 |
Tips for Everyone
Military Formation

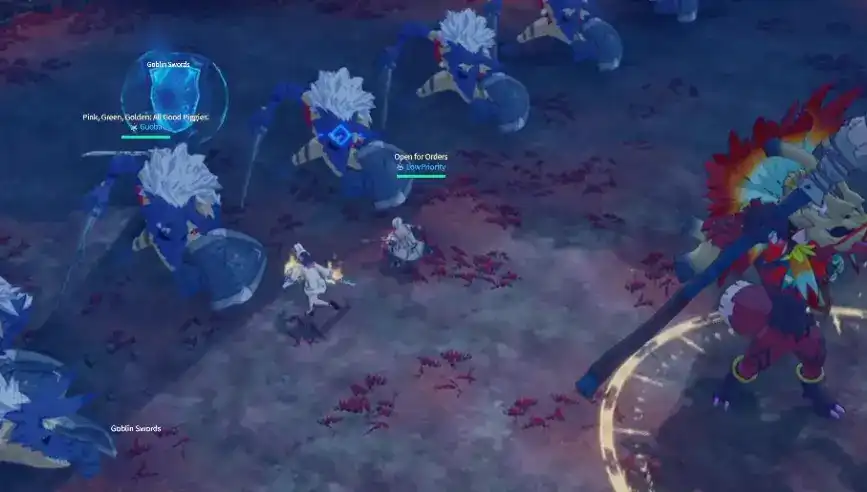
- Shuro Barot becomes immune and summons Goblins in two crossing perpendicular lines. Two Goblins will be marked with Wind Shields above them; slaying them will cause them to drop the Wind Shield. After a few seconds, the Goblins will charge in the direction they’re facing.
- Kill the Shield Goblins and have two party members loot their Shields - they are necessary for the next Boss mechanic. (Healer & Tank recommended, there will be a large DPS window).
- Move to the safe spot in the Goblins' formation you created by killing the shield Goblins.
- Note: In addition to the two Shields dropped by Goblins, there will also be an additional Shield spawned randomly.
Spark of the Storm

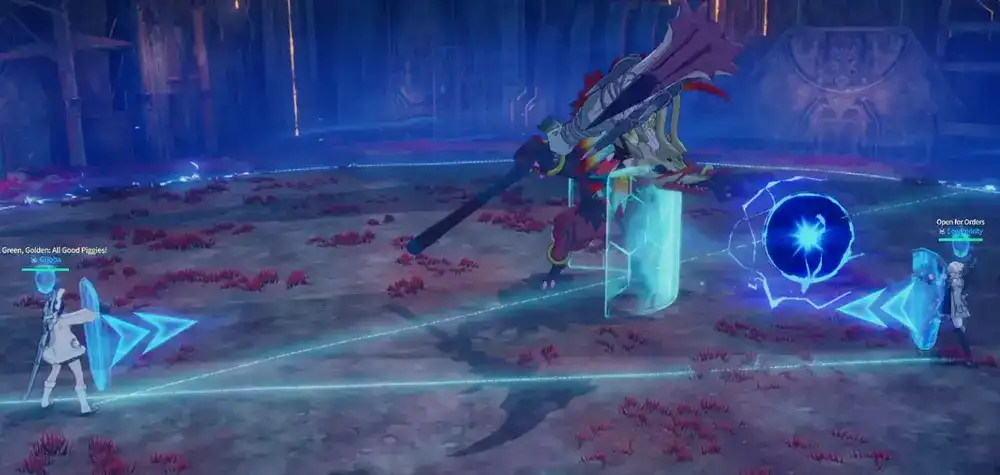
- After the Military Formation ends, Shuro Barot channels Spark of the Storm, restricting the play space permanently while creating a shield directly in front of him. After a short pause, he then launches a Storm Core in the direction of a random player holding a Wind Shield. If this Core reaches the edge of the play space, Shuro Barot will become greatly empowered and the Storm Core will explode, causing damage to the party.
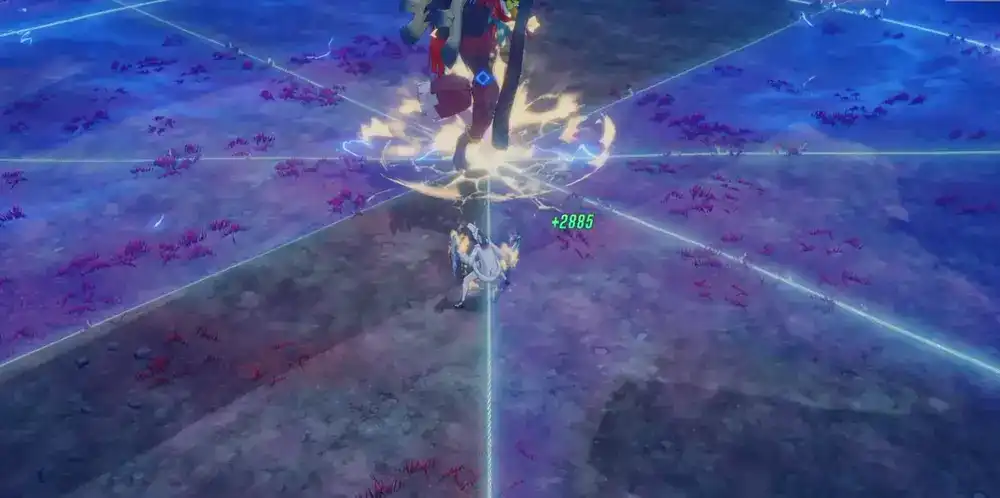
- Intercept the Storm Core and launch it back at Shuro Barot by reflecting it with a Wind Shield. Raise the Wind Shield using the extra action button.
- Hitting Shuro Barot with the Core will stun him temporarily, allowing for a significant DPS window.
- Note: Each Spark of the Storm cast will further restrict the play space, making the fight harder over time.
- Difficult +: Shuro Barot will summon a Storm Barrier around himself.
- On Difficult + two players must coordinate to bounce the Core around Shuro Barot’s Storm Barrier.
- Master +: The Wind Shield will break after coming into contact with the Storm Core, and the trajectory line is no longer visible. Additionally, his frontal shield is larger, leaving only a 45 degree space to stun him.
Thunder Formation

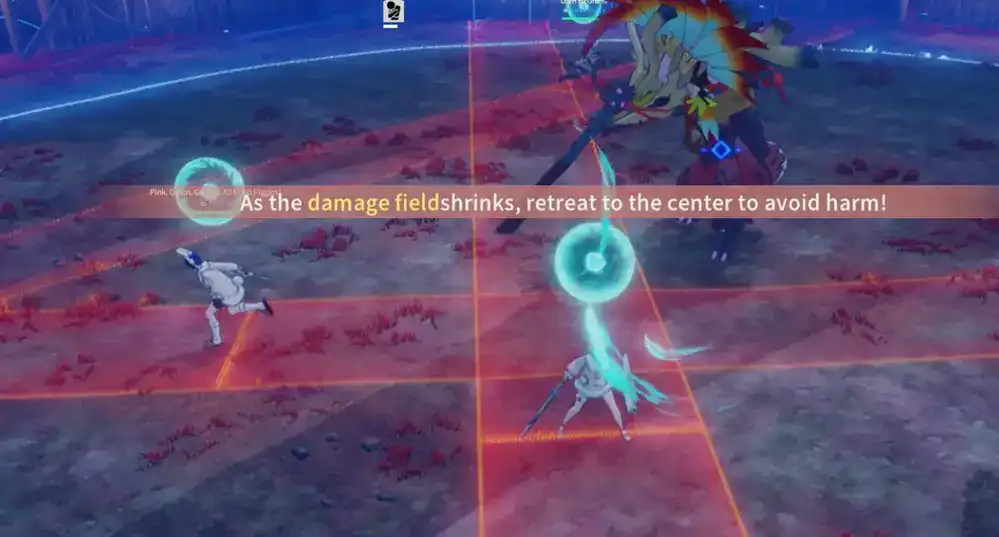
- Shuro Barot moves to the center of the arena and channels Thunder Formation, an AoE set of attacks in pizza slice-shaped zones. The zones will appear in stages, indicating the order in which he strikes. After a consistent but short delay, slices will explode according to the order they appeared.
- This mechanic restricts you from dodging.
- Take note of the order in which slices spawn and move accordingly to avoid taking damage.
- Difficult +: Lightning zones now continuously activate during the mechanic, and their positions are random patterns.
Tornado Sweep

- Marks all players with an orb and a narrow rectangle indicator pointing in one direction. After a couple of seconds, Tornadoes will spawn and travel outwards from you in a line, dealing damage to all they pass through.
- Avoid crossing ability paths with other allies to prevent taking additional damage.
Tips for Tanks
Lightning Strike

- Shuro Barot marks the tank with a circular target marker. After a short period of time, the circle calls down a lethal lightning strike upon the target.
- Time defensive cooldowns and/or immunities in order to survive.
Video
Check below a video of the dungeon: