
1
Epiphany Bonus
When entering Chaos, obtain 1 random Rare Card with an activated Epiphany.


Best Build Guide
 Passion
 Ranger
Last updated: 15/March/2026
Check all the starting cards & the EGO Card available for Veronica

Rapid Fire
 Attack

Illusion of Golden Daffodils
 Skill
Skill
Show Effects

Firing Preparation
 Upgrade
Show Effects

Hunting Time
Ego Skill
Show Effects
Check all the epiphany cards available for Veronica

Repose
Skill
Show Effects

Pendant of Resolution
Upgrade
Show Effects

Sir Kowalski
Skill
Show Effects

Bombardment Prep
Upgrade
Show Effects
Epiphany cards are special evolutions for the cards you can obtain while playing the roguelike mode. Only some cards in the character's deck can get Epiphany effects. Since there's quite a lot of them, we don't display them by default — press the button below to show them.
Check all the generated cards available for Veronica

Ballista
Attack
Show Effects

Piercing Ballista
Attack
Show Effects

Enhanced Ballista
Attack
Show Effects

Giant Ballista
Attack
Show Effects

Shelling Ballista
Attack
Show Effects

Micro Ballista
Attack
Show Effects
Phenomenal targeted Card Draw that can become even stronger with Epiphanies.
Consistently deals damage every turn with Ballista Cards at 0 AP cost after initial setup.
Upgrade-heavy card pool thins out deck size for other Combatants.
Impressive, mostly passive damage, assuming Reload is kept active.
Limited AoE - only accessible via Epiphanies and Ego Skill.
Ballistas target enemies randomly.
Optimal damage output relies on stacking Reload, which isn’t always easy
Upgrade-based strategy requires upfront AP investment to get going.
Veronica is a 5-Star Passion Ranger Combatant that hunts their enemies down from the backline whilst also offering amazing supporting capabilities.
Veronica delivers their damage via their Ballistas, which are unusable Attack Cards that activate themselves at the end of the turn for no cost. Her Ballistas are created from her Firing Preparation Upgrade card and can change the type of Ballista created via alternative Epiphanies to adjust how she delivers her damage.
Veronica can fill into an amazing support DPS thanks to having multiple different sources of low-cost Card Draw built into their kit from their Repose and Sir Kowalski cards, combined with the majority of her damage coming from her freely created Ballistas, can also dish out some great damage without needing any direct investment. As Veronica also comes with multiple upgrade cards, her deck can very quickly become an extremely small and consistent draw engine to help cycle through your deck as quickly as possible. Veronica can also boost her Ballista damage massively via the stackable Reload buff.
Because Veronica's Ballistas activate during the end phase and target enemies randomly, it can cause her damage to be quite random and if you aren't able to consistently stack her Reload buff, their damage can sometimes fall a little short.
Piloting Veronica effectively is relatively straightforward: create Ballistas, stack her Reload buff and support your team with her amazing Card Draw.
Veronica truly is one of the best supporting-DPS characters, with all of this taken into consideration and can almost fit into every single team with ease.
Ballista: Veronica’s main mechanic is Ballista cards. Ballistas are costless cards generated via her kit, which cannot be played and have the [Ephemeral] tag, meaning they’re exhausted automatically at the end of the turn. Before Exhausting, though, Ballista's deal a 150% ATK as Additional Attack damage to a random target. With Epiphanies, different variants of Ballistas can be generated that have different bonuses. Here is what they all do:
Ballista: Deals damage 150% ATK to a single target randomly
Piercing Ballista: Deals 200% ATK and also has piercing, which ignores enemy shields. Also deals +50% damage against shielded enemies.
Enhanced Ballista: Deals 200% ATK and also has +30% critical chance.
Giant Ballista: Deals the same 150% ATK but hits all enemies instead of one
Shelling Ballista: Deals 100% but hits twice instead, making it better at scaling with Flat +% damage scaling (like with Morale).
Micro Ballista: Deals 40% to a single random enemy (far weaker) but can be generated in higher amounts.
Reload: Reload is Veronica’s other core mechanic and is a stackable buff that can be checked either in the buff window or below the team HP gauge. Reload can stack up to 3 times baseline, with each stack offering a 50% multiplicative +%DMG increase to Ballista cards for the turn. Reload is gained via many of Veronica’s cards and all stacks of it will be removed fully at the end of the turn.
Note: Here is how the math works out for Reload at base. 150% x ( 1 + 50% x Reload Stacks). At 3 stacks, that’s 375% DMG.




Repose I
Skill
Pendant of Resolution I
Upgrade
Show Effects
Sir Kowalski I
Skill
Show Effects
Repose I
Skill
Pendant of Resolution I
Upgrade
Show Effects
Sir Kowalski I
Skill
Show Effects


Firing Preparation
Upgrade
Show Effects
Repose
Skill
Show Effects
Sir Kowalski
Skill
Show Effects
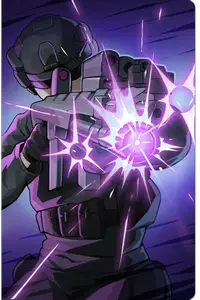
Quick Shelling
Attack

 Justice
 Instinct Passion
 Instinct
 Instinct Passion
 Void Passion Instinct
 Passion Passion
 Order
Order Instinct Instinct Passion
 Order
Order Instinct
 Instinct Instinct Instinct Passion
 Passion Passion Order
 Void Instinct Order Instinct Instinct Passion Passion
 Passion PassionRosariaE4RosariaE0MarinE0
 YuriE4


CRIT Rate > CRIT DMG
Passion DMG% > ATK%
ATK%
Extra ATK DMG% > CRIT Rate% = CRIT DMG% > ATK > ATK%
Veronica’s Signature Potentials add new mechanics to her cards and all improve her damage, enhancing her Sub DPS capabilities.
3-1: Grants Rapid Fire a 20% chance to create a Random Ballista card on use. A must-have Potential if you plan to use Veronica’s Basic Attack at all.
5-1: Increases Rapid Fire’s DMG by +5% and an additional 5% if ATK exceeds 500.
7: Improves Ballista’s DMG by +5% while Veronica’s ATK is 700 or higher. Also adds an additional +1% for every 40 ATK over 700 Veronica, up to +10%.


Introduces Desire Cards. Desire Cards are cards that primarily exist to give a strong passive buff from meeting certain Desire Thresholds (3/5/7) which can only be done by having multiple ally decks also made in Season-4.
For Desire Threshold, it’s common to run 1 Claim / 1 Survival / 1 Inquiry for use in a variety of builds on supports; however, it's also common to just do 3 ‘X’ to meet effect easier or do 2 'X' / 1 Inquiry (to keep Sample Collection as Card Effect). This is extremely dependent on ally desire cards and individual team building goal.
’X’ refers to a ‘Placeholder for Specific Desire Threshold Goal’, i.e. if you are building your team for 7 Claim then you might do 2 Claim / 1 Inquiry.
Introduces Persona Cards and Engravings. Persona Cards are powerful cards that introduce new playstyles or ways of buffing/debuffing. Engravings are effects that can be applied to both the Persona Cards and Equipment, functioning near identically to Refinements of Season-2 but with new effects.
There is no recommended Card Engraving, often times it will be specific to the team or skipped entirely (focusing just on Equipment Engravings).
The most common Equipment Engraving to optimize for is the stacking [When Action Count of enemies is increased by allies, +50% Damage Amount to Ally Attack Cards for 1 turn (1 time per turn)] and [When a card of this unit is activated, 30% to increase Action Count of all enemies by 1 (1 time per turn)], but it's possible to use a variety of other options for a specific set-up (like Discard [Quietus] Engravings when playing high [Quietus] builds or Umbra Engravings just to meet the threshold for certain Persona cards).
Introduces Refinements, effects on Equipment that allow one to get additional Equipment effects for no Faint-Cost (post-S2), and God’s Hammer, a powerful effect that gives a random copy of any other Equipment effect on-top of current Equipment but costs 10 Faint Memory and is only gained from the Boss.
At the start of battle, Draw 1 Exhaust card(s) of this unit.
At the start of the turn, if an Exhaust card is in Draw Pile, have a 30% chance to Draw 1 Exhaust card(s).
If Damage is completely blocked, at the start of the next turn, increase Damage Amount of allies by 10% for 1 turn (1 time per turn).
When Drawing an Exhaust card of this unit through an ally ability, activate immediately (1 time per turn).
Because God’s Hammer is completely RNG at the end of the run, we do not have a specific recommendation since the player has very little control over the decision. Supportive options are recommended for supportive units (like Tentacle or Harp effects).
Introduces Forbidden Cards, powerful cards that create new synergies and can only be acquired once per run (can be duped at one event or via save data editing).
Forbidden: Gesture of Freedom. Permanent Cost-Reduction to 1-card, can be manipulated.
Forbidden: Eternal Hunger. +Draw, ++AP (Ally Reliant)
Forbidden: Portrait of Fury. ++Draw
Forbidden: Guidance of Futility. +++Survivability
Firing Preparation
Upgrade
Show Effects
Firing Preparation I
Upgrade
Show Effects
Firing Preparation II
Upgrade
Show Effects
Firing Preparation III
Upgrade
Show Effects
Firing Preparation IV
Upgrade
Show Effects
Firing Preparation V
Upgrade
Show Effects
Repose
Skill
Show Effects
Repose I
Skill
Repose II
Skill
Show Effects
Repose III
Skill
Show Effects
Repose IV
Skill
Show Effects
Repose V
Skill
Show Effects
Repose I: Now a 0-cost but loses its previous shield. Since Veronica is not typically used as a shielder, this is a completely fine trade-off; moreover, being a 0-cost means it now can get +1 AP Divine instead of -1 Cost Reduction, enabling her to be an AP battery as well.
Repose II: Now does a bit more shield and gives 1 Reload if drawing a Skill Card. Basically, a better version of Repose IV or Repose V, since it allows you to quite easily hit Reload cap without losing the draw effect.
Repose III: Now reduces the cost of cards drawn by 1 for 1-turn. A rather underrated Epiphany that, with Cost Reduction, will provide very similar value to Repose I with AP Divine. Which is to say, this can act as a pseudo-AP card on top of a draw card.
Repose IV: Gives 1 Reload for every Skill Card in hand, but loses its Draw effect. The effect is OK, but there’s almost no scenario where you’d want to get rid of one of the strongest draw cards in the entire game for Reload (a buff you can easily max out through other effects).
Repose V: Discards all other combatant cards and gains Reload for the amount discarded. The effect is kind of terrible (just getting rid of your entire hand for fun), and there’s almost no scenario where you’d want to get rid of one of the strongest Draw cards in the entire game for Reload (a buff you can easily max out through other effects).
Neutral: Target Neutral Epiphany: Resolve.
The most commonly kept Divine is Resolve 2, to use Veronica as a shield and draw unit (and Shield Buffer) for teams that want to maximize shield like Maribell's Shelter Striker. Also, the Base Epiphany is still very strong and will likely be preferred over other options if given a good Divine Epiphany.
Divine: Which Divine Epiphany to go for will depend on what your team needs and which Epiphany you chose, but here are the main ones to look out for if you have spare Save Data: Draw 1, 1 AP (Repose I), -1 Cost Reduction.
Pendant of Resolution
Upgrade
Show Effects
Pendant of Resolution I
Upgrade
Show Effects
Pendant of Resolution II
Upgrade
Show Effects
Pendant of Resolution III
Skill
Show Effects
Pendant of Resolution IV
Upgrade
Show Effects
Pendant of Resolution V
Skill
Show Effects
Pendant of Resolution I: Now gain Reload from Veronica’s cards as well. The go-to Epiphany with most Supportive builds since it’ll allow you to passively hit reload cap every turn off of just Veronica cards alone.
Pendant of Resolution II: If gained at least 3 Reload (and used a Ballista), then gain 1 Micro-Ballista next turn. This is more situational than options that just give Reload, since making an additional Ballista might not be worth the damage if you need the hand space to draw or play certain effects.
Pendant of Resolution III: Becomes a skill with [Exhaust 2] that gives Reload for any card used. This is bad because you already hit Reload cap quite easily off any other Epiphany without needing to play a skill in a specific order or them being exhausted, as they’re passive Upgrades.
Pendant of Resolution IV: 50% chance of gaining an additional Reload. This is basically the base Epiphany since both can hit the Reload cap quite quickly–the additional Reload gain truly does not mean anything in 99.9% of Veronica builds.
Pendant of Resolution V: Becomes a skill and gains [Retrieve 4]. The skill is lowkey buns (just too much Reload), but this is a VERY strong card for Mei Lin’s Aromata (or any buff that needs you to play Passion cards and/or Skill Cards repeatedly) since this allows you to play the card 5 times in one turn (can be very expensive without Cost Reduction Divine, though).
Neutral: Target Neutral Epiphany: N/A.
There is no specific Neutral Epiphany recommended, but the Base Epiphany is comparable to the most universal options, as you should be able to hit Reload cap with it, as well.
Divine: Which Divine Epiphany to go for will depend on what your team needs and which Epiphany you chose, but here are the main ones to look out for if you have spare Save Data: Morale/Resolve.
Sir Kowalski
Skill
Show Effects
Sir Kowalski I
Skill
Show Effects
Sir Kowalski II
Skill
Show Effects
Sir Kowalski III
Skill
Show Effects
Sir Kowalski IV
Skill
Show Effects
Sir Kowalski V
Skill
Show Effects
Sir Kowalski I: Draw 2. The Buff doesn’t matter at all; this is the go-to option simply because many builds cannot afford the hand space that Kowalski III will take up, making this option much more universal.
Sir Kowalski II: Now buffs ALL Ballistas by a multiplicative 30% for the turn. A decent buff to Vero’s Ballistas, this is worth considering if you have other sources of draw and Ballista creation and want to do a Veronica DPS build.
Sir Kowalski III: Now Draw 2 and create a Ballista when drawing a Skill Card. This is probably the best way to make a lot of Ballistas passively every turn. The option builds that want additional Ballista damage (and can afford the hand space) will take.
Sir Kowalski IV: Loses Draw 1 and will give a decent additive buff to 1 Ballista. Losing a draw for a bit more damage on one Ballista is not recommended for most uses of Veronica, as it is more likely to introduce variables that result in dead draws.
Sir Kowalski V: Loses Draw 1 and Exhaust 1 Ballista and creates 2 new Ballistas with 25% less damage. This option doesn’t draw and creates fewer Ballistas than Kowalski III can make, with a debuff as well, so it is very much not recommended.
Neutral: Target Neutral Epiphany: N/A.
Basically, no reason to ever use the Base/Neutral Epiphany since it has less draw than other options and its buff isn’t that great.
Divine: Which Divine Epiphany to go for will depend on what your team needs and which Epiphany you chose, but here are the main ones to look out for if you have spare Save Data: -1 Cost Reduction, Vulnerable 2, 1 AP (Echo V).




Firing Preparation I: Now has a 50% chance to create 1 additional Ballista. This is great for Veronica builds that want to hit the maximum number of Ballistas possible (Veronica DPS), but this can be a detriment in builds that want the hand-space (for draw reasons, typically) as it will potentially add 2 cards to hand you can’t get rid of instead of just 1.
Firing Preparation II: Now creates a Piercing Ballista. This is a great option if you want to ignore enemy shield and want the extra damage from Veronica.
Firing Preparation III: Now creates an Enhanced Ballista. This is a great option if you want to increase the Ballista damage with little external buffers (or with passive mult buffers, as some Orlea builds).
Firing Preparation IV: Now creates a Piercing Ballista. This is a great option if you want to do more damage in multi-target/AOE,
Firing Preparation V: Now creates a Shelling Ballista. This is a great option if you want to do more damage in single-target, using external buffers to increase multihit damage.
Neutral: Target Neutral Epiphany: N/A.
There is no specific Neutral Epiphany recommended, but basically all Firing Preparations are just a bit of passive Ballista damage–there is no clear recommendation as it depends on the situation and personal preference for what type of Ballista you want.
Divine: Which Divine Epiphany to go for will depend on what your team needs and which Epiphany you chose, but here are the main ones to look out for if you have spare Save Data: Morale/Resolve.