Introduction
In NIKKE, there is a considerable gap among new players, veterans, and tryhards. The amount of advanced tech employed by these various groups differs. The more competitive a player is, the more likely they are to employ advanced tech. Note that advanced mechanics may be subtle, and to the eyes of those yet eloquent, they may be invisible. Mastering these strategies as a beginner is key to gaining competitive advantage, allowing you to push Campaign further and accruing more resources per hour.
We have compiled some of the most important tech for you to learn in this guide! It may not be comprehensive, but it will 100% help you improve!
There are still lots of advanced tech not yet covered here. We will update this guide continually to spread the effort. If you have any suggestions on what to add here, let us know!
i-Framing (Invincible Framing)
In this game, there is a technique called i-framing—used to dodge enemy attacks. It’s not really i-frame in the sense that you become invincible. In fact, it’s an incorrect term to lousily describe dodging in NIKKE. In short, enemy attacks are NOT actually directed toward a Nikke. They are directed toward the Nikke's snapshot position at the time of launch (cued by the blinking red circle). Abusing this allows you to deliberately "redirect" an enemy's attack to a Nikke's in-cover or out-of-cover coordinate and evade it by switching to the other position just before it lands. For demonstration, check out this video by Retro:
If an enemy’s projectile comes for a NIKKE’s out-of-cover position, take cover to dodge it. This one often works unless the projectile is large enough to still hit a NIKKE. Not all projectiles can be i-framed this way, but most can. To “encourage” this to happen, you can try to maintain the shooting position just before the projectiles are launched. Sometimes, shields can prevent this from happening—beware!
If an enemy’s projectile goes toward a NIKKE’s in-cover position, peek to dodge it. However, if the cover is alive, it will also be damaged. This is less ideal than the first variant, but sometimes you will have to employ this tech, especially against Alteisen or Mother Whale and in some mob stages. Cover is not essential all the time anyway, so having it destroyed doesn’t do any harm. Note that some projectiles cannot be dodged this way and require the first variant.
To AUTO or NOT to AUTO?
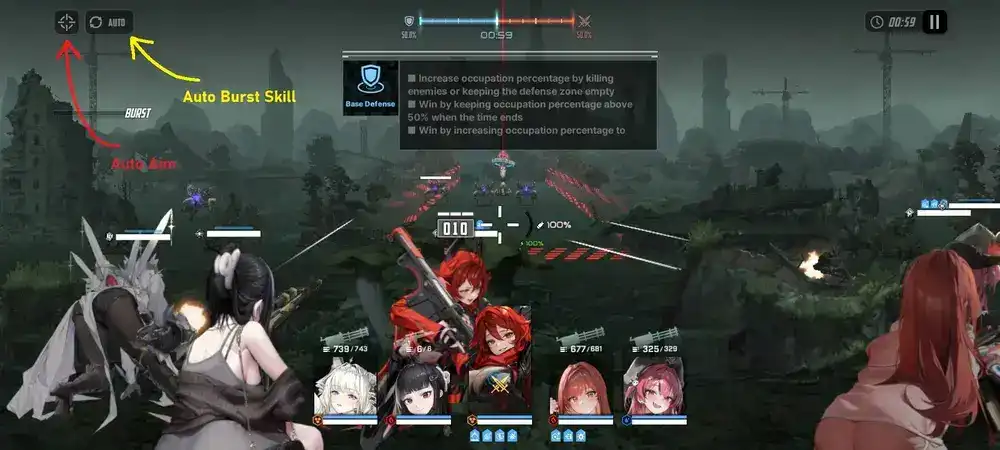
After you finish the Tutorial, you are granted access to two convenience functions: Auto Aim & Auto Burst Skill.

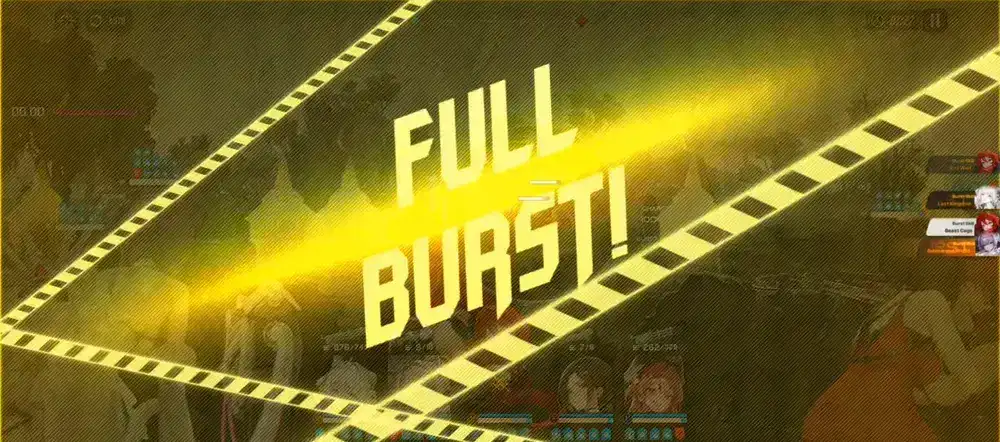
AUTO AIM allows all Nikke(s), including the one you currently control, to fight for themselves, controlled by AI. Since it is AI, you cannot control which targets they shoot, although there is a hidden prioritization system. Some enemies are also untargettable by AI, but they only appear in late game. Auto Aim also has another notable difference: in Full Burst, the focus fire system is disabled.
We do not recommend using Auto Aim for beginners, so you can get used to the feel of the game—but it is absolutely fine to use for casual content. You should leave it OFF when trying to push hard content because targeting choices have a large influence. You can also leave it ON and still control your Nikke as if it were OFF. The Auto Aim function will only kick in after you stop holding the screen.
AUTO BURST SKILL lets the game automatically decide which Burst Skill to use in a fight, so you don't have to press them manually. However, there is one thing you should know—it is not smart; it just selects whichever Burst Skill is available at each Burst Step from the leftmost (P1) to the rightmost (P5). For example, if Scarlet is in P3 and Modernia is in P4, and both have Burst Skills available, Scarlet’s Burst Skill will be used.
You can solve this issue by arranging your units more carefully in the team building screen, but do know that active/passive skills also activate from the left to the right, and sometimes differences in order can impact the performance of a skill. Another problem with Auto Burst Skill is that it imposes a delay between each Burst Skill, which slows down rotations and causes damage loss and possible death (note: you can skip this delay by pressing the Burst Skill(s) yourself).
We do not recommend using Auto Burst Skill when pushing hard content because, sometimes, you will want to pause Burst Skills’ usage for a bit to get the perfect timing. However, if this is not a concern, you can leave it ON, especially if you are a phone user since tapping on multiple parts of the screen at the same time can be difficult.
Maximizing Burst Gen & CDR

Keeping your team in Full Burst all the time is crucial to winning. This is because Full Burst increases damage immensely, and Burst Skills are notably impactful. There are 2 basic techniques that you can implement in order to maximize your Full Burst time:
- Burst Gen-ning: Nikkes generate Burst Energy by shooting (and sometimes skills). While the value per shot is constant, you can play around it to make it give more. We can do this by quick-shotting (spam-shotting) Sniper Rifles/Rocket Launchers, hitting Terrain, and attacking Stage targets. You can also try to hit multiple hitboxes at the same time with Pierce and Explosive attacks (generate nx more energy depending on how many hitboxes are hit, including Terrain).
- Quick-Shotting (Spam-Shotting): A very common technique where you manually control a Sniper Rifle (SR) or Rocket Launcher (RL) Nikke and fire shots at an accelerated rate (no charging). Even though higher Charge Amount results in higher Energy obtained per shot, you gain more from wasting shots, reloading, and doing it again. Whenever you are in the "Recharge Burst Gauge" phase, you should always do it if it's available.
- Hitting Terrain: The destructible Terrain that acts like cover for Raptures (fences, walls, buildings, dilapidated houses, trees) generates double Energy when you hit them. If it's safe to hit them and you need Burst Energy quickly, consider shooting at them, especially with Sniper Rifle (SR)/Rocket Launcher (RL) Nikkes (read: first point).
- Attacking Stage Targets: All bosses, including the bosses of a Destroy Stage (described in the next section), are considered Stage Targets. Attacks on Stage Targets yield 2× Burst Energy.
- Pierce: Units like Alice and Red Hood have Pierce capabilities. Pierce allows an attack to penetrate all enemies in its trajectory. If you hit multiple hitboxes (Terrain or Raptures or Parts [Raptures' outgrowths]), then you can double, triple, quadruple, or nx your Burst Energy per shot.
- Explosives: RL attacks are explosive (some Rocket Launchers have different Explosion range). If an RL attack hits multiple enemies, including Terrain, the amount of Burst Gen gained for that particular shot is also multiplied.
- Cooldown Reduction: In a smooth gameplay, you will enter Burst Cycles before every 15s. However, Burst Skill(s) have a default cooldown of multipliers of 20 (20s, 40s, and 60s). This means the rhythm is off and you are basically stalled, having to wait for their cooldown to end. To fix this, we deploy Cooldown Reduction units in most teams (referred to as CDR or CDR units). CDR units come in many different forms & shapes, and the most popular one that you'd know is Liter. Different CDR units have different CDR activation conditions, although most of them are pretty basic—such as just requiring entering Full Burst or landing Charged Attacks x times. When available, and unless you are using teams that do not rely on CDR (very late-game teams that we don't need to discuss here), you should always deploy a CDR.
Our staff, Retro, using Red Hood to accelerate burst gen, hitting Terrain and multiple Raptures with Piercing shots at the same time.
Best Settings
Suffering from flashbangs or battle effects covering the screen? Troubled by the extreme jiggle effects when playing in public? Annoyed by the zooming in on Stage Targets that make you unable to see your crosshair? Don’t worry; you can lower or turn them all off!
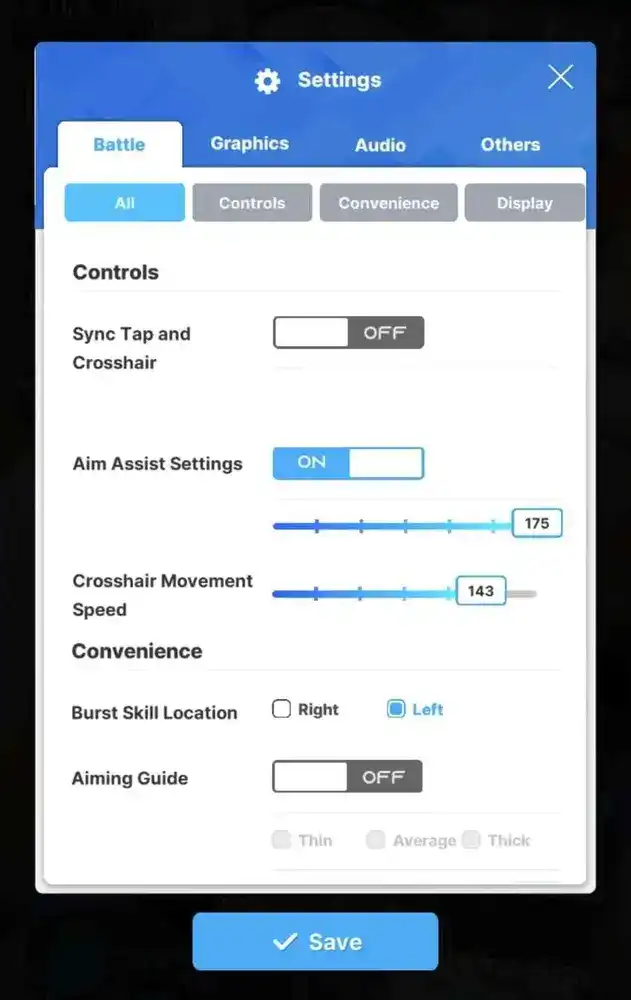
Preferably outside a battle, tap on the top right and access Settings/Options. You will see a screen like below:

For your convenience, we recommend:
- Screen Shaking = Off
- Keeping this On may cause damage loss due to FPS drops or shot inaccuracy.
- Physics Effects = Off
- Mostly affects Nikkes’ jiggle.
- Turning off can improve FPS or reduce distraction.
- Change Nikkes Automatically = Off
- Just prevents you from manualing the Nikke you should.
- Combat Effects = Balanced or Off
- Most skills’ effects are too distracting on High. Dorothy’s Burst Skill effect can flashbang you, for example, and Crown’s may make seeing enemies harder.
- Some important skill effects are removed on Off, but only a few are affected, like Tove.
- Attention When = Off
- This controls the brief zooming in on the stage target in mob stages.
- The zooming in prevents you from seeing other enemies/aiming at other enemies.
- Also puts your crosshair off the screen.
- Fog Level = 0
- Can obscure vision/fidelity.
- Max Frame Rate = 60
- Nikke is FPS-dependent. Machine Guns and SMGs are significantly affected. Turning on Min. Firing Rounds can help (but not completely) preserve DPS.
- Min. Firing Rounds = On
- Improves the fire rate of certain guns on low or unstable FPS.
- Aim Assist = Always On, Unless It Locks to an Undesired Target
- Aim assist helps improve accuracy, especially against far enemies or small targets like a Rapture’s core.
- However, sometimes, you don’t want this locking.
- Sync Crosshair = Sometimes Required to Be On, Sometimes Off
- Some advanced combat tech requires sync crosshair to be turned on/off.
- When fluid movement is desired, leaving this on is recommended. It’s especially good against small enemies who move a lot.
- However, turning this off yields better accuracy because your crosshair will not shake. Turn it off against stationary enemies or enemies with large hitboxes.
- Screen Orientation = Sometimes Horizontal is Mandatory
- Some stages or bosses are too wide that Horizontal is significantly more advantageous than Vertical, such as Alteisen, Kraken, etc.


