
Intro
Developed by Hypergryph, Arknights: Endfield features a dual gameplay of semi-open world ARPG intertwined with Base Building and Automation. For the former, you can think of games like the "Tales of" series, as well as "Xenoblade". For the latter, look up "Factorio" and "Satisfactory".
While roaming through Talos-II, you will be able to make alliances, build and develop outposts, cleanse maps afflicted by the frightful "blight", and, of course, build your own factories in order to aid your game progression. Endfield also allows the sharing of certain features with other players (such as ziplines to help traverse the map and weapons to fight elite enemies or assist with Energy Alluvium cleaning). On the community side, players can visit a friend's base and sell Elastic Goods in the game's own twist of a stock market system.
Hypergryph's gaming philosophy has already been proven three times: in "Arknights", "Ex Astris" and "Popucom". This is a developer that favors personal expression through gameplay and a polished storytelling tied to stage design. For those familiar with the original "Arknights", you will see connections going beyond lore cues. The similarities are present in the classes' roles, the elemental burst working similarly to Arknights' Elemental system (such as talents and skills from Primal Casters, Primal Defenders, among others), as well as game modes that mimic the beloved Tower Defense gameplay. If you are familiar with Ex Astris, Endfield bolsters similar combo systems, where you have to adapt on the go and receive satisfying results as you work your strategy towards a consistent loop. If you played Popucom, the puzzle and platform philosophy makes itself present here as well (along with some shared assets). All in all, Endfield is the culmination of over 6 years of work from Hypergryph, and if you haven't played any of the games mentioned above before, you're welcome to meet a unique and polished experience!
Gameplay
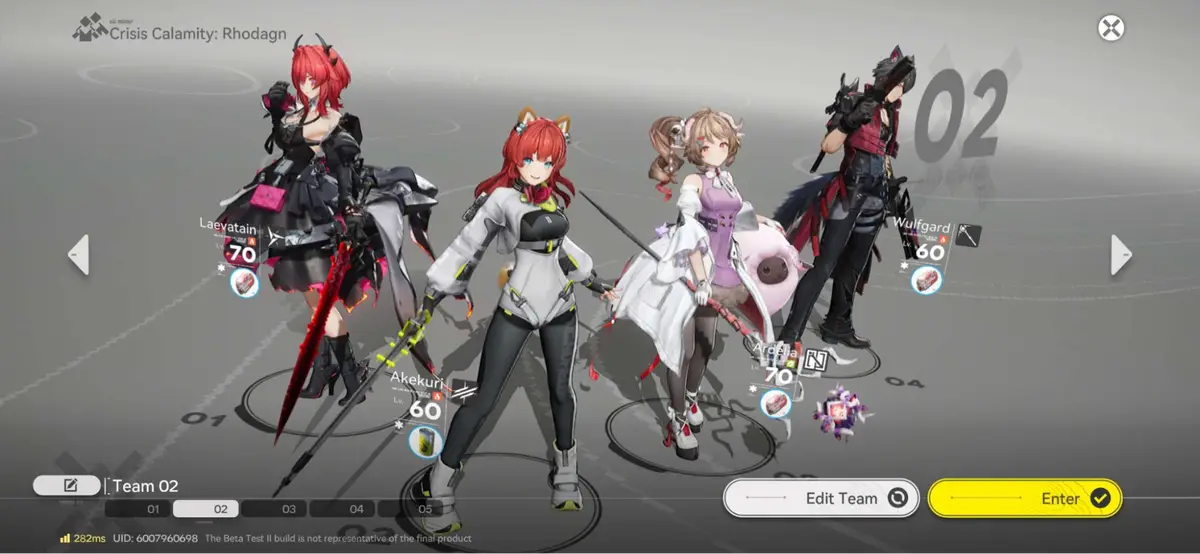
Character and Team Building
Each team can have up to 4 Operators. Each Operator has one Class, wields a specific weapon type (not limited by its class), and has an element. Every character has a set of: Basic Attacks, Battle Skills, Combo Skills, and an Ultimate.
- Basic Attacks are a chain of attacks with the weapon and include a Finisher as the last attack of a basic attack chain that can only be performed by the controlled character. It offers unique effects and can trigger combos with certain Operators.
- Battle Skillshave no cooldown and can be cast in quick succession, consuming SP. The team has to manage three bars of SP (300 SP) shared by all team Operators, however, so SP management is crucial to ensure you don't run out!
- Some Battle Skills also have Enhanced versions. They can be identified by a difference in their icon: Normally, they have an icon with only an outline, but when the requirements for the Enhanced version of that Skill are triggered, the icon will become a filled shape, and the skill button will flash. One example is Ardelia's Battle skill, who inflicts [Physical Susceptibility] and [Arts Susceptibility] if used in its Enhanced version.
- Thirdly, we have the Combo Skill. This skill is different in that it doesn't cost SP and can trigger various unique effects. However, it can only be used when triggered by specific conditions in battle, such as a Finisher striking an enemy or when an enemy reaches a certain number of stacks of a condition.
- Finally, we have the Ultimate: Operator Ultimates are powerful skills that require a special resource called "Energy" that builds during battle at an Energy Acquisition rate affected by Attributes, Equipment, Tacticals and certain Talents. In short, your goal is to build a team whose skills and combos synergize with each other, all while dealing with the management of resources. Performing Combo Skills also recovers Ultimate Energy, so make sure to check if the operators in your team can cycle through their Combos seamlessly.
For more information about Operators and Character Progression, check our dedicated guide:

Combat
Endfield's combat is the definition of "easy to learn, hard to master". Casual players will be able to enjoy the game with their favorite Operators, playing however they want. Nevertheless, in order to tackle bosses, elite enemies, and challenges, the game will require quick thinking and reflexes from the player. It's possible to dodge up to twice in a row, with perfectly timed dodge speeding up SP regeneration for a period of time. To capitalize on this, you'll often want to be right in the thick of the fight.
Among other basic mechanics is the interruption of enemies' attacks when they create a red circle around them. There are also unique mechanics such as destroying specific parts of an enemy, switching from melee to ranged operators to avoid stepping on bad spots on the ground while keeping your attacks going, and so on.
Although Endfield's mechanics are still quite rudimentary, it's been a pattern in all Hypergryph games to start simple and then add more complex mechanics. These mechanics require a bit of thinking and 'puzzle solving' skills from its players in order to counter said mechanics. Please look forward to that!

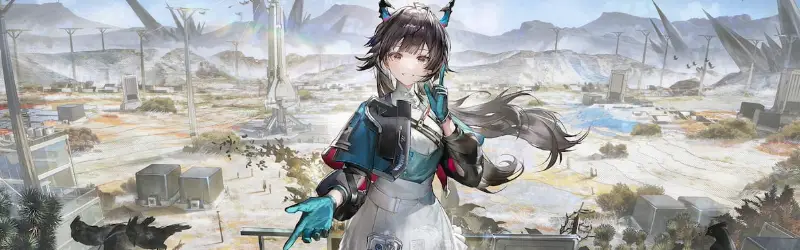
World Exploration
The core of World Exploration features collecting chests and Aurylenes (that can be exchanged for upgrades to your stamina, buffs in later areas, and other items). Outside of that, there's a myriad of puzzles that award Oroberyls (gacha currency), materials and gear. It is through World Exploration that you will find essential materials to upgrade the OMV Dijang (your base), promote Operators and Tune weapons, and upgrade your skills.
Aside from that, mining spots, mini-challenges and Energy Alluvium spots are scattered all about the map, and the best part is that you can use your own facilities to change how you access these resources and tackle these challenges! Ziplines can make the process of going around gathering rare materials infinitely easier, on top of being a fun way to "cheat" in challenge races against NPCs.
Meanwhile, well-placed turrets and healing beacons help greatly with dealing with Elite enemies and Energy Alluvium spots, while Stashes can be placed in strategic spots to help manage your inventory. These are, of course, only a few examples of things that can be done. Your creativity is the limit when it comes to finding ways to explore and transform Talos-II.
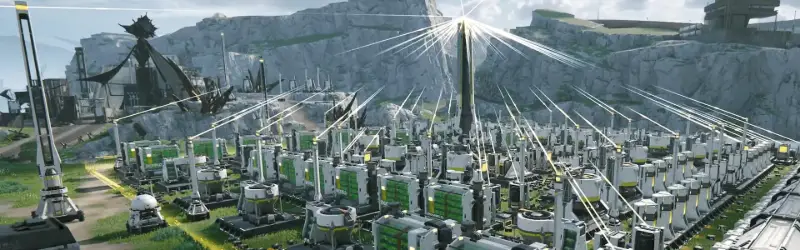
The AIC: Standing for "Automated Industry Complex", the AIC is the heart of Endfield and marks the start of the Base Building and Automation Gameplay. As you progress, you will unlock facilities and technologies that will allow you to improve the way you farm materials, and that's only the beginning. It's possible to create production lines for all sorts of things: Tacticals (i.e. restorative items, buff items), advanced materials to help further improve the performance of your factories (i.e. batteries, protocol stash), and last but not least, gear for your operators.
Classes
Endfield has six classes: Guard, Caster, Striker, Vanguard, Defender, Support. The first three often take the role of DPS, while the latter three play more of an assisting role. This is, however, a mere guideline and not a hard rule. Many characters are versatile enough that they can be either DPS or Assist, or not play the way you expect to initially. One such example is Perlica. Despite being a Caster, which would automatically place her as a main DPS, instead, she plays as a Sub-DPS/Support most of the time. That happens because of her remarkable capability at inflicting Electric affliction, making her one of the best Assist for Electric teams. You can, of course, play her as your team's main DPS if you wish to. It all depends on how you build and equip your team, including the use of Tacticals, which we will explore later.
For now, let's delve deeper on each class and their roles:
- Guard: Guards are skilled at making enemies [Vulnerable] and applying [Physical Statuses]. They are also excellent damage dealers. They wield swords and polearms, with the sword wielders (i.g. Endministrator) excelling at dealing Finishing Strikes.
- Caster: Casters are skilled at applying [Arts Inflictions] and [Arts Reactions]. They are also excellent damage dealers. As of now, most casters wield Arts Units and Handcannons. Compared to Guards, they tend to be more squishy, keeping their distance and either playing a glass-cannon role, or assisting their allies through Arts Infliction and triggering combos.
- Striker: Strikers exploit Physical or Arts effects inflicted by other operators to unleash the decisive attack. As of the writing of this guide, they're the more varied weapon-wise, but they all have something in common: maximizing damage through bursts after stacking other effects. Due to that, they are often the main DPS on elemental teams, having the entire team built around them in order to maximize their damage potential.
- Vanguard: Great at recovering Skill Points (SP) to help their teammates' skill casting. The way they do this is often by consuming Infliction stacks on the target, so it's common that Vanguards and Casters/Supports go hand in hand. Aside from that, much like Support Operators, Vanguard can offer a wide variety of utility, and said utility doesn't always match that Operator's main attribute. However, since dealing damage isn't their main focus, you may consider investing more on the stat that improves the bonuses that they can grant to the team, or that will help them spam their Ultimates or combos more frequently.
- Defender: Defenders are extremely tough. They are skilled at protecting and healing their teammates and counterattacking the enemy. They also help the team with defensive buffs and moves, but that comes with a caveat. At the current state of the game, it's more advantageous to the team that the main Operator faces the incoming attack and dodges it, in order to recover SP. There are very few enemy moves that can't be dodged or interrupted, making Defenders less desirable currently, when compared to the damage and utility that other classes bring. Granted, that can easily change in the future, so there's no need to completely discard these Operators. Not to mention, their healing and protection capabilities can be valuable for players who struggle with timing and dodge mechanics.
- Support: Support operators are skilled in applying various control effects that weaken the enemy. They can also buff and support their teammates. Support operators have varied kits, ranging from healing to amplifying, to crowd-control and more. While Defenders focus on defensive assist, Supporters, on the other hand, tend on focus on offensive assist. Furthermore, much like Casters, most of them are fantastic at [Arts Infliction] or [Physical Statuses], making this class the easiest to synergize with any DPS.
Attributes and Elements
Attributes can be classified as:
- Strength: Influences the Operator's Max HP.
- Agility: Affects the Operator's Physical DMG Reduction.
- Intellect: Affects the Operator's Arts DMG Reduction.
- Will: Influences the amount of treatment (healing) received by the Operator.
Each operator has one main attribute and one secondary attribute. The main attribute grants a large bonus to the Operator's Attack, while the secondary attribute grants a smaller bonus to Attack. It's possible to identify which one is the main attribute and which one is the secondary by checking the yellow and gray highlight, respectively:
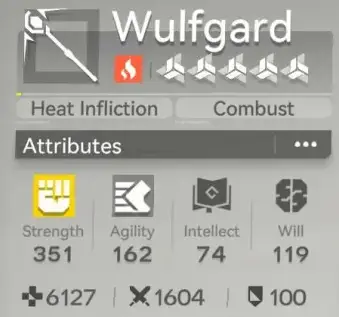
Aside from the four main attributes, Operators also have HP, Attack and Defense. These three numbers are displayed below the main attributes, with the symbols of a cross, two swords, and a shield.
Lastly, Operators will display tags that showcase their specialty at a glance. In this example, Wulfgard has the tags "Heat Infliction" and "Combust", which makes him a perfect partner for a Fire DPS who will take advantage of that, such as Laevatain.
When it comes to Elements, there are five of them:
- Physical: Can inflict [Vulnerable] and other specific [Physical Status] (Lift, Crush, Knock Down, Breach).
- Cryo: Can inflict [Solidification]. A target under [Solidification] cannot move. This element synergizes with Physical: applying [Vulnerable] to a target under [Solidification] triggers [Shatter], dealing massive Physical DMG.
- Electric: Can inflict [Electrification], which increases the Arts DMG taken by the target. The higher the amount of Arts Infliction stacked before triggering the Arts Reaction, the higher the DMG Bonus. This doesn't apply to forcibly applied [Electrification].
- Fire: Can inflict [Combustion]. This Arts Reaction deals damage over time, and can stack.
- Nature: Can inflict [Corrosion]; Reduces the enemy's resistance against all elements. Nature Operators are a great pick to support all teams, being versatile at assisting through their kits and the Corrosion effect alike. Please keep note that triggering Corrosion again won't stack or increase the amount of Resistance reduction. Instead, it will only refresh the duration of the Corrosion.
To understand more in depth the Elements system and their multipliers, check out our Combat & Reactions guide!
First steps at Talos-II
- When you begin your journey in Talos-II, focus on following the Main Story Quest first. It will unlock all the essential features for the game. Under the "Mission" menu, you will find these quests fixed at the top, and highlighted in yellow. Other quests will also be highlighted with their own tags, and classified by importance level and type: Important, Urgent, New Feature, and so on. Typically, aside from the Main Quest, the "New Feature" and "Time Limited" (aka Event quests) are the ones you should focus first.
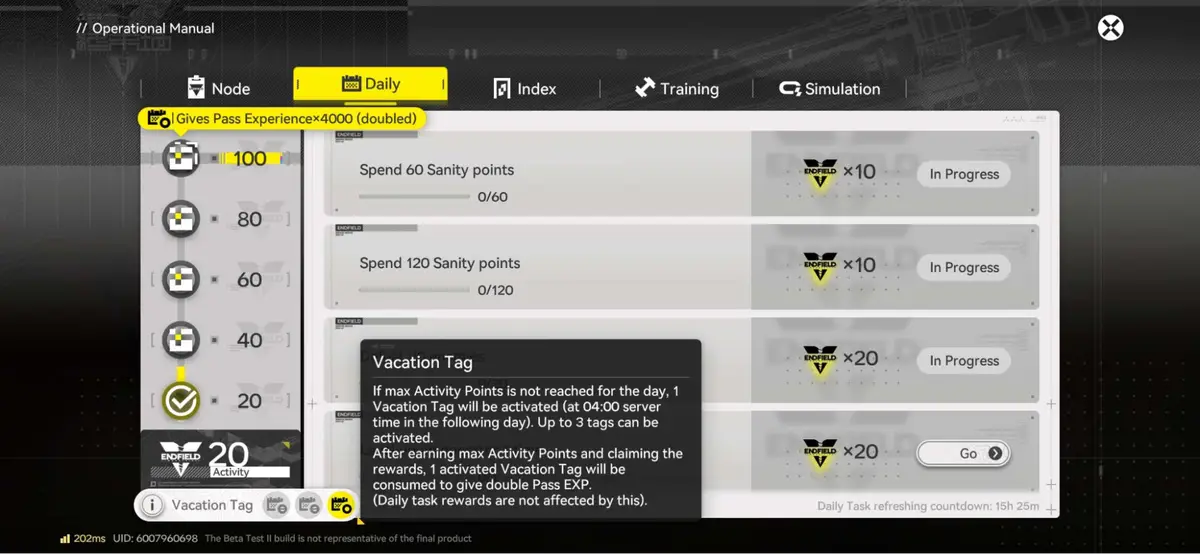
- Keep an eye on your dailies! You can miss them up to 3 days, and although the Vacation Tag system will compensate you by giving extra Pass EXP, you still won't get the Oroberyl and other rewards from the missed days.
- Once you unlock your AIC (the game will bombard you with tutorials), build a production line for gear as soon as possible. The higher the level of the gear, the longer it takes to produce the materials, and you will need good gear to be able to progress smoothly.
- If you wish to speed up your account level and get Oroberyls in the process, do all the simulations as soon as they unlock. They will also give you Blueprints and, while not optimal, they can greatly help to set up your production lines in the early game.
- Focus only on one team first!! Several resources are time-gated, and at higher levels, a single operator requires a ton of resources and money to level up. Having a well-built team will also make it easier for you to farm materials for your next teams!
- Save Sanity Permits for high-level farm stages! These tickets are very hard to come by, and they allow you to get double rewards with a single run of the farm stage. They're invaluable to speed up your progress at higher levels.
- As you explore the map, remember to place Pylons and Ziplines as you go, especially leading towards spots of rare growths. Placing Pylons and Ziplines side by side will make your job a lot simpler, and you can use most of the same Pylons to help you solve puzzles and power Mining Rigs along the way.
Daily Routine
List of Daily Tasks
- Trade Elastic Goods
- Delivery Job
- Trade items at the Outposts
- Gather materials from Recycling Stations (Owls) and Rare Growth Sites (Ascencion Materials)
- Spend stamina (Material Farming or Essence Farming, depending on your needs)
- Manage the ship (OMV Dijang)
- Daily Mission Board
While this all may feel overwhelming at first, there are two things to keep in mind:
- Most of the rare resource sites take a couple of days to max out, so you don't necessarily need to go there every single day.
- You can create Ziplines connecting these spots to make the grind easier and painless.
Outside of that, the other tasks, including the ones from the Daily Missions board are quite simple and quick to finish. That leaves only the "Delivery Job". If you don't have the time or don't want to engage with that, you can assign the job for other players to take it, and both of you will make a profit! If you can, it's advised to coordinate with friends for maximum profit on both sides.
Stock Market and Depot Nodes
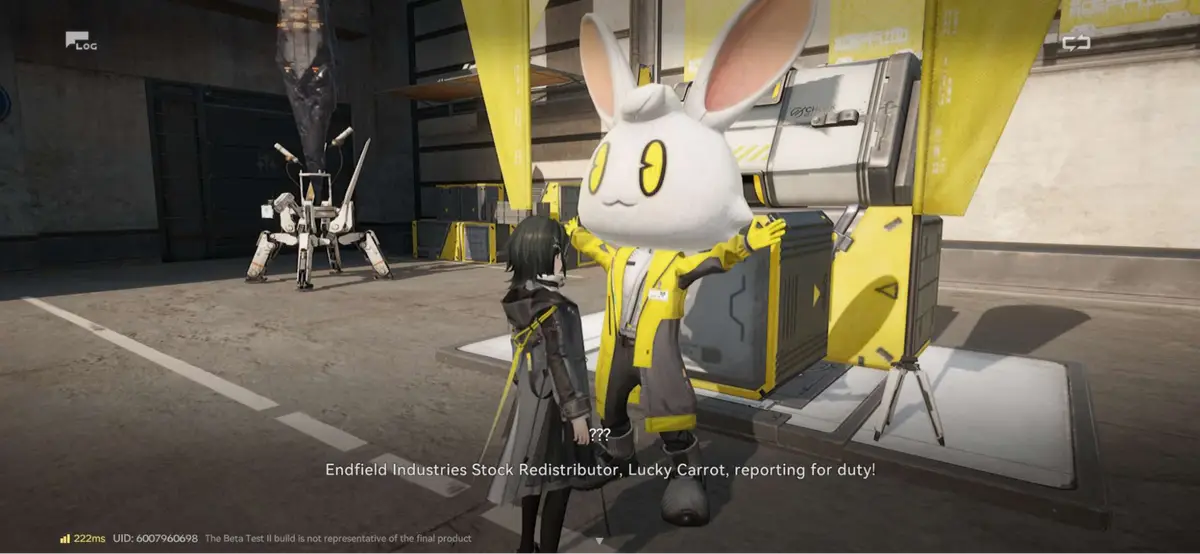
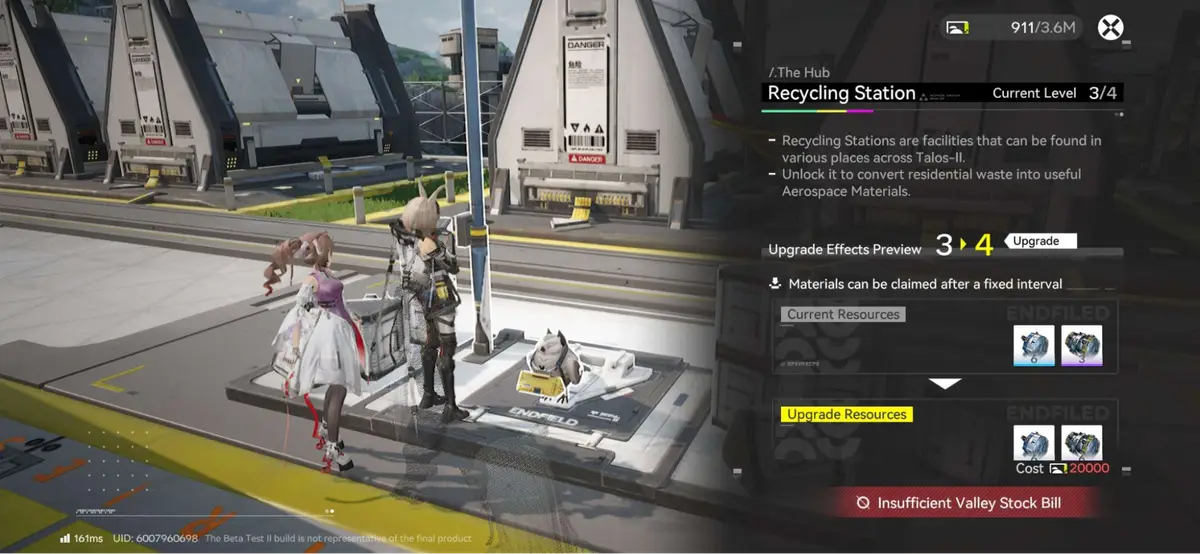
Every time you find this funny bunny (?) around, activate the Stock Redistribution. "What's Stock Redistribution?", you may ask. Well, that's simply the easiest and fastest way to make a large amount of Stockbills. Stockbills are needed to craft gear, expand your AIC and Sub-PAC, and you can also purchase several goodies in the special store, from gacha pulls to materials to gifts for your Operators. Aside from that, you will also need Stockbills to upgrade several facilities across the map: the Stock Redistribution itself, the Depot Nodes and the Recycling stations. Doing so will greatly help improve your Regional Development Level, and thus increase the mineral output, amount of rare materials and more.
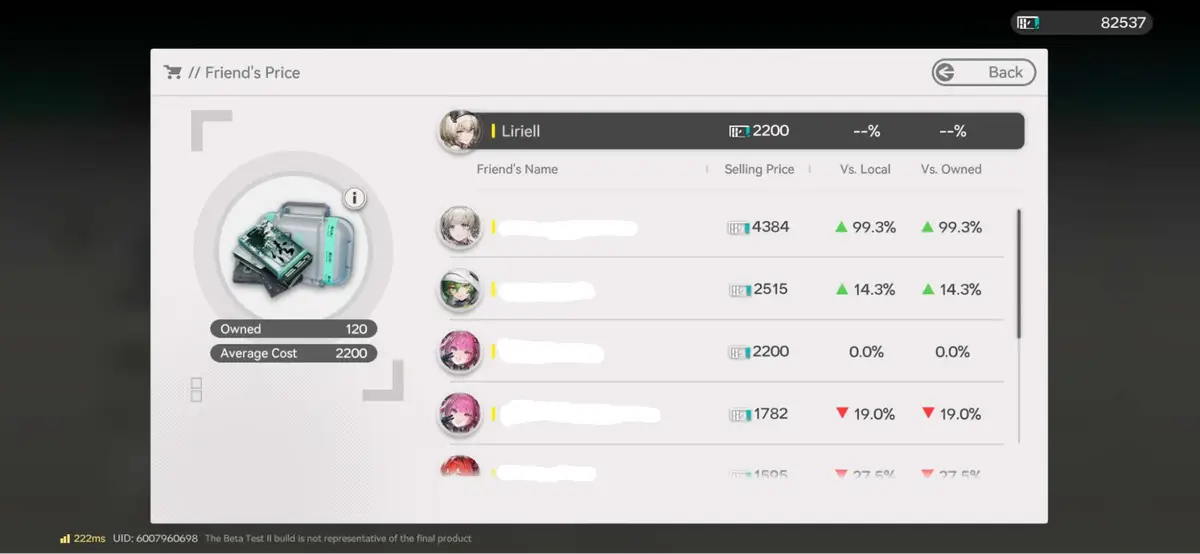
A good tip to follow in order to maximize your profit when trading Elastic Goods is to check your friend's prices in all goods. Sometimes, an item that has a smaller discount (or no discount at all) on your end may be selling for a far higher price at your friend's ship! Compare percentages and aim for the highest profit!
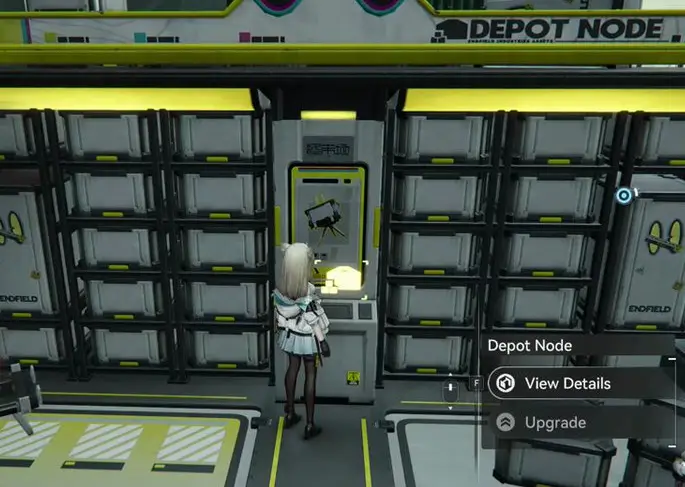
Depot Nodes are another way for Credits income. They're large boxes on the map, and you can pick packages at them and deliver to another point in the map. Certain actions like Teleporting or taking damage may damage the goods and lower the payment received, so check the conditions when picking a package and be careful! The higher the Depot Node level, the bigger the package and the more you can get paid by them. The packages must be filled, of course, with byproducts from your factory. Yet another incentive to get those production lines to work!
Videos
You can also watch the videos below for more information: