

Loading content...
Last updated: 15/October/2026
Introduction
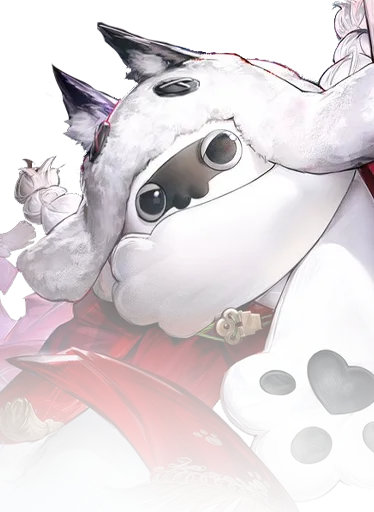
Purrchena is a 5-star character in Arknights: Endfield (AKE). Purrchena wields a Sword and belongs to the Defender class. Purrchena also has access to the Physical element. This guide provides a comprehensive overview of Purrchena's best build, including recommended Weapons, Gear pieces, Stats, and the strongest team compositions and rotations that maximize their potential.
Video guide
Purrchena has at least one video guide available, so if you prefer this sort of medium to learn more about a character, check it out:
Update tracker
Last review update
Patch 1.5
Last major build/calcs update
Patch 1.5
Last profile update*
15/October/2026
*Profile update means smaller edits to the guide that don't require new calculations.
To learn more about Purrchena check the sections below. Use the tabs to quickly switch to the kind of information you're looking for - whether it's best build, teams, synergies or calculations.
Profile
The yellow color shows the Primary Attribute and the green Secondary Attribute. Both of those attributes, on top of their normal bonuses, provide additional ATK to the character.
 Strength
 Agility
 Intellect
 Will
DESSERT! HAVE SOME!
An attack with up to 3 sequences that deals Physical DMG. As the controlled operator, Final Strike also deals 21 Stagger.
Basic attack performed in mid-air becomes a dive attack that deals Physical DMG to nearby enemies.
Basic attack performed near a Staggered enemy becomes a finisher that deals massive Physical DMG and recovers some SP.
I'M NOT SLEEPING!
SP Cost: 100
Purrchena raises up her shield to block an attack and immediately returns some SP. While Purrchena's shield is up, she grants Protection to herself and nearby operators. During the battle skill, the first successful block extends the shield up duration and returns additional SP. After casting, Purrchena's battle skill is temporarily changed to LEAVE MY FRIENDS ALONE!.
LEAVE MY FRIENDS ALONE!: Purrchena headbutts a target in front of her to deal Nature DMG and apply Nature Infliction.
Protection granted during shield-raising is reduced after every blocked attack.
CAKE OR "PREZZIE"
Cooldown: 22s
Throws a Giftbox at the controlled operator. The Giftbox opens after a short delay, granting HP Treatment to nearby operators, randomly revealing one of the following items, and triggering the effects of the revealed item:
Bomb: Deals Physical DMG and additional Stagger to enemies in the area of effect (AOE).
Handicraft: Continuously pulls in nearby enemies and deals Physical DMG.
Yummy Dessert: Grants HP Treatment to the controlled operator.
The attribute of Will increases the amount of HP treatment.
Trigger: When the controlled operator is attacked.
NAUGHTY IS BANNED!
Energy cost: 100
Purrchena opens 3 Big Feline's Prezzies. Each Big Feline's Prezzie randomly reveals a Bomb or a piece of Handicraft.
There is a chance that the Prezzie reveals Ambassador's Special that applies Arts Susceptibility and deals Physical DMG as well as additional Stagger to enemies.
Brand Ambassador
Assign to Reception Room to grant operators a small Clue 2/Clue 2 Rate-UP: TGCC (activates upon assignment; effects of the same type cannot stack)
Desserts for the Debrief
Assign to Manufacturing Cabin to grant operator EXP material production efficiency +20/30%.
Your sorry came LATE!
Battle skill I'M NOT SLEEPING! improved: After successfully blocking an enemy attack for the first time, the skill gives 6/10 additional Ultimate Energy. Chance for Ambassador's Special of the next ultimate NAUGHTY IS BANNED! is increased by 10%. This effect can reach 3 stacks.
Ambassador's Duty
When deployed in battle, all Max HP operators in the team take 50% less DMG from the next hit taken.
For each operator, this effect can only trigger once every 180/90s.
Warm Like the Sun
Potential 1
Ultimate NAUGHTY IS BANNED! improved: Base chance for Ambassador's Special is increased to 1.5 times the original.
"Super Energetic"
Potential 2
DEF +20, Will +20.
Useful "Prezzies"
Potential 3
Combo skill CAKE OR "PREZZIE" improved:
Bomb: DMG Multiplier increased to 1.2 times the original.
Handicraft: Effect radius +20%.
Yummy Dessert: HP Treatment increased to 1.2 times the original.
After the Feast
Potential 4
Ultimate NAUGHTY IS BANNED! improved: Ultimate Energy cost -15%.
Hot Like a BBQ Fire
Potential 5
Ultimate NAUGHTY IS BANNED! improved:
Ambassador's Special DMG Multiplier is increased to 1.2 times the original.
Ambassador's Special: Arts Susceptibility is increased to 1.2 times the original.
Purrchena lore is currently missing. It will be added soon!

Review
Free for all! Both she and her weapon can be P5’d by clearing her giveaway event, being an accessible operator that’s easy to build.
Jack-of-all-trades character, offering HP Treatment, Protection, low-cost Inflictions, team-wide Arts buffs and even grouping.
Depending on her luck, has an incredibly high stagger build, which can be situationally useful to push fast clears at low investment.
T0 in operator fluffiness ranking.
Excessive SP return, reliance on enemy attacks for Combo triggers and RNG on her skills lead to inconsistent performance, making her frustrating to route with.
Fails to specialise in any single thing, with weak numbers on her buffs and a lack of high-value effects (like free Inflictions, forced reactions, etc).
Unlikely to offer anything to most, being at best a holdover option for new or returning players that missed out on previous limited releases.
Reinforcing the adage that Defenders aren’t that good.
Purrchena is a 5-star, Physical, Sword Defender who’s all about doing the best with the hand you’re given. Her Combo Skill and Ultimate can summon boxes with random effects, which can heal, build stagger, group up enemies, etc.
As a Defender, she brings with her the Survivability benefits of one, with HP Treatment, Protection, and a parry skill that returns SP to the team and can be followed up with an attack that applies a Nature Infliction. Getting parries ends up being important too, not only because it increases its SP return, but because it gives extra Ultimate Energy and counts as “getting hit”, which triggers her Combo Skill.
Her gameplay loop revolves around getting frequent uses of her Battle Skill so as to trigger her Combo Skill and build up to her Ultimate, then adapting rotations to the stagger she gets. If luck is on your side, then she can open up very fast rotations.
“I’M NOT SLEEPING!” is Purrchena’s Battle Skill, split into 2 parts.
The cast consumes 100 SP but returns 20, and will apply a strong (90%!) Protection at M3 while putting Purrchena in a blocking stance for 3 seconds. If she’s hit during this stance, the block will extend by another 3 seconds, and it will return an additional 20 SP.
Successfully blocking an attack counts as “getting hit” for the purposes of Combo Skill triggers or item effects, as operators still take damage during it.
Regardless of whether she’s hit or not, it’ll change to “LEAVE MY FRIENDS ALONE!”, which, when used, performs a headbutt that deals Nature DMG and applies a Nature Infliction. This is the only skill in her entire kit that does Arts DMG instead of Physical.
Unlike most operator Battle Skills, which build 10 stagger, this follow-up attack builds 20! Similar “on-hit” attacks, like Ember’s Battle Skill, need the operator to be hit for additional stagger, but Purrchena will get the full value even without blocking with the I’M NOT SLEEPING portion.
Assuming the full 40 SP return is granted, this is one of the most efficient sources of Nature Inflictions and stagger in the game.
Be wary, though, because it is SP return and not recovery! As SP return does not build Ultimate Energy, 3 uses of this Battle Skill can lead to 120 SP’s worth of Energy deficit, significantly altering the Ultimate Gain Efficiency thresholds of other operators.
“CAKE OR ‘PREZZIE’” is Purrchena’s Combo Skill, and it’s where much of her random variance comes from.
It’s triggered when the controlled operator is hit (such as from her Battle Skill’s block), has a 22s cooldown and has Purrchena throw a “Gift Box” to the controlled operator. This Gift Box will always grant some HP Treatment in a small area (scaling with her WILL stat), but yield 1 of 3 different effects:
“Bomb” will be a single-hit explosion that deals damage and builds 10 stagger.
“Handicraft” will vacuum nearby enemies together into a black hole while dealing damage, but building no stagger.
“Yummy Dessert” will give additional HP treatment to the controlled operator, also scaling with Purrchena’s WILL.
Only one of these effects can trigger per Combo Skill use. There is a slight delay (around 2s) between Combo Skill cast and the Gift Box resolving.
It can also be used mid-Battle Skill and it will not remove Purrchena from the blocking stance.
It’s a simple but tricky skill to work with, owing to how unreliable it is.
Bomb is great for pushing through to a quick stagger, but it may misalign rotations by building too much or too little.
Most operators have 10 stagger on their Combo Skills to begin with, so even if it's successful, it isn’t any better than what one would get without running her. The high stagger on Purrchena’s Battle Skill makes up for this, but the randomness on whether she’ll have more or less stagger can mess up rotations.
Handicraft’s range isn’t terrible (assuming P3+), and it lingers for a bit with multiple pulses, so it can pull enemies that weren’t caught by the first hit, but it may also not happen at all and fail to group when it's most needed.
And the delay means that it can’t be used to interrupt enemy red circle attack prompts, not to mention that if Yummy Dessert happens, it won’t even deal any damage to interrupt them to begin with.
Still, if luck resolves to give the desired skill effect, then it can be very helpful.
“NAUGHTY IS BANNED!” is Purrchena’s Ultimate, and it works as a turbocharged variant of her Combo Skill.
It demands 100 Energy, but as all players can get her at P5, the P4 Ultimate Energy Cost reduction will be active, taking it down to 85 Energy.
By itself, it does nothing, instead summoning 3 “Big Feline’s Prezzies”. Each one will turn into either a Bomb, Handicraft or an “Ambassador’s Special”.
This works like an upgraded Bomb, dealing double the damage and 15 stagger, as well as applying a 3% Arts Susceptibility (at P5) debuff to enemies hit for 5 seconds. This Susceptibility effect can stack, so if 3 Ambassador’s Specials appear, it’d go up to 9%.
Unlike her Combo Skill, which has an equal chance for all 3 effects, it’s split evenly between Bomb and Handicraft, while the Ultimate’s Ambassador Special has a base 30% chance to appear (at P1+), which is increased by Purrchena’s Talents.
“Your sorry came LATE!” is Purrchena’s first Talent, and it significantly enhances her Battle Skill. On successful blocks, it generates 10 additional Ultimate Energy for her, and increases the chance of an Ambassador’s Special appearing on the next Ultimate cast by 10%, stacking up to 3 times.
This is an additive increase that does not get multiplied by P1, so it goes 30% (Base) → 40% → 50% → 60%. It applies only to the following Ultimate cast, resetting after use, but this chance is fixed to all 3 Big Feline’s Prezzies. So at max stacks, it’s a 60% chance to all 3.
“Ambassador’s Duty” is Purrchena’s second Talent, and it gives a universal 50% DMG taken decrease effect to the entire team if they’re at Max HP, effectively cutting the first instance of damage they take by half.
It does have a 90s cooldown though (per operator!), so even if operators return to Max HP, the effect won’t trigger again until it expires.
“DESSERT! HAVE SOME!” is Purrchena’s Basic Attack, and it’s quite decent. It’s only a 3-part sequence, but it builds 21 stagger and 23 SP.
She can animation cancel all hits:
SEQ 1 is a double swing, with a cancel point after the first swing hits.
SEQ 2 has her ride her shield for 3 hits, with a cancel point as soon as the 3rd hit connects.
SEQ 3 is the final strike, and can be cancelled as soon as the final hit connects.
SEQ 1 isn’t worth cancelling, but there’s a long recovery animation after SEQ 2. Dash cancelling it significantly speeds up her Basic Attacks, giving her decent stagger and SP per second on it.
Unfortunately, she’s unlikely to do much damage, and as her Combo Skill HP treatment is given to the active operator, it’s best to be on a damage dealer so that she can get her weapon’s effects applied to them.
Likewise, her Finisher has little use, especially as she buffs with Arts Susceptibility through Ultimate as well as Arts Intensity and DMG Dealt with her weapon, none of which apply to her as all non-Battle Skill DMG is Physical.
Purrchena’s own Ultimate isn’t very difficult to work towards. As she gets a bonus 10 Energy on her Battle Skill, even after accounting for SP return, she has no issues with self-sustaining.
Ability | Uses | Energy | Total |
SP Spend | 600 | 6.5 | 39 |
Combo Skill | 3 | 10 | 30 |
SP Return | 120 | 6.5 | -7.8 |
Talent Bonus | 3 | 10 | 30 |
Sum | 91.2 | ||
Ultimate Gain Efficiency | -6.80% | 85 |
If Purrchena can get 3 Battle Skills (each one triggering a Combo Skill), then even a 600 SP rotation gives more than enough resources to her. In practice, though, such rotations are difficult to pull off without Combo Skill cooldown reduction sets, owing to her long 22s cooldown.
Ability | Uses | Energy | Total |
SP Spend | 600 | 6.5 | 39 |
Combo Skill | 2 | 10 | 20 |
SP Return | 80 | 6.5 | -5.2 |
Talent Bonus | 2 | 10 | 20 |
Sum | 73.8 | ||
Ultimate Gain Efficiency | 15.18% | 85 |
A more realistic scenario is 2 Battle and 2 Combo Skills. As there’s less SP returned, it’s possible for Purrchena to meet the requirements for this with only a single Ultimate Gain Efficiency Armor.
Having to work her Battle Skill only when her Combo Skill is up can be restrictive, however, and other operators may prefer having different Infliction sources (e.g. Yvonne with Xaihi). Thankfully, Purrchena can go even lower.
Ability | Uses | Energy | Total |
SP Spend | 600 | 6.5 | 39 |
Combo Skill | 1 | 10 | 10 |
SP Return | 40 | 6.5 | -2.6 |
Talent Bonus | 1 | 10 | 10 |
Sum | 56.4 | ||
Ultimate Gain Efficiency | 50.71% | 85 |
Ability | Uses | Energy | Total |
SP Spend | 600 | 6.5 | 39 |
Combo Skill | 1 | 10 | 10 |
SP Return | 0 | 6.5 | 0 |
Talent Bonus | 0 | 10 | 0 |
Sum | 49 | ||
Ultimate Gain Efficiency | 73.47% | 85 |
Even with only a single Battle and Combo Skill, Purrchena can still get her Ultimate with only a Glove and Kit. If 2 kits are used, then she doesn’t even need to land a Battle Skill, and a single Combo Skill triggered by purposefully getting hit before burst would be enough.
As Battle Skill blocks increase the chance of her getting Ambassador’s Special, it’d be best to maximise their use, but the SP return can mess with other operators’ rotations.
For example, Yvonne, on a 4 Inflictions, 3 Battle & 2 Combo Skill rotation, would be able to support up to 3 Purrchena Battle Skills… but only if there are no additional sources of SP return, like Tangtang, as otherwise that would demand Ultimate Gain Efficiency pieces.
When tailoring rotations, make sure to account for the loss of Energy from SP returns, as depending on the team set-up, it may necessitate gear changes.
Purrchena is a very simple operator, as her game plan simply amounts to making use of her Battle Skill for her Nature Infliction, Combo Skill trigger and Protection, which can trigger Eternal Xiranite. As the items the giftbox reveals are completely random, it’s all about adjusting to what’s given, or if pushing for a specific route, restarting until the right set of items come around.
There isn’t much of a flowchart for her because how she’s used will differ depending on the carry operator that she’s supporting.
For example, it may be good to use her Battle Skill early for her Combo Skill trigger, but the Nature Infliction may not actually be needed.
So instead of wasting SP, simply getting hit on purpose (like by making use of Final Strikes’ interrupt resistance) for her Combo Skill may be best.
Enemy attacks won’t always align with Final Strike timings, however, so if it interrupts controlled operator strings, then whatever stagger benefit could be brought about by Purrchena’s Combo Skill is offset by a reset Basic Attack sequence.
So the ideal is to simply integrate her Nature Inflictions into rotations as needed, trying to get it and a Combo Skill trigger within 15s of burst landing, for Eternal Xiranite, Corrosion, weapon buffs, etc.
The amount of stagger that she gets can vary wildly. 3 Combo Skills and an Ultimate can give up to 75 stagger, or it can give 0. Both of these are unlikely extremes, but how quickly she builds (or fails to build) stagger will alter route planning.
Simply try to adapt to the stagger she builds and treat her as a standard Nature Infliction applier, tailoring rotations to work around the SP return she gives if needed, but otherwise freestyle stagger alignments.
Build

For this Endfield review and some additional content (e.g., rotations), we worked alongside Lin-0. Any calculations and derived data are our own.
Purrchena best Weapons are placed in order of what fits their playstyle the most. Check the comments to get additional context.
Purrchena best sets are placed in order of what fits their playstyle the most. Check the comments to get additional context.
Since Purrchena can apply Protection with her Battle Skill, it's easy enough to activate the set effect, especially given the high amounts of SP return that she gets on successful parries. Her Ultimate's Ambassador's Special can also trigger it, so she has remarkably good uptime. The Ultimate Gain Efficiency with this set-up is overkill for most rotations, but with so much of Purrchena's value coming from stagger, having it be usable earlier can be best, even if it means giving up on its Susceptibility for burst. At this level of Ultimate Gain Efficiency though, it may be possible to get 2 Ultimate casts in a rotation, so no sacrifice is needed.
Armor
 Swordmancer Light ArmorSwordmancer
Gloves
 Eternal Xiranite GlovesEternal Xiranite
Kit
 Eternal Xiranite Heavy SlabEternal Xiranite
Kit
Eternal Xiranite Heavy SlabEternal Xiranite Rift Trekker Heavy Armor
If Eternal Xiranite is already being filled by another operator, Purrchena can make use of the LYNX set to increase the team's survivability. There can be other combinations (like with LYNX Slab), but Purrchena's damage is so negligible that in situations where this set is being used, maximising healing and Ultimate Gain Efficiency is likely for the best.
Armor
 LYNX Cuirass T1LYNX
Gloves
 LYNX GlovesLYNX
Kit
 LYNX Aegis InjectorLYNX
Kit
 Redeemer Seal
In some circumstances, it may be worth using Purrchena's Nature Infliction as a way to apply Corrosion. Going for as much Arts Intensity with the Hot Work set will be best if Eternal Xiranite is already being used. Depending on the Enemy RES, level of Corrosion and how much DMG Dealt saturation there is, it could be better even if Eternal Xiranite isn't taken up. With Purrchena's Ultimate's Susceptibility being so low, it can be preferable to maximise Corrosion scaling over using her Ultimate early or even at all.
Armor
Rift Trekker Heavy ArmorGloves
 Hot Work GlovesHot Work
Kit
 Hot Work Power BankHot Work
Kit
Hot Work Power BankHot Work Swordmancer Light ArmorAs Purrchena's Combo Skill cooldown is very long, it may be best to reduce its cooldown and maximise its casts in a rotation. By enabling faster Bomb triggers, and by building with Ultimate Gain Efficiency, it can be coupled with the Ambassador's Special for incredibly fast staggers, which may lead to faster clears than building for buff value.
Armor
 Qingbo Heavy ArmorQingbo
Gloves
 Qingbo GlovesQingbo
Kit
 Qingbo CaskQingbo
Kit
Redeemer SealDespite Purrchena having no means to apply Physical statuses, she can still benefit from the +20% Stagger Efficiency Bonus from the Swordmancer set. Although Qingbo can get faster staggers by making use of her Ultimate, on fights with full Energy starts where the Ultimate Gain Effiicency isn't needed, this could be a better option.
Armor
Swordmancer Light ArmorSwordmancerGloves
 Swordmancer TAC Gauntlets T1Swordmancer
Kit
 Swordmancer NAV BeaconSwordmancer
Kit
Redeemer SealPurrchena gear pieces calculations aren't available yet. They will be added soon.
This takes the chance for an Ambassador's Special on Purrchena's Ultimate to 30% at base. If coupled with her Talent's increased chance on Battle Skill, it's almost guaranteed to appear at least once per Ultimate cast, increasing the average Susceptibility stacks she can provide.
A generic attribute increase, but notably it does not boost Purrchena's main attribute, but her DEF and secondary instead. This yields no damage increases and only mildly boosts her healing.
A slight enhancement to her Combo Skill, increasing Bomb's DMG multiplier, Handicraft's radius and Yummy Dessert's recovery. The only that's genuinely useful is Handicraft's Radius, as it's very small without the 20% increase from this Potential.
The standard Ultimate Energy cost reduction Potential. As Purrchena can get a fair bit of stagger and provides a short-lived Susceptibility with her Ultimate, it's good to have. When combined with her Talent's Ultimate Energy bonus on successful Battle Skill parries, she can get it surprisingly fast.
A slight increase to the DMG multiplier and Susceptibility of the Ambassador's Special. Although the DMG increase doesn't do much given Purrchena's low stats, the increase to Susceptibility takes it from 2.5% per stack to 3%, which does add-up when having 2 or 3 stacks.
Purrchena calculations aren't available yet. They will be added soon.
Ultimate > Combo Skill > Battle Skill > Basic Attack
Teams and Synergies
Purrchena teams aren't listed in any specific order - so they're not listed best to worst or vice versa. Check our Team Tier List for more information about best teams.
Refer to 15:25 on the embedded video for a showcase!



Refer to 16:53 on the embedded video for a showcase!


Refer to 18:18 on the embedded video for a showcase!



The free 5-star sword given alongside Purrchena on her event, and the only real option for her. She cannot recover SP (only return), and her personal damage contribution is very poor, so being able to buff allies with Arts Intensity and Arts DMG Dealt is the best she can do. Maintaining uptime of this can be frustrating, as it has only a 20s duration and her Combo Skill cooldown is 22s. Even if timestops mean it can have full uptime, it being conditional on enemy attacks to trigger makes it difficult to sustain, so priority should be given to having it up for burst. Note that the buffs apply only to the healed operator, not the entire team! Be sure to be on a main damage dealer/carry before using her Combo Skill to benefit from this weapon's buffs.