


Class Overview
Skills
How to level
Class Overview
Shield Knight is one of the classes available in Blue Protocol: Star Resonance. They fulfill the Tank role while wielding a Sword and Shield as their weapon of choice. Shield Knight has access to two specs - Recovery and Shield. Below you can find a summary of both, showing their strong and weak sides, how they play and more.


Recovery Shield Knight is dedicated to self-sustain while also having some of the best shield generation of all tanks (but lower potential max than “shield” Spec). The Spec utilizes a myriad of abilities, such as Shield Toss, Reckoning, and its upgraded version, Inferno Reckoning, to accumulate resources that can be funneled into Judgment to heal and shield constantly.
Recovery has access to respectable mitigation, but it’s heavily tied to maintaining Valor Bash stacks and keeping its defensive cooldown (Aegis Ward) active. Without it it lacks the unconditional absurd total HP pool of the Shield Spec and the more consistent and superior defense of Heavy Guardian, subjecting it to higher chances of being one-shot when buffs are down. The trade-off for this increased vulnerability is healing and shield generation so strong that they’re able to solo-sustain themselves through many PVE encounters you might not expect them to.
Pros
- Best self sustain among tanks.
- Great shielding.
- Self-sufficient, allowing for soloing of content like some world bosses,
Cons
- Most vulnerable tank to one shots.
- Relies on Imagines for enemy gathering abilities.

Shield… Shield Knight entirely revolves around the Lightforged Barrier passive and abilities that generate and consume it. Lightforged Barrier can stack many times and increases max HP with every stack. It’s also used to fuel one of the spec's most powerful abilities, Zeal Crusade - a spiraling aura that persists and deals damage while healing for its duration.
The Shield in Shield Shield Knight comes from the fact that shields in Blue Protocol: Star Resonance cap based on max HP, so with Lightforged Barrier active, this Spec can have by far the biggest max shields. Furthermore, its mastery boosts the Lightforged Barriers buff even further. Shield Shield Knight has good healing but can also survive big hits thanks to its superior max life and shield size. Ironically, its shield generation is weaker than the recovery spec, despite having a higher cap.
Pros
- Highest total life pool in the game.
- Huge max shield cap.
- Great self sustain and healing.
Cons
- Must stack and consume Lightforged Barrier at the start of the fight, leaving a small opening.
- Relies on Imagines for enemy gathering abilities.
Skills
Blade of Justice
Tags: Basic Attack, Light, Physical, Direct DMG, Single Target, Melee
Multipliers:
- Strike I: 42% ATK +120 (Resilience Break: 30)
- Strike II: 42% ATK +120 (Resilience Break: 30)
- Strike III: 84% ATK +240 (Resilience Break: 60)
- Strike IV: 112% ATK +320 (Resilience Break: 80)
- Red Light Counter: 140% ATK +400 (Resilience Break: 100)
Valor Bash
Tags: Special Attack, Light, Physical, Direct DMG, Single Target, Protect, Melee
Multipliers:
- Total Damage: 112% ATK +320 (Resilience Break: 244)
- Armor Increase per Layer: 8.4% +148
- Duration: 10s
Radiant Infusion
Tags: Ultimate, Light, Physical, Direct DMG, AoE, Protect, Melee
Multipliers:
- Total Damage: 420% ATK +1200 (Resilience Break: 720)
- CD: 60s
[Radiant Shield]: Infuses the Shield with light, absorbing 50% of incoming DMG. The effect can stack absorption and reset duration when the Skill is reused. Max absorption cannot exceed 100% of Max HP.
[Dazzle]: Forces the enemy to move into melee range of their current target to attack. Does not affect bosses. This is a status effect.
Judgment
Tags: Expertise Skill, Light, Physical, Direct DMG, Direct Healing, Single Target, Melee
Multipliers:
- Total Damage: 210% ATK +600 (Resilience Break: 326)
- Total Healing: 40% Lost HP
Reckoning
Tags: Expertise Skill, Physical, Light, Direct DMG, AoE, Melee
Multipliers:
- Total Damage: 489.99% ATK +1400 (Resilience Break: 451)
Shield Toss
Tags: Expertise Skill, Physical, Light, Direct DMG, AoE, Melee
Multipliers:
- Hit Damage: 140% ATK +400 (Resilience Break: 65)
- CD: 12s
[Taunt]: Forcing enemy monsters to attack oneself
[Interrupt]: Interrupts the target’s casting and puts the interrupted skill on CD. Does not affect bosses.
Sacred Blade
Tags: Expertise Skill, Physical, Light, Direct DMG, Single Target, Melee
Multipliers:
- Total Damage: 560% ATK +1600 (Resilience Break: 745)
[Lightforged Barrier]: Each stack increases the final Max HP by 2%. You can have up to 10 stacks of Lightforged Barrier, and any damage taken will consume 1 stack. It lasts for 25s or until all stacks are consumed. Gaining stacks resets the duration.
Radiance
Tags: Expertise Skill, Protect
Multipliers:
- Total Damage: 168% ATK +480 (Resilience Break: 312)
- Reduction Ratio: 14% Max HP
- CD: 70s
[Taunt]: Forcing enemy monsters to attack oneself
[Interrupt]: Interrupts the target’s casting and puts the interrupted skill on CD. Does not affect bosses.
Aegis Ward
Tags: Expertise Skill, Protect, Direct Healing
Multipliers:
- Armor Up: 1700q
- Defense: 32%
- Duration: 10s
- CD: 45s
Zeal Crusade
Tags: Expertise Skill, Physical, Light, DOT, AoE, Melee
Each time it deals DMG to 1 target, restores 1% max HP (up to 5%). When activated, each stack of Lightforged Barrier adds 2s to the duration, up to a maximum of 16s.
Multipliers:
- Single Hit Damage: 140% ATK +400 (Resilience Break: 841)
- CD: 45s
[Lightforged Barrier]: Each stack increases the final Max HP by 2%. You can have up to 10 stacks of Lightforged Barrier, and any damage taken will consume 1 stack. It lasts for 25s or until all stacks are consumed. Gaining stacks resets the duration.
Divine Circle
Tags: Expertise Skill, Physical, Light, DOT, HOT, AoE, Melee
Multipliers:
- Total Damage: 134.4% ATK +792 (Resilience Break: 288)
- Total Healing: 487.08% ATK +1392
- CD: 30s
How to level?
Important!
After you unlock the ability to choose a specialization, move directly to, and follow their guide instead. This simple guide is only meant you to take you to that point.
Skills
Equip the abilities below in the order you unlock them for the most effective pre-specialization Shield Knight build.
- Judgment
![Imagine]()
- /Reckoning
![Imagine]() Sacred Blade
Sacred Blade![Imagine]()
- Shield Toss
![Imagine]()
- Aegis Ward
![Imagine]()
Talents
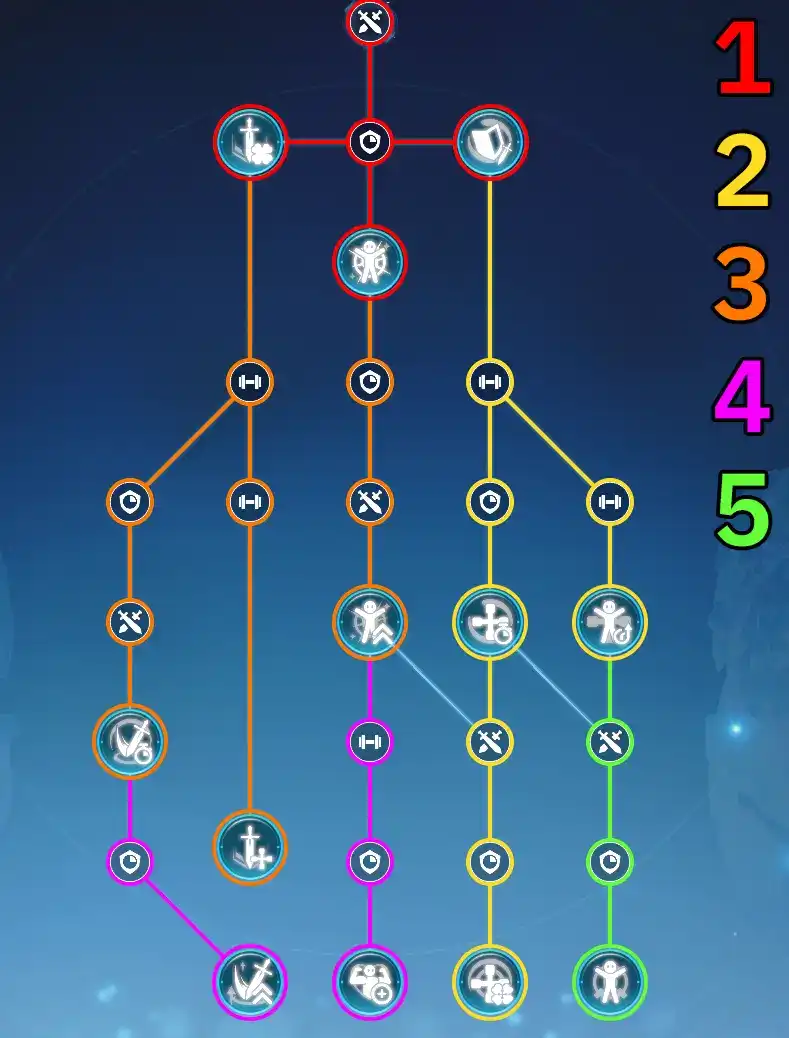
For optimal power, activate your starting talents in the following order:

How to play
Follow this basic ability order to get started:
- if available.Shield Toss
![Imagine]()
- Use until 3 stacks of buff.Valor Bash
![Imagine]()
- If buff is about to fall off, refresh with Valor Bash
![Imagine]()
- Basic Attack when enhanced into “Condemn”.
- /Reckoning
![Imagine]() when sigils are available, and the buff won't fall off.Sacred Blade
when sigils are available, and the buff won't fall off.Sacred Blade![Imagine]()
- Judgment
![Imagine]()
Use these cooldowns when available to prevent damage or save them for risky or lethal mechanics:
- (Ultimate)Radiant Infusion
![Imagine]()
- Aegis Ward
![Imagine]()
Battle Imagines
Important!
Do not choose your Imagines based on your leveling experience. Reaching max level with no Imagines is easy - save crafting them until after you’ve found a spec you enjoy, then choose the best Imagines for it. You can use the freely given Imagines in the meantime.