
Character stats
Level Stats
Base HP10,360
Base ATK299
Base DEF630
Elemental Mastery115

Best Nahida build, teams, weapons, artifacts, combos, rotations, and gameplay notes for Genshin Impact.
 5-star
 Dendro
 Catalyst
Last updated: October 25, 2026

Talent text and per-level multipliers, straight from the character data.


Passive talents are shown in full as kit cards.


All constellation names and descriptions in full for quick reference.


High Dendro application
Very simple gameplay
Can find out your darkest secrets
Skill’s marks suffer into content with waves of enemies
Cannot viably replace Lauma in Lunar teams
Nahida is a 5-star Dendro Catalyst character designed entirely around the Dendro element and its various reactions. She is most commonly used as an off-field Dendro application unit and Support, but she may also act as an on-field driver. Her kit revolves around applying high and consistent amounts of Dendro alongside buffing teammates, specifically the on-fielder.
To first apply Dendro, as a Catalyst user Nahida can use her Normal and Charged Attacks (and Plunging Attacks technically...) These attacks are most commonly used when she acts as an on-field driver, but she can sometimes weave them in before swapping.
Her Elemental Skill first has a Tap and Hold variant. Both versions deal Dendro DMG and mark up to 8 enemies with the Seed of Skandha for 25 seconds, or until they are defeated. Since the Seed is removed when marked enemies die, a new wave of enemies mid fight means you may need to interrupt your rotation to recast her Skill.
Her two variants act and apply the Seed of Skandha in different ways:
The Tap variant is an instant AoE hit with a 5 second cooldown, marking any enemies hit. It is obviously much faster than holding and is used in almost every rotation.
The Hold variant of her Skill enters her into an Aiming mode for up to 5 seconds, letting her select up to 8 enemies within an area to mark. It has a slightly longer cooldown at 6 seconds and is mainly useful for marking enemies that the Tap version would otherwise miss.
Enemies marked with the Seed of Skandha are then linked to one another up to a certain distance. Triggering any Elemental Reactions on a marked enemy unleashes Tri-Karma Purification on the enemy and every enemy linked to it. Taking DMG from Dendro Cores (including Bloom, Burgeon, and Hyperbloom) also triggers it.
Tri-Karma Purification deals Dendro DMG, applies 1.5U of Dendro to all marked enemies with no ICD, and also generates 3 Dendro particles on a 7 second cooldown. This effect can trigger at most once every 2.5 seconds.
As for her Elemental Burst, it summons the Shrine of Maya with an extraordinary radius and which lasts for 15 seconds, granting additional effects based on her teammates’ Elements. At talent Level 10 the following occurs:
Pyro: If 1 / 2 Pyro characters are present, Tri-Karma Purification’s DMG is increased by 26.8% / 40.2%.
Electro: if 1 / 2 Electro characters are present, the Tri-Karma Purification interval is decreased by 0.45s / 0.67s, bringing the interval from 2.5s down to a potential 1.83s.
Hydro: if 1 / 2 Hydro characters are present, the Shrine of Maya’s duration is extended by 6s / 9s.
Nahida, as a Dendro unit, doesn’t count to these conditions, and so her Burst can be noticeably weaker when placed in teams lacking Pyro, Electro, or Hydro units. Her first Constellation can help address this, but luckily she also buffs regardless of team Elemental types; Her first Ascension Passive makes the Shrine of Maya increase the active character’s Elemental Mastery by 25% of the Elemental Mastery of the party member with the highest amount of this stat, up to 250. Nahida herself can be that member.
Her other Ascension Passive then grants herself a bit more damage; Tri-Karma Purification will gain 0.1% DMG Bonus and 0.03% CRIT Rate for each point of Nahida’s Elemental Mastery above 200. This caps at 80% DMG and 24% CRIT Rate, reached at 1000 Elemental Mastery. When combining the two Ascension Passives, you can see why Nahida is generally built all in on EM.
Off-field: Nahida will simply use her Tap Skill (sometimes being able to Hold Skill) and Burst, and then swap out to let her teammates trigger reactions on the enemies she marks. Casting her Burst early in the rotation will be optimal to let the Shrine of Maya’s Elemental Mastery buff cover the team’s damage
On-field: Nahida will follow the same opening as when played off-field, but will stay on-field to apply Dendro and drive reactions with her Normal Attack strings and Charged Attacks. However, Nahida is generally better used as an off-field Support.
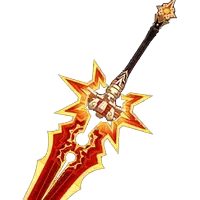
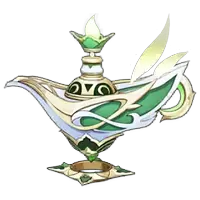 A Thousand Floating DreamsR1Nahida’s signature weapon. It carries the highest EM secondary attribute among Catalysts and gives herself a large amount of buffs on top of a teamwide 40 EM to the team. In practice the gap between this and her best 4-star options is small.
 Sacrificial FragmentsR5A strong EM stat stick with 221 EM at max Level that doesn’t need refinements to work well as its value comes from the secondary attribute.
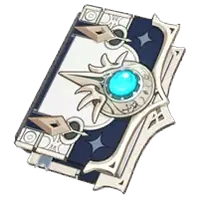 Favonius CodexR5Provides Energy Recharge to help with requirements alongside generating Energy for the entire team. As always a CRIT Rate circlet is recommended to help trigger the passive.
 Wandering EvenstarR5Great when played in ATK-scaling teams, providing an EM buff to Nahida as well as a flat ATK based on her EM to the entire team, even when she is off-field.
 Magic GuideR5A direct downgrade to Sacrificial Fragments but an even cheaper option.
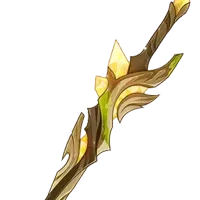
 Deepwood MemoriesHer usual best in slot. Since Tri-Karma Purification counts as Elemental Skill damage she has no uptime issues, constantly refreshing the Dendro RES.
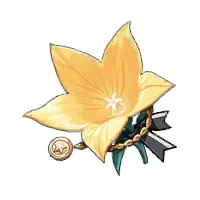 InstructorIn niche cases Nahida may run Instructor if another teammate is running Deepwood Memories.
 Sands
 Goblet
 Circlet
 ER
 EM
 CRIT Rate
 CRIT DMGSkillBurst
| Off-Field | On-Field | |
|---|---|---|
| Lunarbloom (3 Dendro) | 100% | Doesn't play on-field here. |
| Quicken / Quickbloom (2 Dendro) | 120-130% | 100% |
| Hyperbloom / Quickbloom (1 Dendro) | 150-170% | 125-140% |
Usage rates are gathered from player profiles connected to Enka and refreshed periodically. They describe what people are running, not what performs best.
Last statistics update: 03/November/2026
Based on Enka-connected profiles matching this character. Usage rate describes observed profile popularity, not optimality. Characters may have multiple viable builds, and guide recommendations can differ from popularity.
Sample: 1,286,850 The Widsith6.0%
 Mappa Mare4.0%Deepwood Memories80.3%Deepwood Memories [2PC] + Rainbow4.0%
 Gilded Dreams3.3%
 C074.7%C16.4%C214.4%C31.1%C40.4%C50.1%C62.9%
 NeferDendro Main DPSMoonsign
 LaumaDendro SupportMoonsign
 Silken Moon's SerenadeGilded Dreams2PC EM Combinations
Relative team damage chart. Best listed team is treated as 100%.
Nefer TeamNo DPS ComparisonsNahida is used as an OK 4th slot in Nefer teams, buffing Nefer through Artifacts and her 250 EM buff. Sucrose is a better alternative but might not always be available, and Prototype Amber on Nahida can offer some sustain.
108 ER142 ER 147 ER112 ER
 Lauma
 Lauma
 Columbina
 ColumbinaNahidaNahida
 Nefer
 NeferNeferNefer
 NeferColumbina
 Bloom TeamsNo DPS Comparisons
Nahida Lauma form a powerful Bloom core, Lauma being essential but Nahida providing strong Dendro application and decent buffs. You may pick your Hydro on-fielder that suits you, for some examples we have Columbina, Kokomi, or Barbara.



















 Sangonomiya Kokomi
 Barbara