Introduction
If you haven’t checked our other guide(s) about Anomaly Interception, make sure to drop a view
Indivilia in Anomaly Interception is a Wind Boss weak to Fire Nikkes. It is farmed for Vest T9M gear. This guide will go over:
- Boss HP and Rewards
- Best Nikkes and Teams
- Bossfight Breakdown and Tips
- Gameplay Videos
Boss Rewards
Rewards scale with how much damage you do, with significant improvements at Stages 3 and 6 and reaching their max at Stage 7. At 200 shards, Manufacturer Arms can be used to guarantee a T9M piece.
| Stage | Reward |
|---|---|
| Stage 1 | 0 ~ 175,000,000 Damage |
|
| Stage 2 | 175,000,001 ~ 350,000,000 Damage |
|
| Stage 3 | 350,000,001 ~ 689,000,000 Damage |
|
| Stage 4 | 689,000,001 ~ 1,310,000,000 Damage |
|
| Stage 5 | 1,310,000,001 ~ 2,400,000,000 Damage |
|
| Stage 6 | 2,400,000,001 ~ 3,382,000,000 Damage |
|
| Stage 7 | 3,382,000,001 ~ 4,500,000,000 Damage |
|
| Stage 8 | 4,500,000,001 ~ 5,800,000,000 Damage |
|
| Stage 9 | 5,800,000,001+ Damage |
|
Best Nikkes
Teams for Indivilia need a Fire Nikke for QTE and enough damage to destroy the Tail to survive. Healers will help a lot if you have a survivability issue. Keep in mind the boss gains immunity to most debuffs throughout the fight.
Against Indivilia, Fire Nikkes will have their damage boosted a lot if they have Elemental Damage bonuses (from OL & other sources), so investing in Top-Tier Fire DPS is the best option for this fight.
Beginners will perform best running their main team with any Fire Nikke and avoiding Iron units (unless they have immunity or you use the P1 team cover glitch).
- Rapi: Red Hood: The best Fire DPS, no questions asked. She works wonderfully as either a B3 or a B1 Nikke.
- Mihara: Bonding Chain: Another top-tier Fire DPS against bosses. Can be used both on-burst and off-burst.
- Alice: A great option if you have her fully invested and are capable of quick-shooting very fast with her. Just be careful not to break your mouse (or finger).
- Asuka Shikinami Langley: She is a collab Nikke, so not obtainable anymore (unless reran). Solid option as a damage dealer and buffer hybrid. She buffs the core damage of Fire Nikkes while doing decent damage.
- Rei Ayanami: She is a collab Nikke, so not obtainable anymore (unless reran). Solid option as a buffer (also has damage but not much). She buffs the ATK and Attack Damage of Fire Nikkes during Burst while doing decent damage.
- Modernia: Great option as an off-burst DPS at high FPS; she loses quite a bit of value on lower FPS.
- Diesel: Winter Sweets: Despite Indivilia gaining immunity to her debuffs and Sustained Damage, this seasonal unit can do decently as a DPS. This is because her damage isn’t reliant on stacking debuffs on enemies like Mihara used to (fortunately, they “buffed” hers by making hers undispellable).
- Brid: Silent Track: A new Fire Support option introduced in Winter 2025. This seasonal unit grants the team (but not herself) large ATK buffs, which synergize well with Mihara: Bonding Chain and Diesel: Winter Sweets. She also makes Wind enemies take extra damage.
- Mast: Romantic Maid: This boss has high DEF, making having high ATK important for dishing damage. MastM can provide a permanent ATK buff that spikes when she Bursts.
Best Teams
Here are some example teams you can try:
Oh Crab!
Mode: Anomaly - Indivilla || Element: Fire
Characters
About the team
The best team to use against Indivilia. Survival is very difficult and you'll have to rely on Crown s2 a lot but it's worth it thanks to the massive damage output. Mast: Romantic Maid should burst at start and at 3 stacks (Crown → Crown → Mast).
Substitutions
Mast: Romantic Maid may be replaced with Helm Treasure or Naga. Mihara:Bonding Chain may be replaced with Alice.
Hyper Rapi
Mode: Anomaly - Indivilla || Element: Fire
Characters
About the team
Focuses on buffing Rapi:Red Hood as much as possible. Very comfy team to play and with enough investment can reach s9. Mast:Romantic Maid should burst with Rapi:Red Hood and you should manual full charges on HelmT for maximum burst gen.
Substitutions
Sirem may be replaced with Liter.
B1 Rapi vs Crab
Mode: Anomaly - Indivilla || Element: Fire
Characters
About the team
Rapi : Red Hood b1 still deals very good damage while allowing the team to have more b3s, only worth it if you have invested in other fire dpses. Mast : Romantic Maid should burst at start and at 3 stacks and you should manual full charges on HelmT for maximum burst gen.
Substitutions
Mihara: Bonding Chain may be replaced with Alice.
Boss Fight Breakdown
Indivilia is an easy-to-counter boss, but be careful of its lethal attacks! In short:
- She spawns multiple Kamikaze Mobs that can't be auto-targeted (unless by Crown). Kill them before they explode on your team.
- If the Tail is kept alive for too long, she will one-shot your highest ATK Nikke, so destroy the tail before it finishes doing its attacks after getting closer.
- She frequently shoots lasers that hurt. Be prepared to take cover.
- At the start of Phase 2 transformation, she shoots a laser targeting the entire team. You need to time Crown’s S2 for her to survive the laser attack or cover your team just before (only works if Crown is in P1!).
If you are looking for the full breakdown, Indivilia’s stats increase a lot in certain stages:
- At Stage 4, ATK and DEF increase massively (the DEF increase is so high that it can result in lower-sync players dealing 1 damage).
- From Stage 5, ATK will rise with every Stage, capping at Stage 8. The increase from Stage 4 to 5 is low, but from Stage 5 onward will be high.
- DEF increases slightly at Stages 7 and 8.
Indivilia deals increased damage to Iron Nikkes :
- 300% at Stages 1~3
- 400% at Stages 4~6
- 500% at Stages 7~9
Phase I
Indivilia has:
- 1 Tail
- 2 Pincers
- 1 Permanently Exposed Core
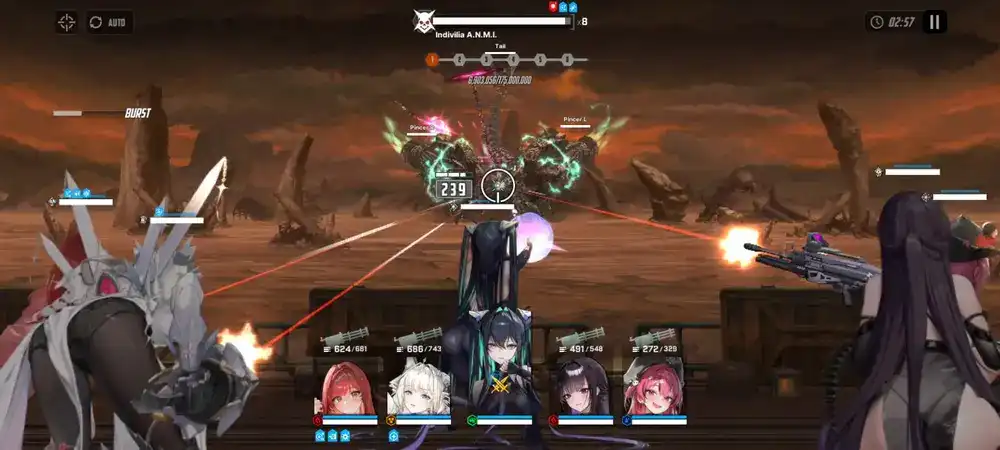
At the start of the fight, Indivilia summons 2 groups of Kamikaze Mobs (Fly) that cannot be auto-targeted. They move slowly in a spiral-like pattern to the center before selecting a target for their self-destruct attack. Most of the time, they will move past your crosshair while aiming at Indivilia’s core and die as collateral, but make sure they die before they hit your team.
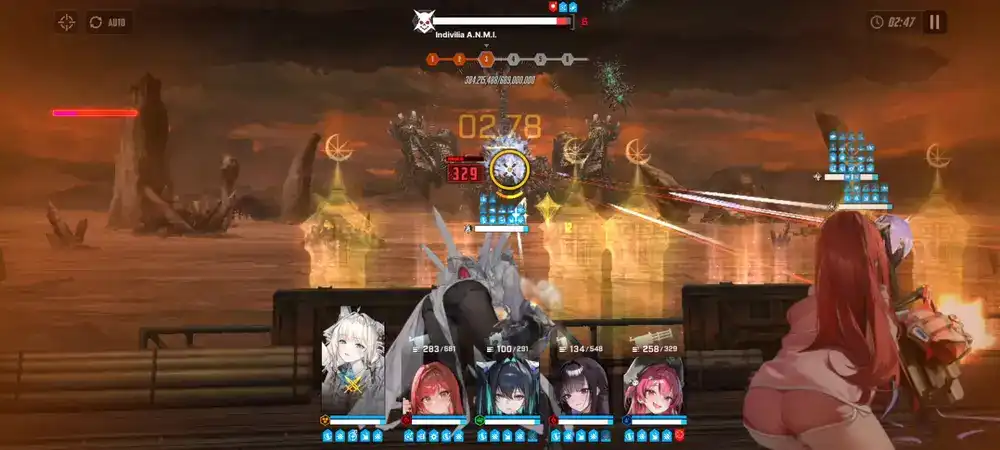
Next, Indivilia jumps and fires guns at the highest ATK Nikke 6 times consecutively. They can be blocked by cover or redirected with a taunt.

After that, Indivilia fires a laser at a random Nikke 2 times in a row. It can be blocked by a shield or cover, but can't be taunted. There will be a warning sign on the target.
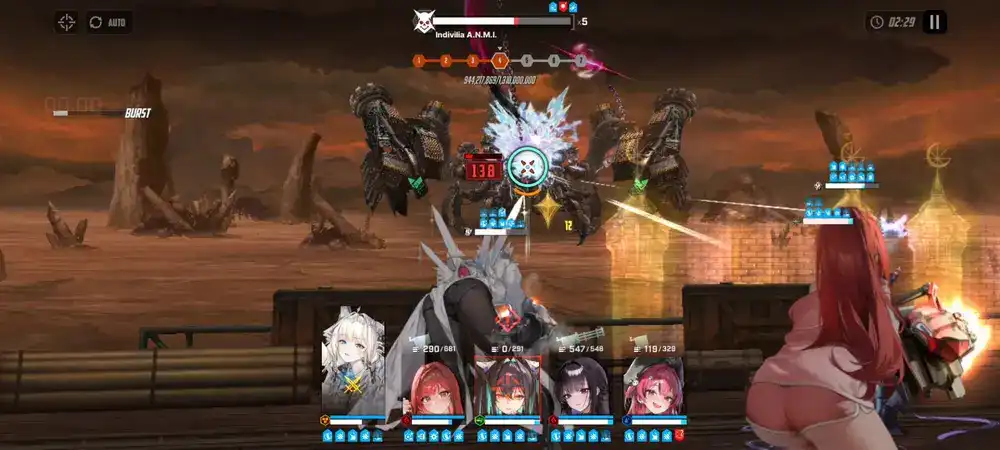
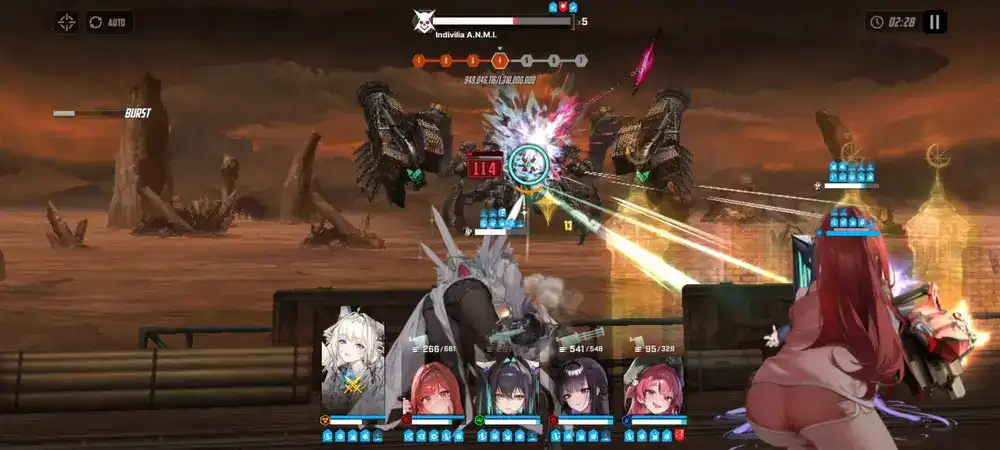
Then, it is followed by the first QTE (red circles) of the fight. Only Fire Nikkes can break the QTE. Failing to destroy it results in a team wipe.
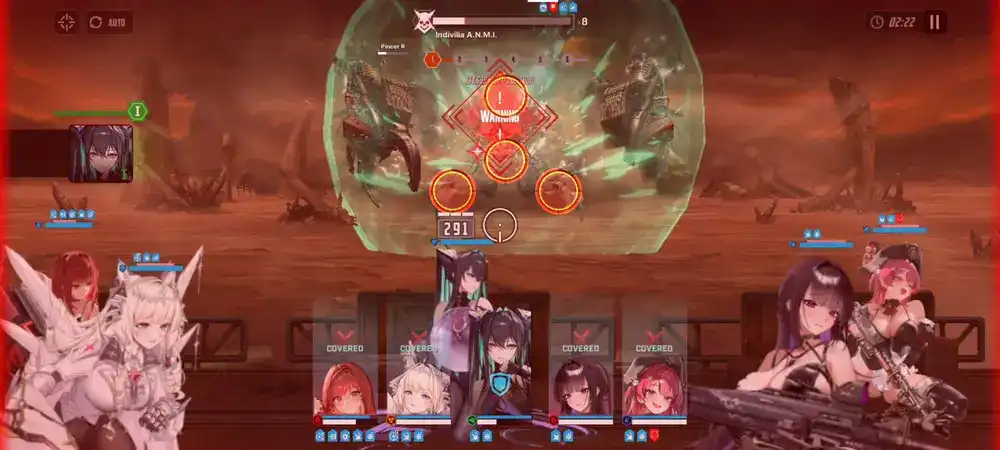
After the QTE, Indivilia charges up and gains immunity to debuffs for 15 seconds

Next, Indivilia fires guns for 3 more times before proceeding based on the available parts:
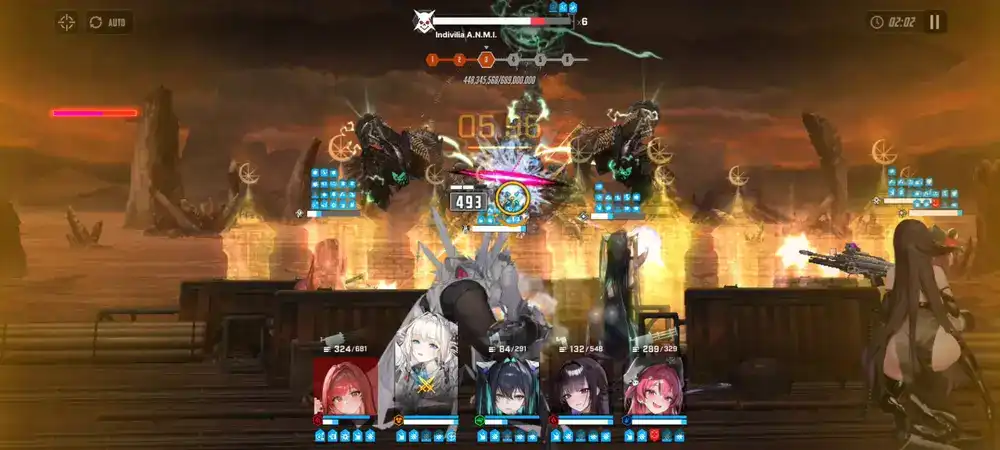
- No parts are destroyed or Tail is still intact: She charges a laser beam at the highest ATK Nikke that pierces cover. The attack can't be taunted while charging, but can be taunted if the taunt happens before the attack is charged.
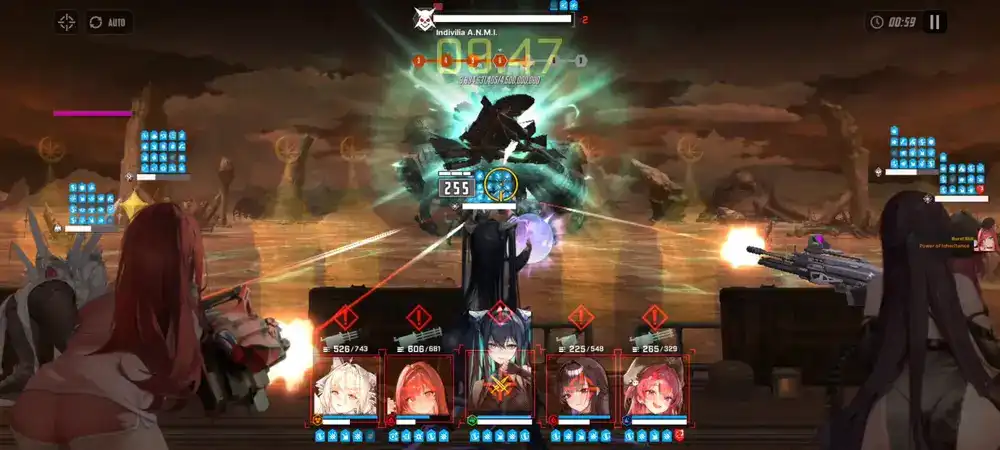
- Tail is destroyed, but Pincer is still intact: She charges, then fires an AOE attack. This can be blocked by a cover or a shield. You can break the Pincers late to provoke Indivilia to enter this rotation, delaying the start of Phase 2, which might be helpful!
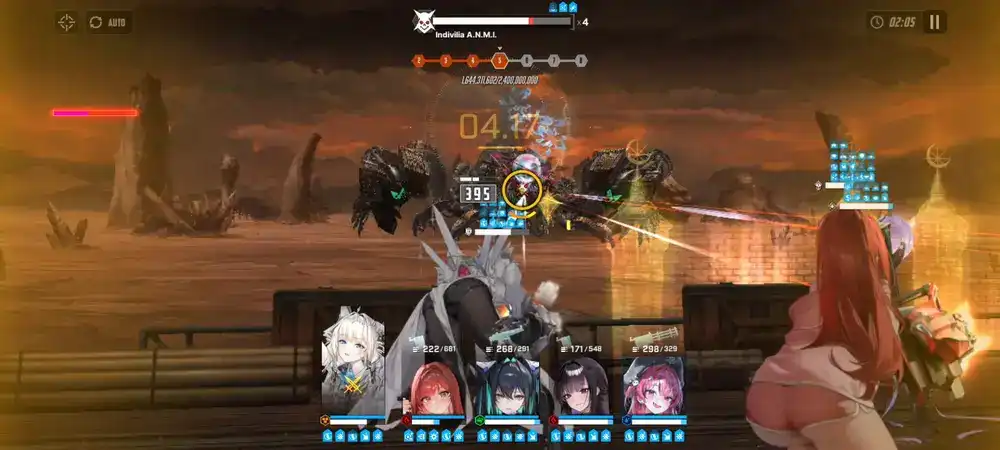
- All parts are destroyed: She gets stunned for a short time.
Then, Indivilia jumps and, for the rest of Phase 1, this entire sequence is repeated 1 more time before going into Phase 2.
Phase 2
Indivilia transforms into a serpent, with a permanently exposed core and a Blade part.
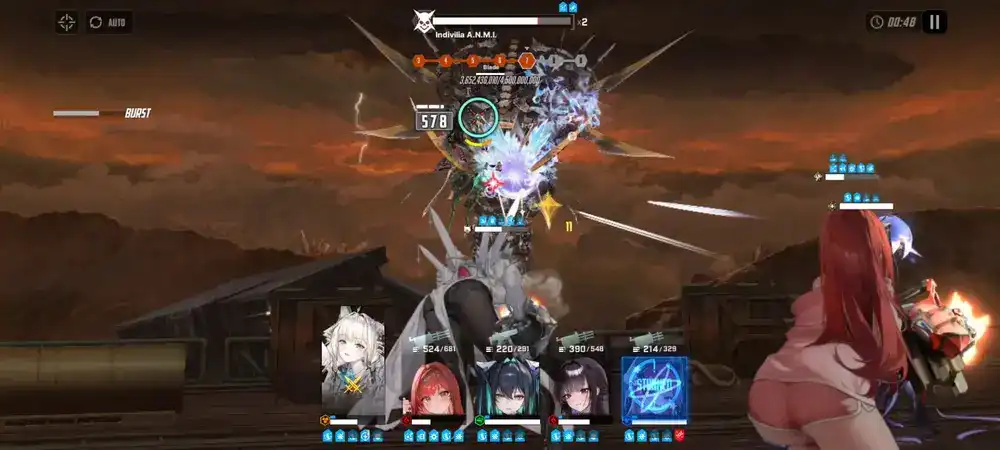
Right after the transformation, she fires a laser targeting all Nikkes that pierce cover/shield and can't be taunted. This laser often incapacitates Iron Nikkes as they are elementally countered. To prevent this, use Immunity skills like Crown’s and/or the P1 team cover glitch (place your Iron unit in P1, then cover your team just before the AoE attack).

It is then followed by a QTE (red and grey circles). The red circles’ pattern will be traced by the grey circles that automatically spawn immediately after. Failure to destroy them in time results in a squad wipe.
After the QTE, Indivilia spawns more Kamikaze Mobs (Fly) and uses her guns just like in Phase 1. Then, she fires missiles at a random Nikke that can be intercepted or i-framed.

Afterward, Indivilia fires 2 lasers at random Nikkes just like in Phase 1 before charging a laser sweep, hitting the entire team. It can be blocked by a shield and cover. At this point, the fight usually ends due to timeout.


Tips
- If using Pierce DPS, put them in the leftmost or rightmost position (P1/P5) so that they can hit Pincers + Main Body at the same time. Sometimes, these positions have a higher core hit rate too.
- Destroy the Tail before Indivilia charges the Tail attack.
- It is fine to keep Pincers alive for burst gen and for damage if using a pierce DPS.
- Make sure to time Crown’s S2 right before the laser is fired at the start of Phase 2 so that she survives.
- The Nikke in the leftmost position (P1) will not get hit by the Phase 2 laser when the team is fully covered. You can use this to your advantage by putting the most targeted Nikke there for better survivability or Crown if you don't want to time her S2.
- You can use Auto Aim to focus on hitting the core in Phase 2 since it moves a lot and is hard to hit.
Gameplay Videos
For visual learners, a pretty fast way to understand what to do is to watch a walkthrough/successful run:
Full credit goes to the original creators.


