
Foreword
This guide aims to provide a more generic set of "rules" to follow when gearing your Animus before having access to the highest tiers of both Modules and Shells.
We have determined which stats and sets are the most impactful to focus on when you don't have access to triple matrixes and Mythic Shells, ensuring that you're strong enough to take an optimized/coherent team of Animus and bring them all the way into the late game grinds.
All Set recommendations in the following sections take into account +9/12 max Yellow/Pink Modules. Only Red Modules with high potential i.e.3 base stats are upgraded. Gold is a scarce resource in the game, so use it sparingly!
DPS Gearing
Stats
The role that needs the most investment and has a variety of builds available depending on who you run as one:
Crit Builds
- If you're playing with Crit Buffers/DPS such as
 Gray or
  Rosa, aiming for Crit Rate is highly advised, as 55% Crit Rate is easily achievable within a few days of playing. Beyond that the Buff + Affinity advantage easily puts you at 100% Crit Rate. However, if you're often using your DPS without the Affinity Advantage, aim to get 70% Crit Rate instead.
 - Crit Damage is a very valuable stat, and given how rare Crit Damage buffs are, it's a lot easier to increase it with Modules instead of relying on buffers. Unless of course, you go for a Beyontin or Lily reroll.
- ATK is an ever useful stat that you can never have enough of, especially as a substat on your Modules. It's best to Focus on ATK %, as it scales much better than ATK (aka Flat ATK).
Non-Crit Builds
If you're playing Animus like ![]() Borgne a Shielder/Sub-DPS Hybrid
Borgne a Shielder/Sub-DPS Hybrid ![]() Helkid or you simply only have a single DPS in your roster which you bring along even with Affinity Disadvantage:
Helkid or you simply only have a single DPS in your roster which you bring along even with Affinity Disadvantage:
- Focusing on ATK % and disregarding Crit Rate/Crit Damage is the way to go. Keep in mind that aside from Borgne, this almost always results in a DPS loss compared to a proper Crit Build.
- It's a lot easier to get some Speed and HP substats with this type of build, as you have way less "target stats" to look for.
Special Builds
For Animus' such as ![]() Tiamat and
Tiamat and ![]() Rahu who scale off HP or DEF, focus on their Main Stat and Speed.
Rahu who scale off HP or DEF, focus on their Main Stat and Speed.
Universal Stats
These stats are always a welcome addition to the Animus if you are struggling to get the build specific stats or have achieved their milestones.
- Speed - While Speed isn't the most important stat for a DPS if you run proper Support Animus', it is nonetheless a good way of increasing your DPS. The turn count is dependent on the Speed stat, thus increasing it makes your DPS act more often. Once you reach 55/70% Crit Rate on your Animus' stat sheet, you may start looking for Speed substats.
- HP - Don't disregard the value of HP in this game, especially during the early progression. A few extra thousand HP can easily turn a very risky fight into a comfortable AUTO setup. Although it isn't the most relevant stat, any good Module with HP % substat + another key substat is a potential keeper - at least until you reach a point where your Supports/Tanks are strong enough to fully protect your DPS from danger.
Sets
To start things off, a disclaimer that this guide doesn't feature any of the 6-piece sets, as they're the last ones to be unlocked and by time you get them you have entered the long 'late game' gearing phase.
Early on, Main Stats and Substats are more important than Sets for DPS - as it takes a few days to even unlock Crit Rate Sets. Here's the order of things to look for:
Crit Builds
- 55/70% Crit Rate Stat (Aim all from Subs ideally; else 1/2 Main stats on Right Side + Subs)
- 12-piece Set (orKeeneye [12/12]
 set if you're running debuff heavy teams, but that set drops from Aurora so you can't get it before level 30)Momentum [12/12]
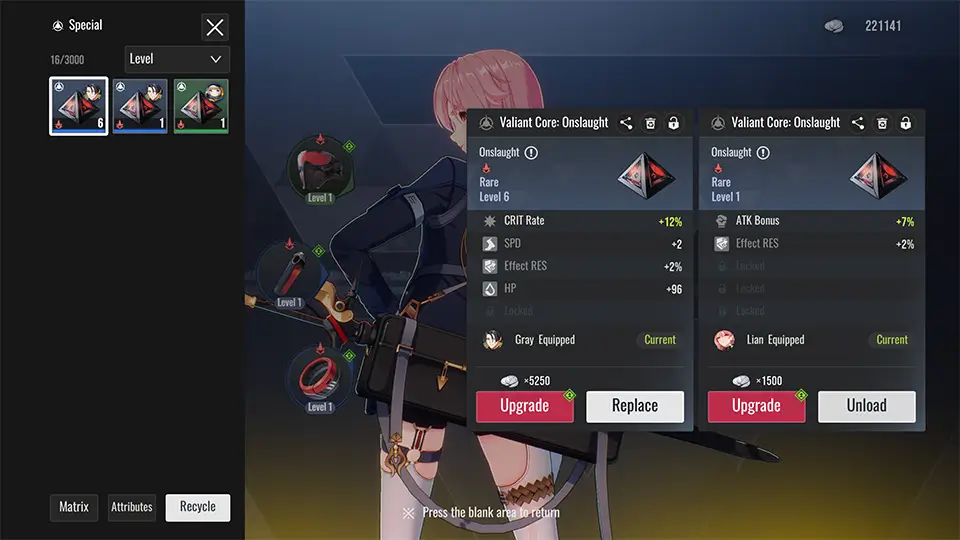
- Crit Damage Stat (Main and Subs) = 8-piece/12-piece Set = ATK % Stat (Main and Subs)Onslaught [12/12]

- Speed Stat (Subs)
- HP % Stat (Subs)
This priority works great all the way until you reach the triple Matrix' Modules and Mythic Shells. All in all, reach the soft cap for Crit Rate, then as long as you have a Keeneye set it's fine to go for either Crit DMG or ATK % as your Main stats on the Right side.
Non-Crit Builds
- 8-piece/12-piece Set = ATK % (Right Side Main Stat and Subs)Onslaught [12/12]
- 12-piece SetKeeneye [12/12]
- Set = Speed Stat (Subs)Swiftrush [12/12]

- HP % Stat (Subs)
For Special Builds replace Onslaught Set and ATK % Stat Set by ![]()
![]()
Adding to the previous sets, the 8-piece ![]()
![]() Tiamat thanks to her AoE Taunt and high Basic attack damage. She can also consider an 8-Piece
Tiamat thanks to her AoE Taunt and high Basic attack damage. She can also consider an 8-Piece ![]()
![]() Rahu is another contender to use an 8-piece Bramble Set on.
Rahu is another contender to use an 8-piece Bramble Set on.
Shells
This guide only accounts for Unique Rarity Shells with one exception, following the advice of our Early Progression guide to skip most Epic Shells and jump directly from Unique Rarity to Mythic Rarity.
For your early Mythic Shells (less than a week of progress needed!), check out the Characters' Build sections and use any of the Mythic Shells recommended for the character you're building.
- - Even for DPS, this Shell is excellent. Keep in mind however that you lose access to an easy way of getting more DPS set matrixes, which makes main and substats all the more important when building your character. If you're not going for any Speed in your build in the first place, the Speed buff won't do much anyway so only pick Black Flag for your DPS if you're getting some Speed substats/Swiftrush set.
 Black Flag
For Unique Rarity shells, here are the standouts:
- - A good use-case for any Animus who really wants ATK, such as Borgne/Shielder Helkid. It can also help softcap your Crit Rate if you're struggling to reach 55/70%. While the 600 ATK is really noticeable early on for all DPS, the higher your ATK stat goes, the worse this Shell will become.
 Tamamo Doji
 - - If you can get to 55/70% Crit Rate without trouble, and have access to Onslaught Set + Swiftrush DPS Set go for this one. Trading some offense for Speed works so long as the fights don't end in 2/3 turns.
 Budo Panda
Debuffer Gearing
Stats
Debuffers are essential to push through the game's various Boss fights, especially early on. Debuffers are extremely straightforward to build, minus one noteworthy exception which we have noted in a separate section:
- Effect Acc (Eff ACC) - High Effect Acc is a mandatory stat to have for Debuffers. The biggest hurdle when you unlock the Hell/Inferno difficulties is not only adjusting to the much higher base Speed of the enemies, but also their higher Effect Resist (Eff Res). Reducing the RNG of your debuffs failing to land is a very important way to secure a consistent AUTO setup. For Manual runs, lower Effect Acc is okay but this game's grinding is all about building the fastest, most consistent AUTO setup and that always requires a high enough Effect Acc.
- Speed - Unlike DPS Animus, this is the number one stat you are looking for on your Debuffers. While maximizing the chances of landing your debuffs is definitely nice, inflicting them before the opponent takes their turn is that much more important. You want every single Module in your loadout to have Speed substats eventually, the higher the better.
- HP - Just like for DPS, HP is good but not nearly as big of a deal as the other two main stats. You only need enough to avoid one or two shots from the enemy.
The Exception
Thanks to ![]() Heinrich DPS potential, it is possible to play Heinrich as a Debuffer + DPS hybrid, maximizing Speed, then grabbing one or two Effect Acc Modules before investing everything left into Damage (Crit Build). This kind of hybrid gearing is quite difficult to make work when you reach the Hell/Inferno difficulties. While you'll instead prefer three Effect Acc Modules for consistency, it remains a viable build if you can't get multiple good Speed sets, allowing you to give one to another Animus without compromising Heinrich's utility too much.
Heinrich DPS potential, it is possible to play Heinrich as a Debuffer + DPS hybrid, maximizing Speed, then grabbing one or two Effect Acc Modules before investing everything left into Damage (Crit Build). This kind of hybrid gearing is quite difficult to make work when you reach the Hell/Inferno difficulties. While you'll instead prefer three Effect Acc Modules for consistency, it remains a viable build if you can't get multiple good Speed sets, allowing you to give one to another Animus without compromising Heinrich's utility too much.
Sets
To start things off, a disclaimer that this guide doesn't feature any of the 6-piece sets, as they're the last ones to be unlocked and by time you get them you have entered the long 'late game' gearing phase.
For most SR/SSR Animus, you may consider that each piece of ![]()
Thus as outlined earlier, 8-piece/12-piece ![]()
![]()
Shells
This guide only accounts for Unique Rarity Shells with one exception, following the advice of our Early Progression guide to skip most Epic Shells and jump directly from Unique Rarity to Mythic Rarity.
For your early Mythic Shells (less than a week of progress needed!), check out the Characters' Build sections and use any of the Mythic Shells recommended for the character you're building.
- - THE early game Shell, Black Flag sets itself apart thanks to its Speed buff and turn meter increase. If you don't run a Speed buffer in your party all the time, then Black Flag's value is through the roof, even without investing too much into it in preparation for your first DPS Mythic Shell.Black Flag
For Unique Rarity shells, here are the standouts:
- - For Animus heavily reliant on a single but extremely powerful skill, Star is an excellent budget option.
 Star
Star - - Debuffers with a more spread out kit prefer Unbridled Science, allowing them in some cases (like Marvell) to perform 2 turns before the Boss even gets their first, and that too without any help from the rest of the team.
 Unbridled Science
 - - While not the best option generally speaking, White Gale is especially powerful when paired with crippling debuffs like Speed Down, or when followed by skills that apply multiple debuffs in one activation, such as Dinah's Skill 3 and Turandot's Skill 2 among others.
 White Gale
Support Gearing
Stats
Support is another very straightforward role to gear up in early game. Supports only require two to three stats, and two of them are the most universal ones to boot:
- Speed - Speed, Speed and some more Speed. You want your Support Animus to be as fast as you can get them, especially when it comes to Turn Manipulation Supports. The only time you have to worry about reducing the Speed of your Support is when they rely on debuffs, in which case you'd want them to go after Debuffers like Heinrich or Marvell. Otherwise, Speedtuning is nearly irrelevant until you reach the End Game and start looking at 3 starring Inferno content, or PvP.
- HP - HP matters quite a bit, but not any more than it does for Debuffers.
Early on Support is one of the few roles that can spare some room for Eff Res alongside Tanks. However, it's not strictly necessary so don't compromise Speed for it, but other than getting one shotted the only troublesome thing that can happen to your Support is being slowed down or pushed back on the 'Turn Timeline'.
In the case of Hybrid Support/Debuffers, like ![]() Turandot or
Turandot or ![]() Freya for example, Effect Acc is the second most important stat after Speed. These characters heavily rely on their debuffs to make their kit complete.
Freya for example, Effect Acc is the second most important stat after Speed. These characters heavily rely on their debuffs to make their kit complete.
Sets
To start things off, a disclaimer that this guide doesn't feature any of the 6-piece sets, as they're the last ones to be unlocked and by time you get them you have entered the long 'late game' gearing phase.
Go for 8-piece/12-piece ![]()
For Supports, few set effects matter when compared to Speed stat. At account lvl30, getting an 8-piece ![]()
![]()
Shells
This guide only accounts for Unique Rarity Shells with one exception, following the advice of our Early Progression guide to skip most Epic Shells and jump directly from Unique Rarity to Mythic Rarity.
For your early Mythic Shells (less than a week of progress needed!), check out the Characters' Build sections and use any of the Mythic Shells recommended for the character you're building.
- - THE early game Shell, Black Flag sets itself apart thanks to its Speed buff and turn meter increase. If you don't run a Speed buffer in your party all the time, then Black Flag's value is through the roof, even without investing too much into it in preparation for your first DPS Mythic Shell.Black Flag
For Unique Rarity shells, here are the standouts:
- - Just like Debuffers, the more turns your Supports take, the better your team fares. Star is once again favored for Animus with a super stacked skill.Star
- - Unbridled Science can help Supports with multiple buff skills activate them in quick succession, such as a Buff focused Freya for example. It's also worth noting that Hybrid Support/Debuffer Animus like Turandot can really appreciate the extra Turn meter in AUTO, as you don't need to choose which skill to use if you end up playing twice before the enemy.Unbridled Science
Sustain Gearing
Sustains, who are mostly there for their defensive utility (Heals, Shields, defensive buffs, etc.) are the least important in priority to build optimally. As such for most accounts they're the Animus whom you give your "leftover" gear to, a couple of exceptions aside.
Stats
- Speed - Once again Speed is a big deal, but it's not as important for Sustains. Give them your leftover Speed Modules and keep the better ones for your Debuffer and Support Animus, as most Sustain Animus can play 2nd, 3rd, or even after the enemy.
- HP - If you're playing the likes of Sania or Valerian, HP is a core stat as it determines how much you'll Heal/Shield your teammates. For Animus like Lingluo or Helkid however, the stat isn't all that important and having enough to survive 2/3 hits per turn is more than enough.
- DEF + Effect Acc - If you're playing Rin that's the stat combo you're looking for coupled with Speed, with HP having a lower priority.
Sets
To start things off, a disclaimer that this guide doesn't feature any of the 6-piece sets, as they're the last ones to be unlocked and by time you get them you have entered the long 'late game' gearing phase.
- 8-piece/12-piece Set if you can afford it after gearing your Debuffer and Support followed by Sets having Speed and HP % Main and Subs.Swiftrush [12/12]
- Strive [8/8]
 andWellspring [12/12]
 Sets are okay, but not as important as good substats.Cure [8/8]
- is also a great option as it will allow the character to use their Basic more often - and sometimes they have special effects attached to it like healing/debuffs.Bramble [8/8]

Shells
This guide only accounts for Unique Rarity Shells with one exception, following the advice of our Early Progression guide to skip most Epic Shells and jump directly from Unique Rarity to Mythic Rarity.
For your early Mythic Shells (less than a week of progress needed!), check out the Characters' Build sections and use any of the Mythic Shells recommended for the character you're building.
- - THE early game Shell, Black Flag sets itself apart thanks to its Speed buff and turn meter increase. If you don't run a Speed buffer in your party all the time, then Black Flag's value is through the roof, even without investing too much into it in preparation for your first DPS Mythic Shell.Black Flag
For Unique Rarity shells, here are the standouts:
- - Most Sustains in the game currently have super powerful skill 3s, whose CD can be shortened by Star.Star
- - On the flip side, as your Sustain won't be that fast compared to the rest of your team early on, getting an extra 30/40% Turn meter can help a lot in stabilizing the first couple of turns while you set yourself up with various buffs and debuffs.Unbridled Science
- - It is viable, but only use it if you have none of the above options available for your Sustain or absolutely need that extra Heal Over Time. This Shell is usually only played on slow Sustains, when the enemies all hit before you can land your first heal.
 Reason