
Foreword
Resonance Solstice is a Train Management Simulator first and foremost. Consequently, understanding your train and how to navigate the several menus and bits about it is fundamental for your success as a Conductor. In this guide, we'll cover how to get started, what to farm, and how to unlock and use features.
Your start as a Conductor: Train Parts
The first Train features unlock once you reach Conductor level 8. Most of those features use “Fatigue” instead of “Clarity”, with “Clarity” being reserved for combat. “Fatigue” is the red bar, and it recovers very slowly, so you will have to be a bit more careful in terms of how you use it. “Fatigue” is used for:
- Train travels.
- Bargaining and Haggling.
- Destroying things on the Railroad.
- Crafting.
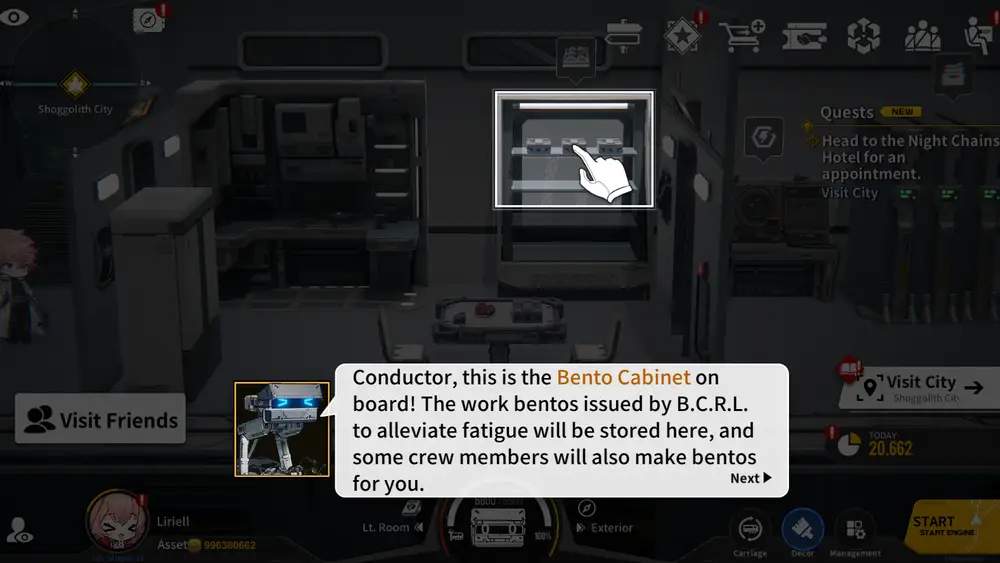
The main source of Fatigue Recovery, outside the normal timer, is Bento, which is unlocked at Level 8. There are two types of Bento: Standard and Special. Specials are prepared by your crew, and you may trigger specific ones depending on your bond level. Standard Bento recover 33 Fatigue each and are unlocked three times a day, at 05:00, 12:00, and 18:00 (server time). The other way to refresh Fatigue is by using Refresh Lollipops, Refresh Gum, Cactus Refresh Pop or Chaos Stones (up to 8 times a day for the latter). You can also get up to 6 refreshes a day by having a drink with Arina at the Rest Area in each city.
Essential Tips
- You can also unlock several Conductor buffs by taking meals and drinks across cities. They always last 30 minutes and will also improve your bond with one or more crew members.
- Always pick up “lost loot” on the Railroad; it's free profit and sometimes you may get useful items from it, including bullets.
- Do NOT attack the random enemies you find on the railroad. They aren't an efficient way to spend clarity, and can be a waste of time in your travels. The ones who ambush your train, on the other hand, don't cost Clarity to fight and can give useful items like “Chaos Gland” and “Chaos Residue”, used to upgrade your train. NOTE: Quest related ambushes will cost you clarity.
- You can use decoy balloons to evade fights.
- Train interface: Headlights and Honk don't do much. The bullet increases your speed considerably for a few seconds. D is for Drive, B is for Brake, and R is for Reverse. Using these three can be quite useful to pick up on missed loot or special spots on the railroads.
- Always enter every new outpost, station, or city you find on the map.
- As you upgrade your Conductor level, you will unlock tools that will assist you with train driving management. They need “Duty Medals” to be unlocked, which you can get from a myriad of sources, such as bosses, missions, bounty quests, heteromorphy, etc. The Driving Assistant Tools can be toggled on or off depending on your needs. They are:
- “Auto Enter Station”: Unlocked at level 20, will make your train automatically enter a station. This one is only recommended to use when you're questing or transporting passengers; otherwise, the train will stop at the station you targeted as your final destination. This can be a nuisance if you planned a longer route to collect Lost Cargos or deal with buoys and heteromorphy, as you cannot change to another station upon arriving.
- “Auto Rapid Bullet”: Unlocked at level 25, very useful. The name is self-explanatory.
- “Auto Ram Weapon”: Unlocked at level 28, also very useful. It will automatically use the Ram weapon on obstacles or ambushes you may find on the railroad.
- “Auto Escort Engage”: Unlocked at level 30, probably the most useful of them all. If you have auto-battle set, it will engage, finish the battle and then continue the travel.
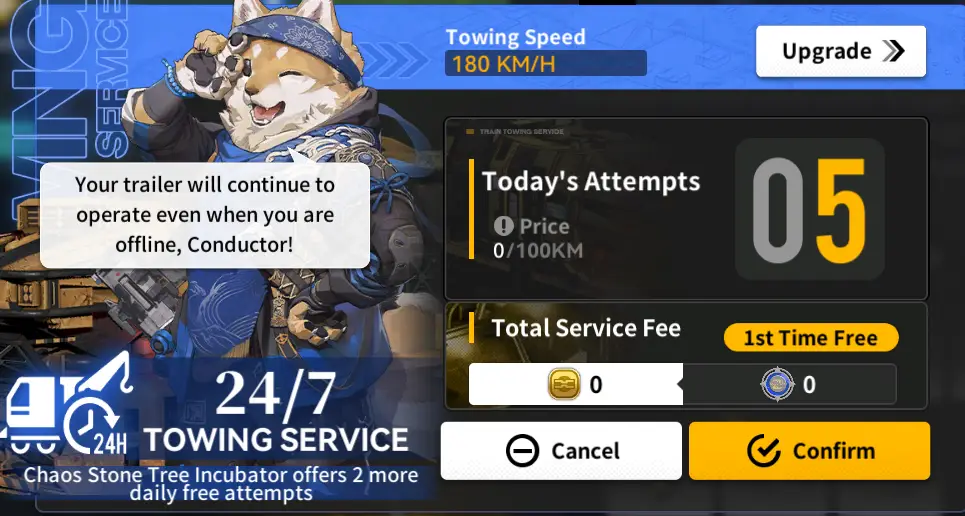
- Remember to use the Towing System! It will keep your train operating even if you're offline, and it's quite cheap.
Early Game: Trading
For the Early Game, focus on following the Main Story and the trade routes it gives you. As a rule of thumb, buy items with red tags and sell items with green tags. Never sell items tagged as “Local”. Always remember to use your Bargaining/Haggling. If you're doing a lot of trading in one day, it's possible to use an item called “Negotiation Appl.” to refresh your tries. This item can be acquired through several means, such as quests, dailies, the Night Chains shop, among others.
More tips:
- Local specialties (items marked with a star) tend to bring higher revenue.
- Increase your City Prestige as soon as possible. This can be done by completing Eviction missions, bounties, request deliveries and other tasks depending on the city. You can also find a shortcut for Eviction Missions and Bounties by clicking the icon with a crossed sword on the top left of the main menu, next to the mini-map.
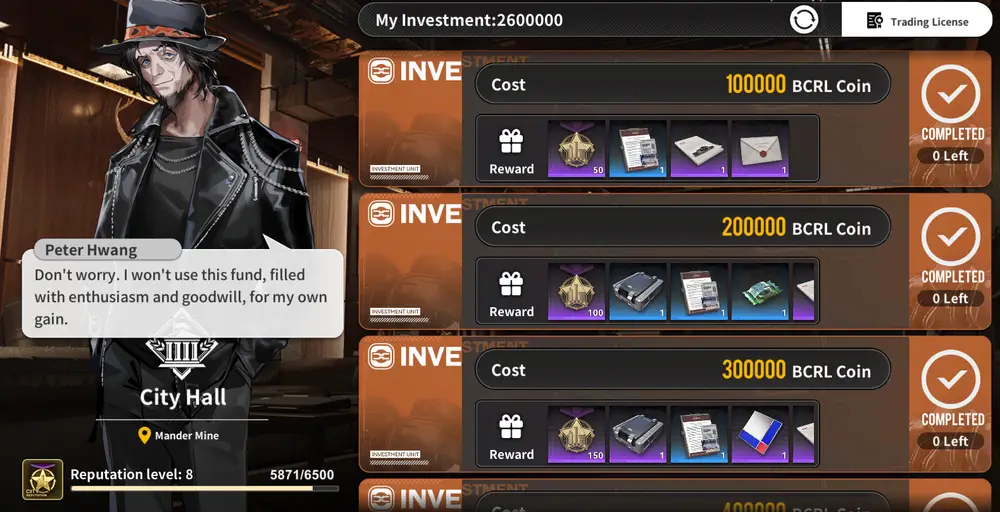
- If you have money to spare, consider investments. They're unlocked at City Reputation 1, and can be accessed in the Management Center of each city. Increasing reputation is a great boon for your trading since it will reduce taxes, unlock exclusive goods for trade, among other benefits.
For more trading tips and guidance, check out our dedicated Trading Guide!

Early Game: Maintenance and Upgrades
As you go about your routine, your train will accumulate dirt, trash, and damage.
Train maintenance is unlocked at Main Story Chapter 2-2, and most Train features from hereon require Conductor level 20 or more. The maintenance itself is pretty straightforward, and you can keep it to “auto”.
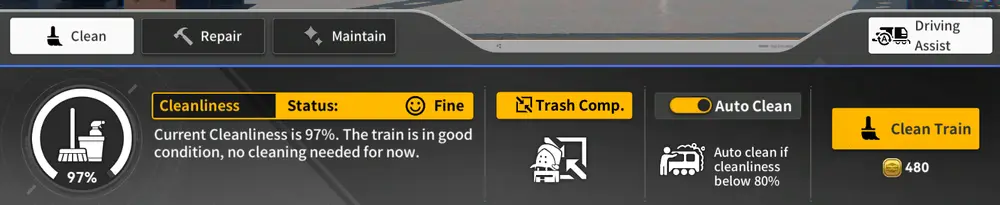
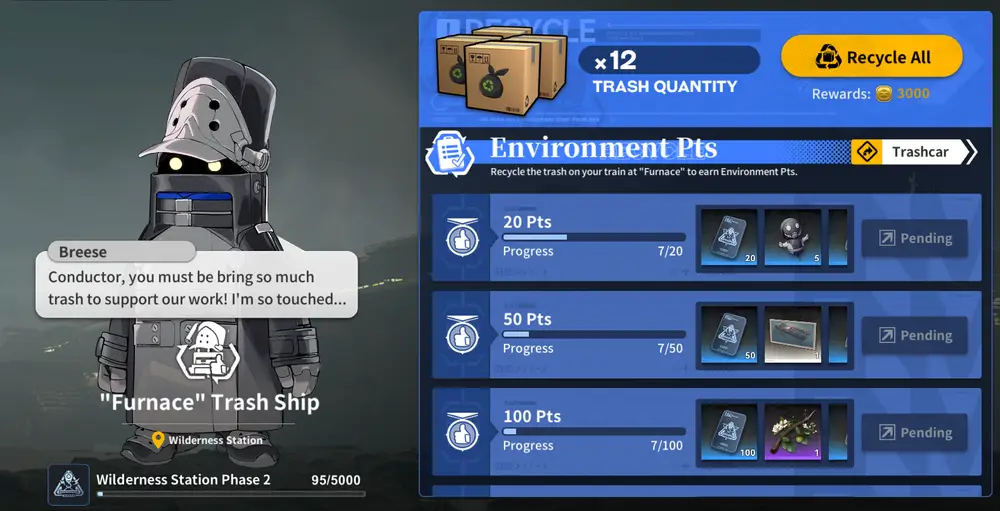
Trash Comp. Maintenance is a bit different. It has a separate upgrade system, and it's advised to upgrade it as early as possible, in order to unlock more slots and automated functions. Keeping your train clean also increases its Comfort Level, which will later affect your profit with Passengers. Furthermore, after you unlock the Wilderness “Furnace” Trash Ship, you can earn Reputation there, along with other items, by recycling trash there. The Wilderness Station unlocks at Main Story 3-7.
The Train Core
Train Power, Mod Power and Engine Core are the first things you need to worry about upgrading. Most advanced upgrades rely on Power Core being at least level 20, and for Engine Core, the upgrades will depend on the type and rarity of equipment you want to install. Train core uses mainly “Chaos Gland” and “Chaos Residue” for upgrades. They are easy enough to farm just by doing the encounters during your travels and completing Evictions.
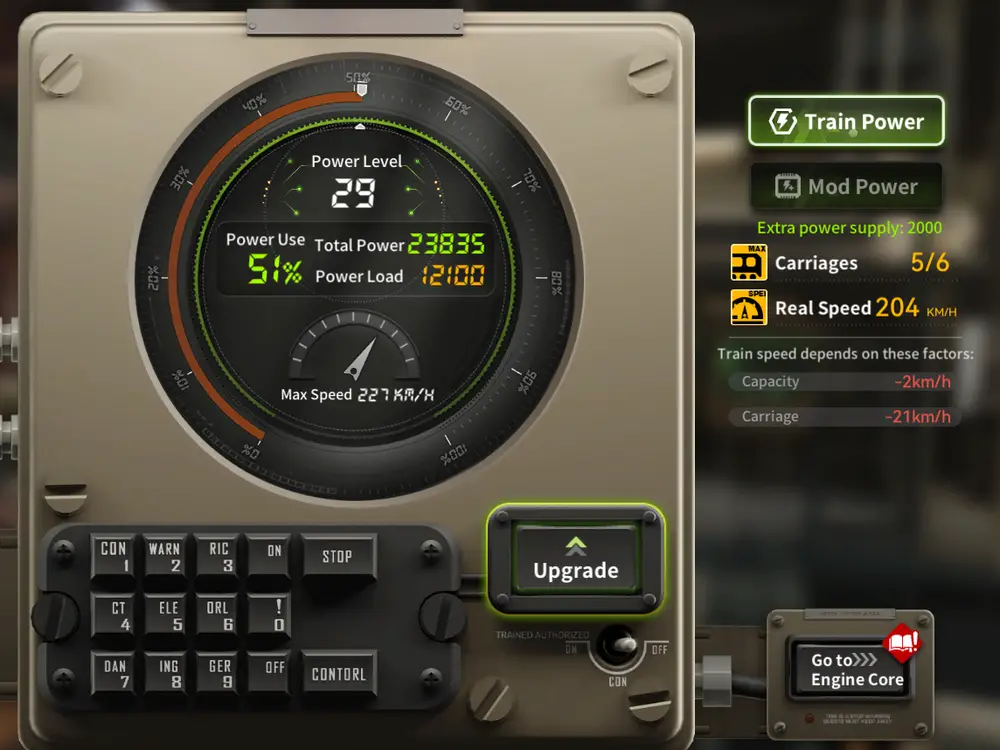
- Modules are cheap extra upgrades you can install to increase Train power.
- Engine Core requires triggering a specific elemental reaction (Electrify, Ignite, Chill, Reverb, Reverenergy) several times to upgrade the core. The breakthroughs are at 60, 100, 200.
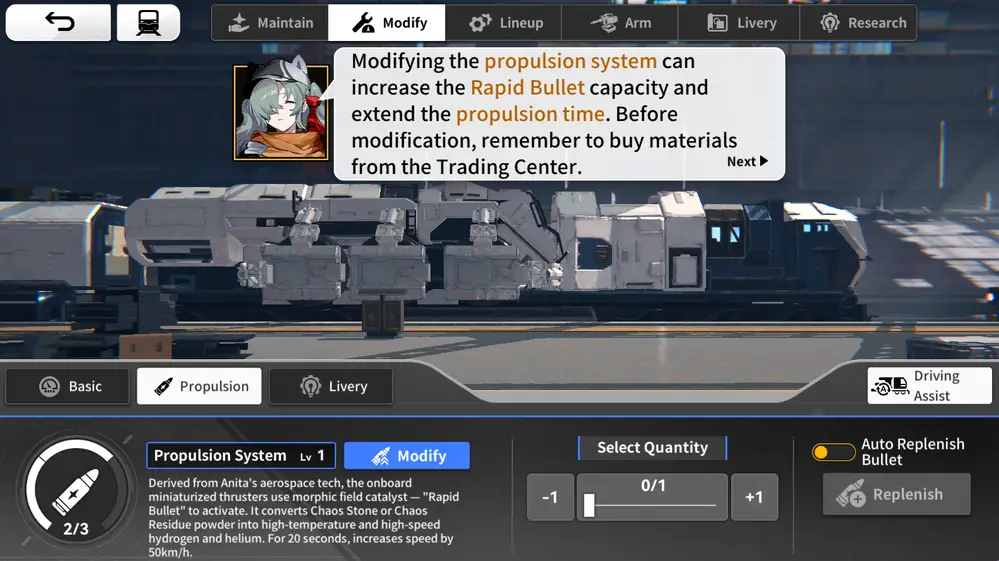
- At this point in the game, you can also upgrade your Train Acceleration > Propulsion System > Train Braking (in this order of priority). They're quite cheap to level and increase what their names suggest.
Arms and Weapons
Tennie's Train Arsenal is located in [Mander Mines]. You need to progress with Chapter 2 of the Main Quest to unlock it.
You can craft arms here. In order to unlock the next one, you need to craft the previous one, so the process is very straightforward.
Meanwhile, in Chapter 3, you unlock Nugget Mech's Armory at ONEderland.
To be able to equip Arms and Weapons, however, you need to make sure that your Engine Core has the required levels.
Each equipment will add stats and features to your train, and they can also be upgraded.

Important!
To upgrade your arms, armory and weapons, you will need an “Armament License”. You can get these by exchanging Duty Medals at the Duty Medal Shop. However, it's not recommended to do so in the early game, since the R equipment will soon be replaced by SR (then SSR and UR).
To unlock more weapon slots, you will need to build “Armored Carriages” (more on this in the “Planning for the Future” section).
What and Where to farm for Upgrades
The easiest way to get your essential materials to upgrade your train parts is to do the three daily battles in Operation Blade. This is available in your Dailies menu (top left corner of the screen). The items you will need the most early on for breakthrough upgrades are: Chaos Kernel, Blastbug Venom Sac, Chaos Tentacle, Pure Gold Parts, Looter's Saw Wheel, Phosphor Bone and Large Saw Blade.

There are also three “white trees” on the map per week, one large and two small. They're called Heteromorphy, cost no clarity to clear, and will give you lots of useful materials and Duty Medals.

Engine Core Upgrades
As mentioned before, upgrading the Engine Core is simple. All you need to do is trigger the required elemental Reaction a number of times: 60, 100, 200.
Here are some budget and Advanced team examples:
Overload Core [Electrify]
Overload Core [Electrify]
Mode: Engine Core Upgrade

About the team
Comment
Little to no investment required, no gear required.
Team Code
Passengers and You
In Chapter 3, you unlock “Passenger Transport”. Clicking on “Attract Passengers”, you can use pamphlets to bring passengers in. You can select the destination for the passengers, so you should always select your next trading destination in the early game to maximize profits. Passenger revenue is affected by a series of variables, but overall, you can follow the passenger screen to see where you are lacking and need to invest:
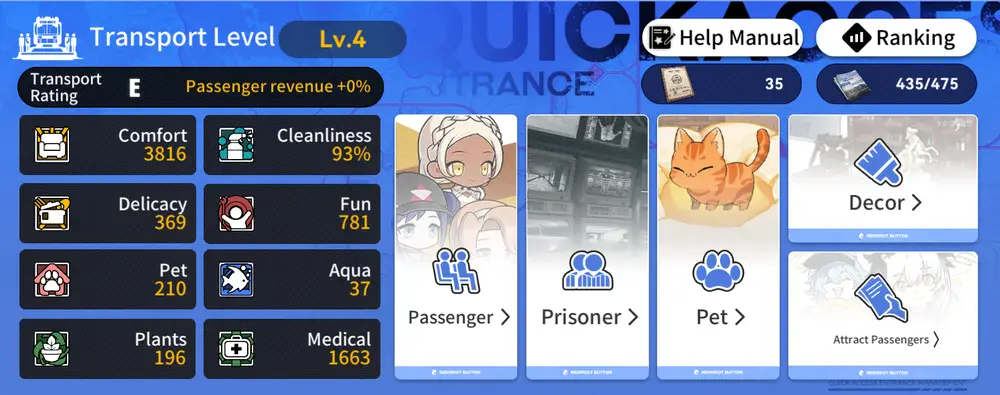
The base revenue from passengers is mainly dictated by the Transport Rating:
| Guest transport points | Revenue of goods (%) | Comfort | Except for comfort. |
|---|---|---|---|
| E | 0 | 0 | 0 |
| D | 2 | 3000 | 500 |
| C | 4 | 6000 | 1000 |
| B | 6 | 9000 | 1500 |
| A | 8 | 15000 | 2500 |
| S | 10 | 21000 | 3500 |
| SS | 12 | 30000 | 5000 |
| S S S | 15 | 42000 | 7000 |
Note that in order to improve your ratings, you need to install the Furniture, Pets, Fish, Plants and so on in the Passenger Car; otherwise, it won't take effect. One exception is Pets. It's advised to place them in the Conductor Room, because if you clear all furniture from a Carriage, the Pet will be sent away and lost.
Planning for the Future
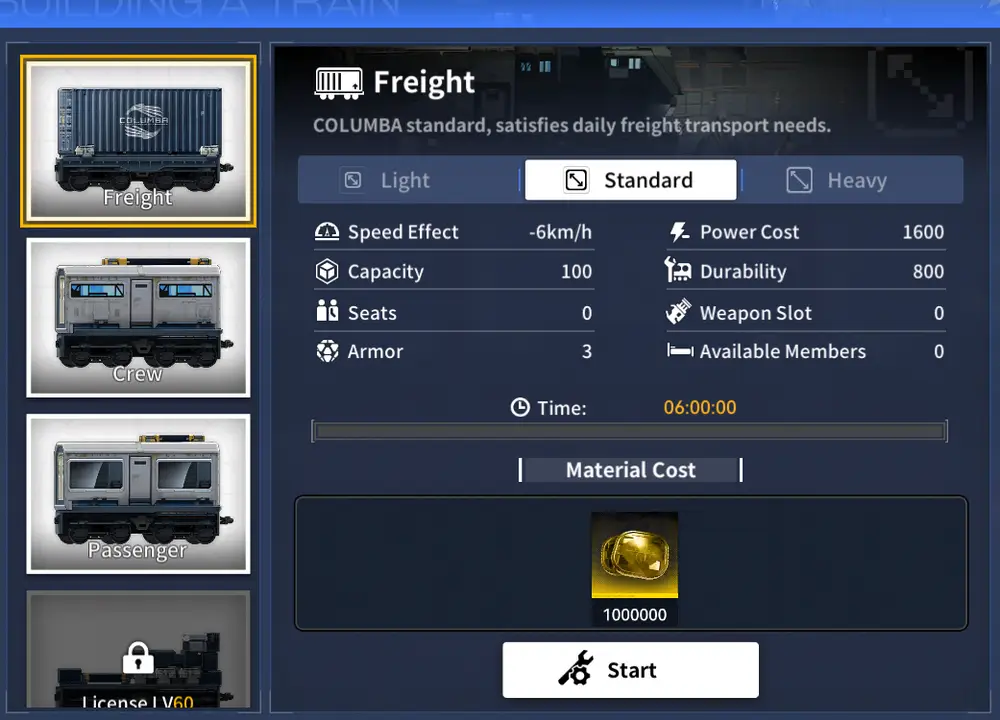
In Chapter 3, you unlock the Crafting system, which allows you to add more Train Carriages!
Unlocking more Carriage slots depends on the Train Power Core level. After choosing what kind of Carriage you want to build, you need to wait a certain amount of time for it to get ready, or use Chaos Stones to finish instantly. Aside from the installed carriages, you also have a garage where you can store different carriages and adjust your train based on your needs and preferences.
At an early level, it's advised to focus on Freight Carriages, as they increase the amount of goods you can carry.