


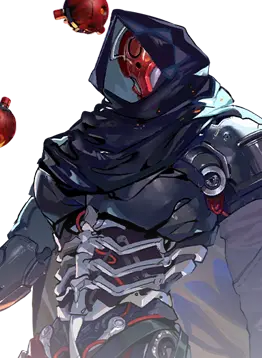
Nayuta is a really strong support for beginners and doesn’t need dupes or high investment in order to work. His skills mainly revolve around shuffling the deck in order for him to generate his cards; these cards offer a variety of effects such as damage, debuffs, healing and defense. There are plenty of teams you can make around his mechanics to draw and shuffle cards, or simply slot him as a support for your favorite characters.
Playstyle and Key Mechanics
Nayuta's playstyle involves a lot of shuffling and discarding. His utility allows him to fit in multiple team compositions. He is commonly found on teams that require a lot of cards in hand. With that said, let's take a closer look at his cards:
Main Cards:
His first card [Vanish] selects a target and turns them [Invisible] and gives them an ATK bonus that can stack. Good lifeline skill for allies that are in low HP and simply for buffing ATK.
The second card is [Shuffle], using this card discards your entire hand and draws cards according to the number of cards you have discarded. At Resonance 2, this card will increase your Hand cap by 3. Great Cycling card to refresh your hand with better cards.
Lastly, his ultimate [Mystic] when used returns all your cards in hand to the deck pile and will draw X cards. These cards will determine what Derivative Card Nayuta is generating. Refer to the section below.
Derivatives:
Flame: Integrate - Generated upon drawing a Red card after using [Mystic]. Applies [Ignite] to all enemies, a great tool for stacking [Ignite].
Power: Reconstruct - Generated upon drawing a Blue card after using [Mystic]. Shrouds the team with a [Force Field] that reduces damage taken by 80%. Incredible defensive tool.
Bolt: Disintegrate - Generated upon drawing a yellow card after using [Mystic]. Targets the enemy with the highest HP using [Bolt], dealing great damage.
Reverengy - Generated upon drawing a green card after using [Mystic]. It can be used as fuel for certain skills.
Light: Purify - Generated upon drawing a purple card after using [Mystic]. Instantly heals an allied target back to full HP. To activate, destroy a [Reverengy] card from your hand. Great life-saving tool, Unlocks at Resonance 5
Investment
Nayuta overall doesn’t really need many dupes as his functionality is already in his Main skill kit and Resonance; however, dupes will improve his capability as support and maybe perhaps as a DPS. Let's break down his awakening.
Awakening 1 - Allows you to draw a card upon using the discard button, great quality of life, especially for manual play and if you just need 1 more card to activate his Leader Skill.
Awakening 2 - Allows him to heal allies that are buffed with [Invisible], great for teams that can apply [Invisible] on themselves or are simply reliant on Nayuta’s card [Vanish].
Awakening 4 - Nayuta increases his own ATK up to 30% by discarding cards, a nice stopping point if you want to mainly use him as a DPS for Red Teams/[Ignite] or Yellow Teams/[Electrify].
Awakening 5 - Whenever Nayuta draws a [Reverengy] card from his Ultimate/Leader Skill, he applies [Invisible] to all allies. This duration is extended for each [Reverengy] drawn. Additionally, whenever the deck refreshes, he gives a 10% ATK buff to all allies. This awakening heavily capitalizes on his Awakening 2. It's a really strong awakening node that could free an extra slot by removing a healer; however, to generate [Reverengy] from his Ultimate/Leader Skill, you need Green cards, which are found from healers and most Nayuta decks do not want him to have his Resonance 5 Activated.
Resonance
Resonance 1 - Enables [Vanish] to draw a card when used; this prioritizes Red cards.
Resonance 2 - Whenever the [Shuffle] card is in hand, he increases the card cap by 3. It works well on automation, as you can just permanently disable [Shuffle].
Resonance 4 - Shuffle will always be one of your first cards; this synergizes with Resonance 2.
Resonance 5 - Adds the function to draw [Light: Purity] when drawing a purple card after using his Ultimate/Leader Skill. Recommended to be deactivated as this will clog up your hand if you’re running him outside [Reverengy] teams.
Synergies
❗ ❗ ❗ The Synergies mentioned here are merely samples. Taking their core mechanics as an example, you can use many other characters as replacements or other synergies. ❗ ❗ ❗
Fenia - To act as a main Damage Dealer, Fenia relies well on Nayuta’s Derivatives to increase the number of cards fueled for additional hits on her Ultimate/Leader Skill. Alternatively, she can also support Nayuta by making him discard her Yellow Card, which in turn draws more cards to help Nayuta activate his Leader Skill to reshuffle cards and obtain derivatives.
Ganya - Similarly to Fenia, a Leader Ganya relies heavily on the number of cards in hand to consistently use her Leader Skill, which requires at least 5 cards in hand.
Kaleya - Kaleya supports Nayuta by drawing more cards and doubling the damage of Nayuta’s [Ignite].
Ilona - Ilona can have a fairly high uptime, being [Invisible]. In the case where your Nayuta is Awakening 2, Ilona just heals almost permanently.
Gear and Affixes
Some examples of overall good equipment choices for Nayuta. For specific picks, please check the respective teams.
Weapons:
UR Scorching Spike: Whenever [Ignite] is inflicted 8 times or [Blaze] is inflicted 4 times, inflicts [Wildfire].
UR Space Tangent: Draws 1 more card at the start of battle prioritizing own Ultimate card.
SSR Ball Lightning: Whenever wearer's skill card is played, unleashes a ball lightning that [Penetrate] enemies, dealing damage once each time it hits enemies in its path and [Electrify] them.
SSR Unbewusstes Probe: Whenever you play a Red card of cost 3 or more, random enemy receive 3% less healing. This effect stacks up to a maximum of 75%.
SR Destroyer Torch: Own skill cards have a 10% chance to release an additional dazzling ray, dealing damage once and [Stun] the target.
SR Viscera Collector MK 0: Using [Leader Skill] restores 0.4 Cost. This effect stacks.
R Gardener Multi-Tool: Playing a Red card increases ATK by 0.5%. This effect stacks.
R Mass Projector: Using [Leader Skill] increases ATK by 1.5%. This effect stacks.
Armor:
UR Lucid Dream Fiber: Wearer's Red cards heal the wearer for 2% of the damage dealt.
SSR Simulated Stars: Using [Leader Skill] restores 5% HP. This effect stacks.
SSR External Memory Matrix: Max damage taken per hit is 33% of Max HP
SSR Black Rock Armor: Reduces wearer's final DMG taken by 10%. This effect stacks..
SSR High Dimension Construct: Generating a Black card restores 5% of Max HP. This effect stacks.
SR Resonance Fiber: When own skill card is used, restores 2% of Max HP.
Accessory:
UR Dawncloud Seal: Max Hand Size +1.
SSR Mobius: Cards in your hand are replenished 0.25 seconds faster. This effect stacks.
SSR Divinity Seal: Gains 2 Cost at the battle's beginning. This effect stacks.
SSR Fengshui Tactical Drone: For every 8 cards used, increases ATK or DEF by 2%, up to a maximum of 50%.
SR Magic Spring: Restores 0.02 Cost per second. This effect stacks.
R Harrison Device: Playing a Yellow card restores 0.3 Cost. This effect does not stack.
Affixes
Using [Leader Skill] restores 0.2/0.3 Cost. This effect stacks.
Using [Leader Skill] restores 2/3% of own Max HP. This effect stacks.
Using [Leader Skill] increases own ATK by 0.5/1%. This effect stacks.
Increases own ATK by 1/3%. This effect stacks.
Increases own ATK by 10/30. This effect stacks.
Increases all own trigger rates by 1/5%. This effect stacks.
Restores 0.01/0.02 Cost per second. This effect stacks.
Playing a Red card increases own ATK by 0.2/0.5%. This effect stacks.
Increases final DMG dealt by 2/5%. This effect stacks.
Gains [Hyperarmor] for 1 second when using own skill cards. This effect stacks.
Playing a Yellow card restores 0.05/0.1 Cost. This effect stacks.
Playing a Yellow card has a 5/10% chance to draw a card. The trigger rate stacks.


![Shizuru [Summer]](https://cdn.prydwen.gg/images/resonance-solstice/characters/shizuru-summer_card.webp)


![Raziel [The Reminisce]](https://cdn.prydwen.gg/images/resonance-solstice/characters/raziel-the-reminisce_card.webp)