Character stats
Level Stats
Base HP13,226
Base ATK342
Base DEF752
CRIT Rate19.2%

Best Sandrone build, teams, weapons, artifacts, combos, rotations, and gameplay notes for Genshin Impact.
 5-star
 Cryo
Cryo Claymore
Last updated: August 12, 2026

Sandrone is a 5-star character from the Cryo element who wields the Claymore weapon. Sandrone was added to the game with the 6.7 patch.
The Seventh of the Fatui Harbingers, "Marionette." Interprets all phenomena through the prism of mathematics, and is an elegant lady who is never absent from a tea party.
Talent text and per-level multipliers, straight from the character data.



Passive talents are shown in full as kit cards.




All constellation names and descriptions in full for quick reference.





Keyword and ability definitions referenced across this character's kit.
Simple playstyle
One of the strongest DPS as of the guide's release
Extremely flexible rotations
Still ideally wants specific premium allies like Yae Miko and Odette
Sandrone is a 5-star Cryo Claymore character who is most commonly played as an on-field Stellar-Conduct Main DPS, and our first introduction to the Stellar Reactions featured in Snezhnaya. She focuses on dealing direct Stellar-Conduct damage once enabled to do so by the reaction, most notably through her Charged Attack.
Stellar-Conduct is a reaction that replaces Superconduct when certain characters are on the team. It deals no damage when triggered, instead spawning a Polestar Field around it. This applies the 40% Physical RES Shred from the base reaction while also activating Radiance: Stellar-Conduct effects in kit - many of which allow characters to deal direct Stellar-Conduct damage. It additionally provides a DMG Bonus for the Electro and Cryo DMG and a Base Reaction Coefficient for direct Stellar-Conduct damage based on a tally which counts whenever these elements are applied; this starts at 29% and 1.45 at one stack, and increase by 1% and 0.05 to a maximum of 40% and 2 respectively. These bonuses are granted every 4 seconds, with the tally beginning anew each time. Note that if both Stellar-Conduct and Stellar-Swirl are triggered by the team, Radiance: Stellar-Conduct will take priority.
Similar to damaging reactions, direct Stellar-Conduct damage scales with EM, reaction damage bonuses, ignores DEF, and does not benefit from standard DMG% - unlike typical reaction damage, it can also CRIT. Direct Stellar-Conduct damage is considered to be of the element of the unit dealing it and is based on the multiplier and the scaling stat listed in the ability instead of level, with Stellar-Conduct damage additionally being multiplied by the Base Reaction Coefficient.
Sandrone’s Passive enables reactions to be converted to their Stellar variants and boosts its Base DMG based on her ATK, reaching the cap of 14% at 2000 ATK. This is a separate multiplier to Reaction DMG and Base Reaction Coefficient. Due to Sandrone relying on her Radiance: Stellar Glimmer effects to deal direct Stellar Reaction DMG and Stellar Swirl being suboptimal, this review shall assume she is run on Stellar-Conduct teams.
While most of Sandrone’s damage comes from her Charged Attack, it is intrinsically tied to her Skill. Her Charged Attack has Sandrone using Fagio to fire a continuous beam that at C0 deals up to 3 sets of attacks, with each set consisting of 3 instances of Cryo damage and one “Condensed Beam” dealing Stellar-Conduct damage - after this, the “Decoding Power” this attack accumulates will hit the maximum and cause the beam to peter out and deal weak Cryo damage.
This Decoding Power is cleared gradually over time, more rapidly when Sandrone is off-field, and near-instantly when using her Elemental Skill whose cooldown of 4 seconds syncs up with her Charged Attack’s full duration. It also deals one instance of Cryo damage and Stellar-Conduct damage each; the latter is increased by 4 times by her first Ascension Passive if Sandrone has high Decoding Power when using her Skill.
Thus, Sandrone’s gameplay consists mostly of alternating her Charged Attack and Skill. Her Burst is far from useless, however, dealing a large instance of Stellar-Conduct damage automatically after a short delay. Her first Ascension Passive further allows her Burst to deal up to double its original damage when Sandrone clears a full gauge of Decoding Power, which is generally a non-issue as long as her Burst is used after a Skill cast - especially considering the Passive’s 60 second duration.
Her second Ascension Passive grants Sandrone Elemental Mastery based on her ATK, reaching the cap of 160 EM at 2000 ATK - the same amount Sandrone needs to maximize her Stellar-Conduct Base Damage buff.
Most of the time, this section would be concluded by mentioning how her Normal Attacks are useless. Sandrone bucks this trend since her Normal Attacks are only mostly useless, with the input for it being used in her animation cancels - though you can rest assured that she then cancels these Normal Attacks well before she ever hits an enemy with them.
Sandrone’s gameplay loop can be summarized as follows:
Setup the Polestar Field and other buffs,
Use Sandrone’s Charged Attacks, using Skill after to clear Decoding Power - typically 3 times a rotation,
Use Sandrone’s Burst at any point after a full gauge of Decoding Power is cleared and when fully buffed.
The notation used to refer to combat inputs in this section will be as follows:
C E C E C E
Sandrone’s default combo: using her Charged Attack then clearing her Decoding Power with Skill when it hits maximum, three times a rotation.
C E N0 C E N0 C E
Sandrone’s Skill animation can be cancelled very early by her Normal Attack, while can subsequently be cancelled by her Charged Attack. However, when done too quickly, Sandrone does not spend enough time to clear all of her Decoding Power which causes the following Charged Attack to whiff; therefore, it is important to find the correct timing at which she can execute her cancel. This is not difficult, but considering that the gain for performing the cancel isn’t major, this is unnecessary for most players.
C E Q
Sandrone’s Skill cast can be cancelled almost completely by her Burst, and using it after a Skill cast almost always ensures her first Ascension Passive is maximized. This can be inserted after any Skill cast in the above combos. Since the Burst cast has a short delay before the damage is dealt, short duration buffs like Viridescent Venerer can be reapplied if they have worn off; typically, this is only a concern if using her Burst after her third Charged Attack, at which point she would want to swap off anyway. This can also be a double-edged sword, so care should be taken that Sandrone is not swapped off too early if played in a team with buffs that only apply to the active character.
 Disenchantment in Deep Shadow100%DPS - SoloHer best option by a significant margin, even with subpar substats.
 Sands
Sands Goblet
 Circlet
 CRIT Rate
 CRIT DMG
 ATK%
ATK% EM
EM ERNormal AttackBurstSkill
| 3 Cryo or 2 Cryo/2 Electro | Other teams and/or Burst when available | |
|---|---|---|
| No Favonius teammates | 140-150% | Not recommended |
| Reduction per team Favonius trigger | -10% | - |
 Sandrone
 Yae Miko
 Odette
 Escoffier
Usage rates are gathered from player profiles connected to Enka and refreshed periodically. They describe what people are running, not what performs best.
Last statistics update: 04/September/2026
Based on Enka-connected profiles matching this character. Usage rate describes observed profile popularity, not optimality. Characters may have multiple viable builds, and guide recommendations can differ from popularity.
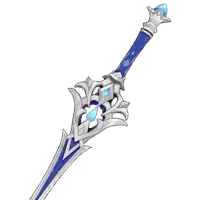
Sample: 481,457 Wolf's Gravestone20.5%
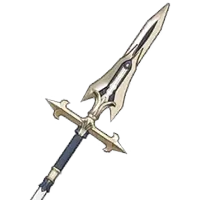
 Tidal Shadow16.4%
 Mailed Flower4.3%Disenchantment in Deep Shadow [2PC] + Rainbow1.6%
 Gladiator's Finale [2PC] + Rainbow0.2%C083.6%C19.2%C24.0%C30.6%C40.2%C50.0%C62.4%
Sandrone’s best teams typically consist mostly of Cryo and Electro characters in order to maximize Polestar Field stacks, though she can slot in generalist supports if lacking synergistic options.
Yae Miko Electro Sub-DPS, SupportRadiance: Stellar-ConductOdetteCryo Sub-DPS, SupportRadiance: Stellar-Glimmer
 AlyoshaElectro Support, SustainRadiance: Stellar-Conduct
 QiqiCryo Support, SustainRadiance: Stellar-Glimmer
Relative team damage chart. Best listed team is treated as 100%.
Stellar-Conduct TeamsEscoffier SSC is 100% Baseline for all team comparisons127 ER100 ER100 ER100 ER Odette
 Yae Miko
 EscoffierSandroneSandrone136 ER100 ER100 ER116 EROdetteYae Miko
 Alyosha
 AlyoshaSandroneSandrone105 ER100 ER100 ER100 ERYae MikoEscoffier
 QiqiSandroneSandrone
 Stellar-Swirl TeamsEscoffier SSC is 100% Baseline for all team comparisons100 ER
 100 ER100 ER
 236 EROdette
 Traveler Cryo
 Sucrose
 SucroseSandroneSandroneSandroneSandroneSucrose
 Traveler Cryo
 Traveler Cryo