Character stats
Level Stats
Base HP10,372
Base ATK340
Base DEF569
CRIT Rate19.2%

Best Yae Miko build, teams, weapons, artifacts, combos, rotations, and gameplay notes for Genshin Impact.
 5-star
 Electro
 Catalyst
Last updated: September 2, 2026

Talent text and per-level multipliers, straight from the character data.



Passive talents are shown in full as kit cards.




All constellation names and descriptions in full for quick reference.






Keyword and ability definitions referenced across this character's kit.
Force of nature in the Stellar-Conduct meta.
Potent C1 which can be unlocked for free eventually after Yae is obtained.
High Sub-DPS damage.
Not particularly meta outside of Stellar-Conduct.
Will never farm aura with her Burst in optimal gameplay
Yae Miko is a 5-star Electro Catalyst character in Genshin Impact, most commonly played as an off-field Stellar-Conduct Sub-DPS. Thanks to her long awaited buffs in Luna VIII (6.7), she can use her Elemental Skill to deploy long lasting turrets that can also deal direct Stellar-Conduct damage once enabled by the reaction; her Constellations also provide her strong buffing utility.
Stellar-Conduct is a reaction that replaces Superconduct when certain characters are on the team. It deals no damage when triggered, instead spawning a Polestar Field around it. This applies the 40% Physical RES Shred from the base reaction while also activating Radiance: Stellar-Conduct effects in kit - many of which allow characters to deal direct Stellar-Conduct damage. It additionally provides a DMG Bonus for the Electro and Cryo DMG and a Base Reaction Coefficient for direct Stellar-Conduct damage based on a tally which counts whenever these elements are applied; this starts at 29% and 1.45 at one stack, and increase by 1% and 0.05 to a maximum of 40% and 2 respectively. These bonuses are granted every 4 seconds, with the tally beginning anew each time. Note that if both Stellar-Conduct and Stellar-Swirl are triggered by the team, Radiance: Stellar-Conduct will take priority.
Similar to damaging reactions, direct Stellar-Conduct damage scales with EM, reaction damage bonuses, ignores DEF, and does not benefit from standard DMG% - unlike typical reaction damage, it can also CRIT. Direct Stellar-Conduct damage is considered to be of the element of the unit dealing it and is based on the multiplier and the scaling stat listed in the ability instead of level, with Stellar-Conduct damage additionally being multiplied by the Base Reaction Coefficient.
Yae’s Skill is the cornerstone of her kit. It has three charges, and using it deploys a “Sesshou Sakura” which deals Electro damage once every 3 seconds; up to three can exist at once, with each Sesshou Sakura levelling up to improve its multipliers when others are nearby. These can then be further enhanced every 2.5 seconds by triggering Superconduct or Stellar-Conduct, allowing the Sesshou Sakura to fire an even stronger thunderbolt on its next strike. The real value of this, however, lies in Yae’s Radiance: Stellar-Conduct effect - this lets this enhanced strike also deal direct Stellar-Conduct damage, and it is here that most of Yae’s damage comes from. The Sesshou Sakura have a lengthy 24 second duration, making up for the time required to triple cast her Skill.
The rest of Yae’s kit goes relatively unused, despite offering some interesting mechanics. Her Normal Attacks are probably the most useful despite being unremarkable, thanks to offering Yae on-demand Electro application.
Her Burst is a nuke Skill, featuring an initial strike alongside one additional bolt for each Sesshin Sakura on the field. This offers some fascinating interplay with her first Ascension Passive, which allows her Skill to deal a weak instance of direct Stellar-Conduct damage if cast when 3 Sesshou Sakura are on the field while also resetting her Skill cooldowns when Burst is used. Unfortunately, these damage instances are a bit too weak, and her Burst itself deals none of the Stellar-Conduct damage Yae is built for - meaning it rarely sees use for its damage. Instead, it offers a little bit of utility thanks to her Burst not being limited by any internal cooldowns on how often it can apply Electro; thus, it can apply Electro 4 times in quick succession which has some niche shieldbreaking value.
Her second Ascension Passive takes the worst traits of the previous two abilities by being both boring and of little use; it offers Yae standard DMG% for her turrets based on her Elemental Mastery, but Yae Miko rarely builds a significant amount of Elemental Mastery and the buff itself only applies to a small part of Yae’s damage profile.
Finally, thanks to the “To Temper Thyself and Journey Far” recurring event, Yae Miko has relatively easy access to her first Constellation. While the energy generation is hardly useful, it was also buffed to provide an excellent 50% DMG Bonus to both Electro DMG and Stellar-Conduct DMG more or less unconditionally when Yae is used on Stellar-Conduct teams. This is a good boost for both her and her allies, and currently makes Yae a strong consideration to obtain a Stella Fortuna for.
Yae uses her Skill three times before swapping off for the rest of the rotation; this is typically done at the start of the rotation or close to it thanks to her long durations. If needed, she can weave an additional Normal Attack at any point in this field time for an extra instance of immediate Electro application.
 Disenchantment in Deep ShadowYae’s best option for personal damage on Stellar-Conduct teams, which is often significant enough to make this set worth using.
 Gilded DreamsA weaker option for Yae’s personal damage than the above.
 Heart of the FurnaceYae’s best option if there are no better holders on the team due to its powerful teamwide buff that Yae effortlessly maintains uptime on. However, it is ideal to give this set to a teammate when possible.
 Golden TroupeNot great because it buffs her skill damage which is only ~25% of her total damage profile compared to the ~75% direct Stellar-Conduct DMG, but... it’s an option that certainly exists.
 Sands
Sands Goblet
 Circlet
 CRIT Rate
 CRIT DMG
 ATK%
ATK% EMSkillBurstNormal Attack
 Sandrone
 Yae Miko
 Odette
 Alyosha (C6)
Usage rates are gathered from player profiles connected to Enka and refreshed periodically. They describe what people are running, not what performs best.
Last statistics update: 04/September/2026
Based on Enka-connected profiles matching this character. Usage rate describes observed profile popularity, not optimality. Characters may have multiple viable builds, and guide recommendations can differ from popularity.
Sample: 276,208 The Widsith42.1%
 Kagura's Verity29.5%
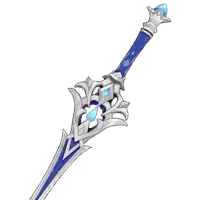
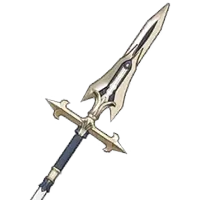
 Skyward Atlas5.9%Gilded Dreams18.7%Golden Troupe17.4%
 Thundering Fury1.7%C031.4%C151.0%C28.2%C33.3%C41.0%C50.2%C64.9%
Yae needs a Cryo applicant so you can consistently trigger Superconduct/Stellar-Conduct for Yae to get a Stellar Hit every wave, as well as a character who enables the Stellar-Conduct reaction in the first place.
Odette Cryo Sub-DPS, SupportRadiance: Stellar-Glimmer
Relative team damage chart. Best listed team is treated as 100%.
Sandrone TeamsTeam DPS compared solely within this team group134 ER100 ER100 ER122 ERYae Miko Odette
 Alyosha
 Alyosha
 Sandrone
 Sandrone134 ER100 ER100 ER122 ERYae MikoOdetteAlyoshaAlyoshaSandroneSandrone133 ER171 ER100 ER
 100 ER
 EscoffierOdetteAlyoshaAlyoshaSandroneSandrone110 ER100 ER100 ER118 ERYae MikoAlyoshaAlyoshaEscoffierSandroneSandroneWriothesley TeamsTeam DPS compared solely within this team group
 100 ER100 ER100 ER
 100 ER
 NicoleYae MikoOdette
 Wriothesley
 WriothesleyWriothesleyWriothesley100 ER100 ER100 ER100 ERNicoleYae MikoOdetteWriothesleyWriothesleyWriothesleyWriothesley100 ER
 220 ER134 ER100 EREscoffier
 OdetteOdette
 Beidou
 BeidouWriothesleyWriothesleyWriothesleyWriothesley























 Pyro
Pyro