Character stats
Level Stats
Base HP9,244
Base ATK170
Base DEF703
Anemo DMG Bonus24.0%

Best Sucrose build, teams, weapons, artifacts, combos, rotations, and gameplay notes for Genshin Impact.
 4-star
 Anemo
Anemo Catalyst
Last updated: September 9, 2026

Talent text and per-level multipliers, straight from the character data.



Passive talents are shown in full as kit cards.




All constellation names and descriptions in full for quick reference.






Potent teamwide Elemental Mastery buffs.
Simple Stat goals.
Passable grouping on weaker enemies.
Is complete at C0, which can be obtained for free.
Gameplay can feel jank at times.
Relatively low buff durations.
Sucrose is a 4-star Anemo Catalyst user most commonly played as a support for teams that use reactions in order to deal damage. While being a Hexerei character gives her some important synergies with others in the faction, she herself is entirely non reliant on them.
Her Ascension Passives clearly illustrate her role: the first one allows Sucrose to increase Elemental Mastery by 50 for allies who match an element she Swirls, while the second allow Sucrose to share 20% of her current Elemental Mastery to allies after using her Skill or Burst. Their short 8 second durations can be an issue; nonetheless, when paired with her ability to hold supportive gear like Thrilling Tales of Dragon Slayers and Viridescent Venerer, these Passives make Sucrose an incredible support.
Her Elemental Skill is typically her primary means of applying her buffs and debuffs - when used, it summons a “Small Wind Spirit” that pulls in enemies and deals Anemo damage after a very short delay. It has a fairly long 15 second cooldown, though Sucrose thankfully has means of working around this if necessary.
Her Elemental Burst on the other hand summons a “Large Wind Spirit” which persists on the field for 6 seconds, dealing Anemo damage every 2 seconds; it can also absorb Pyro, Hydro, Electro, or Cryo in order to deal damage of the corresponding element, with the absorption radius being limited to a small distance around the Wind Spirit’s core. The Skill has good suction, and its long duration allows Sucrose to maintain her Elemental Mastery buffs over an extended period.
However, all these aspects come with caveats. For one, it has a long 20 second cooldown. The limited absorption radius and short duration means that it can be difficult at times to rely on it for reaction setups, and it can also absorb an undesirable element and disrupt reaction setups. Finally, the ability also has strong knockback, meaning it can end up scattering enemies that it is designed to group!
Her Hexerei Passive is fairly minor, with it largely existing so she can be paired with other Hexerei characters to activate their Passives; it allows her to provide a small buff of 5.71428 DMG% Bonus with Skill, and an ever so slightly larger buff of 7.14285% DMG% Bonus with her Burst.
While her Normal and Charged Attacks are unremarkable, their ability to apply Anemo is vital to certain reaction setups; her Normal attacks are relatively quick, while the relatively lengthy cast time on her Charged Attack is compensated for by its lack of an internal cooldown - allowing it to apply Anemo at any time.
Finally, as a 4* that can both be freely obtained and is available since the start of the game, Sucrose’ Constellations are relatively accessible and worth discussion. Thankfully, they are mostly very minor. C1 offers her Skill an extra charge - this can help provide additional Energy if short, or allow Sucrose to temporarily sustain the use of her Skill at a quicker pace than its cooldown. C2 extends her Burst duration by 2 seconds and thus lets it hit one more time, which can be useful for certain reaction setups. C4 allows Sucrose to shorten her Skill cooldown by 1-7 seconds every 7 Normal Attacks, and is typically not used due to Sucrose rarely staying on-field. Her capstone Constellation grants a nice 20 DMG% Bonus on the Element absorbed by her Burst, with Hexerei characters gaining an additional 8.57142%; however, it is infrequent that her Burst is used to absorb the element of the team’s damage dealer.
And for a fun note on trivia; If wondering about why the numbers on her Hexerei Passive are like that, they’re randomly selected parts of the decimals when dividing 1 by 7, the output of which consists of .142857 repeating endlessly. This corresponds to the 7 times Sucrose ran the experiment in her Witch’s Homework quest, which in turn likely corresponds to the 7 elements of Teyvat and alchemy allowing one to transmute between them.

Characters part of the Hexerei faction, after completing their Witch’s Rite Story Quest, unlock special Passive abilities in combat. These are activated when there are 2 Hexerei characters on the team, with Sucrose themselves counting as one.
Sucrose’s Skill can be animation cancelled with either a Dash or Jump, with the Wind Spirit still attacking after its short delay; however, swapping immediately after a Dash-cancelled Skill can result in Sucrose not being on-field when the hit occurs if executed perfectly. This means effects that require Sucrose to be on-field to trigger, like Viridescent Venerer, will not be applied in such cases.
There is also a bug on her first Normal (referred to here with N1) where it can randomly whiff with no attack coming out if spam clicking the Normal Attack button. This does not occur if only using one click to cast her N1.
Sucrose’s Skill can almost uniquely be used to Swirl off of the Guoba summoned by Xiangling’s Elemental Skill, as it self-infuses with Pyro before launching its Pyro breath - enabling Sucrose to apply her buffs and debuffs in situations where it would otherwise be impossible if already being used with Xiangling. The timing for this is to cast Sucrose’s Skill immediately as the exclamation point appears and Guoba starts breathing in.
An even more niche interaction is Sucrose’s Burst and Skill accelerating enemies when pulling in enemies above it, increasing their fall damage taken. This can be exploited with characters able to lift enemies into the air such as Jean, though is rarely relevant in endgame combat.
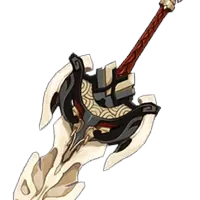
 Thrilling Tales of Dragon SlayersR5One of Sucrose’s strongest Weapon choices when supporting a DPS unit that scales with ATK, especially since most of Sucrose’s rotations naturally have her preceding the Main DPS anyway to pass the buff.
 A Thousand Floating DreamsR1Provides Sucrose a massive dose of Elemental Mastery, which can be shared to the team alongside the Catalyst’s own teamwide Elemental Mastery buff.
 Favonius CodexR5Can be used when as a generalist support for non-ATK scaling carries, or when Sucrose requires Energy to Burst every rotation. Requires Sucrose to build CRIT Rate to trigger consistently.
 Wandering EvenstarR5While Thrilling Tales of Dragon Slayers is typically preferable on teams that benefit from ATK scaling. Wandering Evenstar can be a good option on teams with multiple damage dealers or when rotations cannot accommodate Sucrose going before the DPS.
 Sunny Morning Sleep-InR1Provides Sucrose with an obscene amount of Elemental Mastery, but little else; Note that unlike other buffs that are triggered by her Skill, the 96 Elemental Mastery on Skill hit is not included in her Ascension 4 Passive’s Elemental Mastery share if her Skill is only cast once.
Starcaller’s Watch is a lesser version of this Weapon.
Sunny Morning Sleep-InR1Provides Sucrose with an obscene amount of Elemental Mastery, but little else; Note that unlike other buffs that are triggered by her Skill, the 96 Elemental Mastery on Skill hit is not included in her Ascension 4 Passive’s Elemental Mastery share if her Skill is only cast once.
Starcaller’s Watch is a lesser version of this Weapon. Sacrificial FragmentsR5Has the most Elemental Mastery of the 4-star Catalysts if other supportive options are not available; can also allow Sucrose to recast her Skill to help with Energy needs.
 Viridescent VenererBy far the best choice for Anemo Supports for its gigantic RES Shred provided the team’s primary damage source is an Element that can be Swirled - in other words, Pyro, Electro, Cryo, or Hydro.
 InstructorThis is a great alternative for Sucrose in teams where the main source of damage cannot be Swirled such as a Nefer (Dendro) composition. Sucrose still needs to trigger a Swirl to activate the Set's buff; in the above example she can Swirl Hydro from Aino or Columbina.
 Deepwood MemoriesAn alternative for Sucrose if used in teams where the main source of damage is Dendro. While there are typically better holders for this Set, it does not require Sucrose to Swirl at all for its buff; this can make it significantly easier to use.
 Sands
Sands Goblet
 Circlet
 EM
EM Level
LevelUsage rates are gathered from player profiles connected to Enka and refreshed periodically. They describe what people are running, not what performs best.
Last statistics update: 04/September/2026
Based on Enka-connected profiles matching this character. Usage rate describes observed profile popularity, not optimality. Characters may have multiple viable builds, and guide recommendations can differ from popularity.
Sample: 131,876Favonius Codex4.8% Mappa Mare3.9%
 Apprentice's Notes2.8%Viridescent Venerer72.6%Viridescent Venerer [2PC] + Rainbow3.9%Instructor2.9%
 C05.7%C17.4%C28.3%C38.5%C48.1%C57.5%C654.4%
 Mona
Mona Hydro SupportHexerei
Relative team damage chart. Best listed team is treated as 100%.
 Mavuika ComparisonsTeam DPS compared solely within this team group
 100 ER
 237 ER
 164 ER
 214 ER
 Mavuika
 Bennett
 Iansan
 Iansan
 Bennett
 Citlali
 CitlaliMavuika
 Mavuika100 ER188 ER220 ER214 ERMavuikaMavuikaBennettBennettCitlaliCitlaliBennettSucroseSucrose
 MavuikaMavuikaMizuki ComparisonsTeam DPS compared solely within this team group
 100 ER
 203 ER
 100 ER
 114 ER
 Odette
 Traveler Cryo
 Traveler Cryo
 Faruzan
 Yumemizuki Mizuki
 Yumemizuki Mizuki
 Faruzan100 ER100 ER100 ER125 EROdetteTraveler CryoTraveler CryoSucroseYumemizuki MizukiYumemizuki MizukiSucrose
 Flins TeamNo DPS Comparisons
 119 ER
 100 ER
 194 ER134 ER
 Columbina
 Columbina
 Ineffa
 IneffaSucrose
 FlinsFlins
 FlinsFlinsFlinsFlinsFlinsSucrose
 Nefer TeamNo DPS Comparisons
 100 ER
 215 ER185 ER100 ER
 Lauma
Lauma LaumaColumbinaColumbinaSucrose
 NeferNeferNeferNefer
 NeferColumbinaArlecchino TeamNo DPS Comparisons
 100 ER246 ER100 ER229 ER
 ArlecchinoBennettBennettSucrose
 Mona
Mona MonaArlecchinoArlecchinoArlecchinoArlecchinoMonaArlecchinoArlecchinoArlecchino



 Cryo
Cryo