Character stats
Level Stats
Base HP12,699
Base ATK356
Base DEF782
CRIT Rate19.2%

Best Varesa build, teams, weapons, artifacts, combos, rotations, and gameplay notes for Genshin Impact.
 5-star
 Electro
 Catalyst
Last updated: September 13, 2026

Varesa is a 5-star character from the Electro element who wields the Catalyst weapon. Varesa was added to the game with the 5.5 patch.
A laid-back orchard manager and warrior of the Collective of Plenty. An aspiring hero who hungers for justice... and lots and lots of food!
Talent text and per-level multipliers, straight from the character data.



Passive talents are shown in full as kit cards.




All constellation names and descriptions in full for quick reference.






Highly mobile gameplay.
Easy to play.
Flexible rotations.
Poor F2P Weapon Options.
Wants contested supports such as Iansan and Chevreuse.
Varesa is a 5-star Electro Catalyst user who is most commonly played as an on-field Main DPS. Her core gameplay loop involves her being able to plunge after a Charged Attack, building up to an enhanced state where her damage is buffed and she can use a special Elemental Burst. As a Natlan character, she has access to and utilizes Nightsoul mechanics.
Varesa’s Nightsoul mechanics revolve around her Plunge Attacks. To that end, she has a unique Charged Attack - using it allows her to launch herself into the air after it hits. While it can feel cumbersome to use, her Elemental Skill solves this: it comes with two charges, and Varesa can cast it to shortcut into a faster Charged Attack with the Normal Attack input that does not consume stamina. Their importance becomes clear when noting that landing Plunge Attacks and using an Elemental Skill through which she can access it generate 25 and 20 Nightsoul points respectively. Together, they make hitting her Nightsoul point cap of 40 a trivial matter; a good thing, considering she can spend them just as quickly!
When using a Plunging Attack when at maximum Nightsoul points Varesa gets put in the Fiery Passion state, which is also considered as her Nightsoul's Blessing. This gives her a bonus charge of her Elemental Skill and a good boost to her multipliers, but its 15 second duration is deceptive; more often that not, it is ended almost immediately as she also consumes her Nightsoul points and leaves the Fiery Passion state after launching her Plunge Attack. The reward for doing this is worthwhile - on its way out, the state leaves Varesa with Apex Overdrive. This can be consumed during a brief window after landing a Plunging Attack, and doing so allows Varesa to cast a special variant of her Elemental Burst that is also considered a Plunging Attack for only 30 Energy. Considering her Burst normally costs 80 Energy and the special Burst’s multiplier is only slightly lower than even her Fiery Passion-buffed Burst, this is a more than worthwhile tradeoff.
With that, the core of Varesa’s gameplay loop takes shape: she uses her Skill to swiftly connect into a Charged Attack and Plunging Attack following it, putting her in the Fiery Passion State. She can then use the bonus Elemental Skill charge it grants to do this again with access to her improved multipliers, rounding it off with her special Burst as soon as she lands.
Her Passives thankfully don’t add any further complexity, and are just simple bonuses. The first Ascension Passive increases her Plunging Attack DMG by a portion of her ATK after using Skill, which is further powered up if she is in the Fiery Passion state. Her second Ascension Passive provides her a 35% ATK buff when a Nightsoul Burst is triggered which can stack up to two times and lasting 12s; Varesa will generally be able to maintain one stack of this when it matters even as the sole Natlan unit on a team, though uptime on both stacks can prove difficult even with 3 Natlan characters. While Xilonen makes it a cinch, the buff isn’t major enough that Varesa has to go out of her way to partner up with her.
Finally, note that while her standard Elemental Burst is almost never used, her standard Charge Attack does occasionally see play if looking to extend Varesa’s field time. She also has a Hold Skill, though this is primarily for overworld exploration; its only usage in combat is its ability to consume Nightsoul points when briefly Held to trigger related effects, such as Obsidian Codex.

Nightsoul is a mechanic involving Natlanese characters with two distinct components: “Nightsoul Blessing” and “Nightsoul Burst”. Nightsoul Blessing is a state allowing for the generation and/or consumption of Nightsoul points, with many Natlan character kits revolving around triggering effects based on this in some way.
Nightsoul Bursts, on the other hand, is an effect triggered whenever dealing Elemental damage while a Natlanese character is in the party, with the cooldown on its trigger decreasing from 18 to 12 to the minimum of 9 for each Natlanese character present; note that Pyro Traveler is not considered to be Natlanese despite access to Nightsoul mechanics. While having no effect on its own, many character abilities and some artifact set effects only activate when a Nightsoul Burst is triggered, often granting bonuses which can vary in usefulness but are rarely tied to core functionality.
Varesa’s gameplay loop can be summarized as follows:
Setup buffs before Varesa’s field time,
Use Skill then input a Normal Attack to shortcut into a Charged Attack, followed by a Plunging Attack to enter Fiery Passion,
Repeat the above steps with the Skill charge granted by Fiery Passion,
If fully buffed and she has sufficient Energy, cast her special Burst,
Either repeat the above with her other Skill charge, rotate through supports again, or extend field time through using her standard Charged and Plunging Attack.
The charge based nature of Varesa’s Skill affords her a lot of flexibility in her rotations, as she can use them in quick succession or separate their uses to match her team or combat situation.
It’s worth noting that if Varesa is at her Nightsoul point maximum when starting a Plunge Attack, she will enter Fiery Passion during that Plunge Attack; this helps Varesa not waste Nightsoul points.
The notation used to refer to combat inputs in this section will be as follows:
The following combos all execute the same basic gameplan detailed above; the nuance between them primarily comes down to rotation time and how often her special Burst is used. While her special Burst can be used every other Plunging Attack, it can sometimes be beneficial for Varesa to instead opt to focus on offensive stats at the expense of the ER she would need to Burst that frequently.
In practice, considering Varesa’s aforementioned flexibility and different Energy situations between different encounters, these combos are rarely airtight. Often, it is best to use Varesa’s special Burst if it is available after a Plunging Attack and she is fully buffed - provided that she is not saving it for a DPS window during a boss fight. If needing to fill out time in a rotation for ally cooldowns, her standard Charged Attack is used. Furthermore, it is important to keep in mind that after using her Skill, her Charged Attack can be accessed through her Normal Attack input.
If looking for more structure, the following section details her specific attack strings and how they are used in tandem.
E → CA → P → E → CA → P → sQ (Footage shown in combo button)
Varesa’s standard combo during her field time; the first Plunging Attack sequence puts her in Fiery Passion, which is followed up by a second set with the Fiery Passion buff and ended with special Burst if available. If using Obsidian Codex, the first Skill in this sequence can be briefly Held to ensure uptime.
CA → P
Varesa’s manual Charged Attack and the following Plunging Attack can be used if needing to fill out time in rotations.
J → P
An option when Varesa is played with Xianyun over the above, allowing Varesa to skip her Charged Attack. Note that if Varesa has her Skill ready she should still use her Skill and Charged Attack to become airborne due to its Nightsoul point generation.
E → CA → P → sQ
Used if Varesa starts her rotation with Nightsoul points already accumulated from a previous rotation.
Due to three of Varesa’s best teammates - Iansan, Mavuika and Durin - having 18-second cooldowns, and many of her other teammates having decently long-lasting buff durations, Varesa’s combos are often fit into 18 seconds as follows:
Opener - E CA P → Supports
Then, alternate between the following during Varesa’s field time:
E CA P sQ → E CA P → E CA P sQ → E CA P → E CA P sQ (→ CA P)
E CA P → E CA P → E CA P → E CA P sQ → CA P → CA P
The manual Charge and Plunge Attack in the first part of the rotation is optional, and can especially be better to skip if fitting 3 special Bursts in.
This combo is listed out assuming you start from full Energy; as detailed above, the Burst usage is highly flexible and dependent on Energy and battle situation. Fitting three of Varesa’s special Bursts into one rotation allows her to relatively frontload her damage and maximize the use of buffs that may only be active every other rotation, such as Thrilling Tales of Dragon Slayers and Widsith.
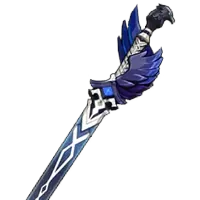
 Lost Prayer to the Sacred WindsR1103.08%DPS - Team103.63%DPS - SoloSwaps to Long Night's Oath Artifact Set.
 Long Night's OathOne of two closely performing Artifact options for Varesa, with the choice coming down to Substats and build. Long Night’s Oath provides 100% Plunge DMG Bonus for Varesa; this makes it better when using CRIT Rate weapons to avoid overcapping as well as her signature due to it already providing Varesa with a ridiculous amount of CRIT DMG.
 Obsidian CodexObsidian Codex provides an obscene 40% CRIT Rate, which can make it better if struggling to balance CRIT Ratios. A short Hold Skill can be used to consume some Nightsoul points and activate the Set effect at the start of her field time.
 Sands
Sands Goblet
 Circlet
 CRIT Rate
 CRIT DMG
 ATK%Normal AttackBurst
| 2 Special Burst per Rotation (Average) | Burst as available | |
|---|---|---|
| With Iansan | ~130-140% | 100% |
| With Fischl/Ororon | ~110-120% | 100% |
| Solo Electro | Not Recommended | 100% |
| Reduction from team Favonius trigger | -10% | - |
 Varesa
 Iansan
 Chevreuse
 Mavuika
Usage rates are gathered from player profiles connected to Enka and refreshed periodically. They describe what people are running, not what performs best.
Last statistics update: 04/September/2026
Based on Enka-connected profiles matching this character. Usage rate describes observed profile popularity, not optimality. Characters may have multiple viable builds, and guide recommendations can differ from popularity.
Sample: 208,764 The Widsith36.6%
 Vivid Notions33.6%
 Skyward Atlas2.3%
 Kagura's Verity1.2%Long Night's Oath81.9%Obsidian Codex9.6%Long Night's Oath [2PC] + Rainbow2.7%Obsidian Codex [2PC] + Rainbow0.9%C079.2%C19.5%C27.6%C30.7%C40.3%C50.0%C62.6%IansanElectro SupportNightsoulMavuika
 Pyro DPS, SupportNightsoul
 DurinPyro Sub-DPS, SupportHexerei
Relative team damage chart. Best listed team is treated as 100%.
Mavuika TeamsMavuika (Simple) is 100% Baseline for all team comparisons110 ER100 ER125 ER100 ER Chevreuse
 Chevreuse
 Iansan
 Iansan
 Mavuika
 MavuikaVaresa110 ER100 ER105 ER100 ERChevreuseChevreuseIansanIansanMavuikaMavuikaMavuikaVaresaOther Overload TeamsMavuika (Simple) is 100% Baseline for all team comparisons125 ER100 ER125 ER100 ERChevreuseChevreuseIansanIansan
 Durin
Durin DurinDurinVaresa125 ER
 207 ER118 ER179 ER
 ChevreuseChevreuseIansanIansan
 BennettVaresa
 BennettVaresaVaresa
 Furina TeamsMavuika (Simple) is 100% Baseline for all team comparisons120 ER
 170 ER
 162 ER103 ER
 Furina
 FurinaIansanIansan
 XilonenXilonen
 XilonenVaresa120 ER186 ER
 206 ER109 ERFurinaFurinaIansanIansan
 XianyunXianyun
 XianyunVaresa









 Geo
Geo


 Anemo
Anemo