


Body

Feet

Planar Sphere
Link Rope

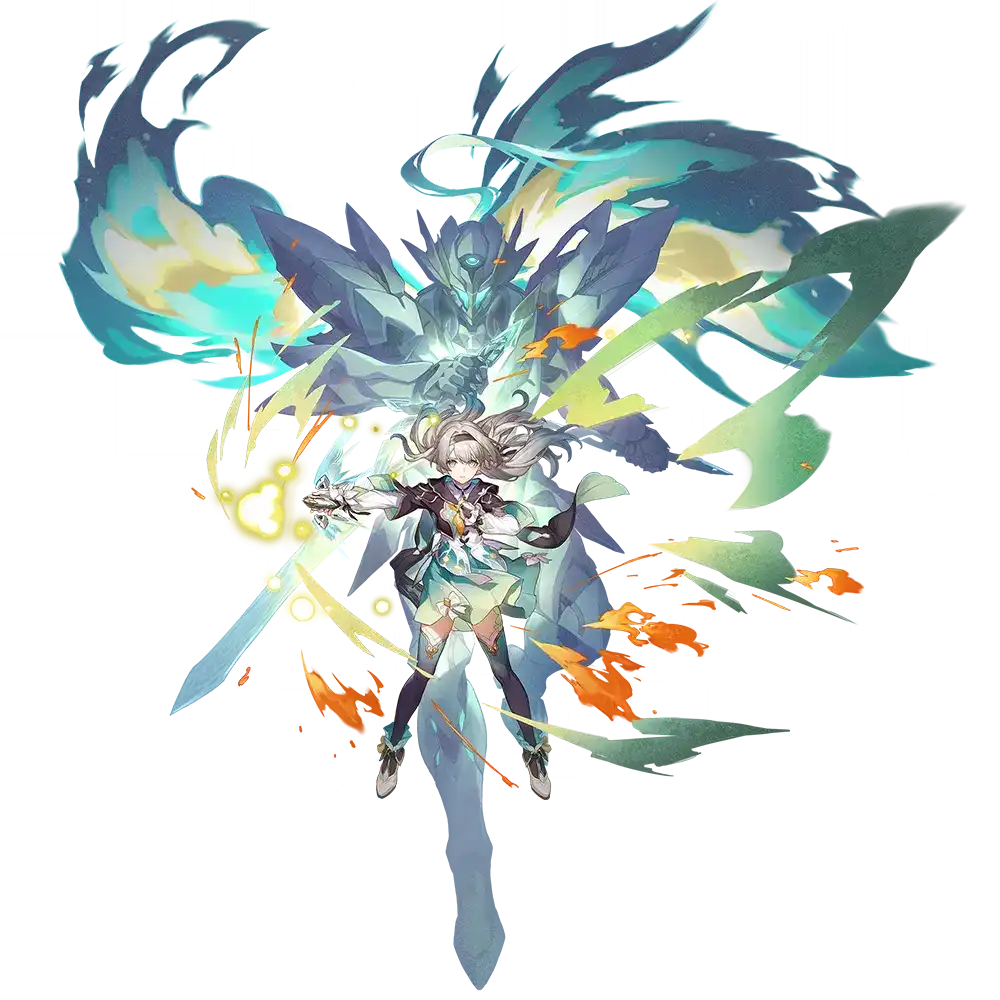
A member of the Stellaron Hunters and a young girl clad in a mechanical armor "SAM." Born as a weapon, she's afflicted with the agony of Entropy Loss Syndrome due to genetic modification. She joined the Stellaron Hunters in search of the meaning of life, relentlessly pursuing ways to defy fate.
Firefly has at least one video guide available, so if you prefer this sort of medium to learn more about a character, check it out:
Last review update
Patch 3.1
Last major build/calcs update
Patch 3.0
Last profile update*
March 4th, 2025
*Profile update means smaller edits to relics, stats, synergies or teams that don't require new calculations.
To learn more about Firefly check the sections below. Use the tabs to quickly switch to the kind of information you're looking for - kit, traces, review or build guides.
Profile
Review
Build and teams
MoC/PF/AS Statistics
Calculations
Profile
Order: Flare Propulsion
Single Target
Energy gain: 20
Break: 10
Fyrefly Type-IV: Pyrogenic Decimation
Single Target
Energy gain: 0
Break: 15
Order: Aerial Bombardment
Single Target
Energy gain: 0
Break: 20
Fyrefly Type-IV: Deathstar Overload
Blast
Energy gain: 0
Break: 30 + 15 adjacent
Fyrefly Type-IV: Complete Combustion
Enhance | 240 energy cost
Energy gain: 5
Break: -
Chrysalid Pyronexus
Defense
Energy gain: 0
Break: -
Δ Order: Meteoric Incineration
Support
Energy gain: 0
Break: 20
Module α: Antilag Outburst
Module β: Autoreactive Armor
Module γ: Core Overload
In Reddened Chrysalis, I Once Rest
Eidolon 1
When using the Enhanced Skill, ignores 15% of the target's DEF. And the Enhanced Skill does not consume Skill Points.
From Shattered Sky, I Free Fall
Eidolon 2
When using the Enhanced Basic ATK or the Enhanced Skill in Complete Combustion state to defeat an enemy target or cause them to be Weakness Broken, SAM immediately gains 1 extra turn. This effect can trigger again after 1 turn(s).
Amidst Silenced Stars, I Deep Sleep
Eidolon 3
Skill Lv. +2, up to a maximum of Lv. 15. Basic ATK Lv. +1, up to a maximum of Lv. 10.
Upon Lighted Fyrefly, I Soon Gaze
Eidolon 4
While in Complete Combustion, increases SAM's Effect RES by 50%.
From Undreamt Night, I Thence Shine
Eidolon 5
Ultimate Lv. +2, up to a maximum of Lv. 15. Talent Lv. +2, up to a maximum of Lv. 15.
In Finalized Morrow, I Full Bloom
Eidolon 6
While in Complete Combustion, increases SAM's Fire RES PEN by 20%. When using the Enhanced Basic ATK or Enhanced Skill, increases the Weakness Break efficiency by 50%.
Review
Top-tier damage output with proper team setup,
Extremely overloaded and synergistic kit,
Can apply Fire Weakness easily and regularly,
Deals tremendous Toughness damage consistently,
Entirely self-sufficient when it comes to Energy,
Lots of free SPD boosts and Action Advances,
Increased durability with near-constant free Damage Reduction and Effect RES.
Non-functional without the Harmony Trailblazer or Fugue,
The best final teammate option is Ruan Mei,
Needs a lot of specific stat investments to reach her peak,
Absolutely useless against enemies who lock their Toughness bars.
Firefly is a remarkable Break-focused unit. She can regain her Ultimate extremely fast with her Skill's percentage restore and has a natural 25% Action Advance when using said Skill, though it also consumes HP to use. With her Ultimate, she immediately Advances her turn by 100% and gains vastly increased SPD, Damage Reduction, Effect RES, and Weakness Break Efficiency when attacking enemies. During her Ultimate, she will also be able to heal herself when using her Enhanced attacks, and she will implant a Fire Weakness onto the main target of her Enhanced Skill. She has a very synergistic kit that lends itself to having many ways of improving over time.
Ah, finally, everyone's favourite Kamen Rider, Gundam, Orbital Frame, Samfly is here! There's a frightening lot about her that's great and a little about her that's somewhat rigid for now, but all of this culminates in one of the best characters we've gotten so far. To leave it at that wouldn't be telling the whole story, but make no mistake, Firefly has no trouble wiping the floor with pretty much everything that breathes.
Her kit is very interlinked, so we'll start with Firefly's Ultimate. It has a colossal cost of 240 Energy, though this is not as limiting as it may initially seem. Upon using the Ultimate, Firefly enters the Complete Combustion state. She gets a 100% Action Advance, meaning it is now her turn, and she gains up to 60 SPD. She gains access to an Enhanced Basic ATK and Enhanced Skill, and the Weakness Break Efficiency of these Enhanced attacks is increased by 50% and the Break DMG received by enemies is increased by up to 20%.
This Ultimate state gets a separate countdown timer in the Action Order, much like Robin's Ultimate, with a fixed SPD of 70. The Ultimate may not be recast before it expires, but if you defeat all enemies within a cycle in Memory of Chaos, you can extend the effects of the Ultimate as the fixed SPD countdown gets thrown back down the Action Order. By default, this allows SAM to perform 3 Enhanced attacks per Ultimate usage.
Her Talent provides her with DMG Reduction based on how low her health is, capping out when her health is at or below 20% Max HP and giving her up to a 40% DMG Reduction. However, during her Ultimate she will always have the maximum amount, and additionally gain 30% Effect RES on top. When her Energy reaches 100% in combat, all of her debuffs will be dispelled, meaning she will almost never be subject to pesky stat-reducing debuffs when she goes to destroy enemies in her Ultimate. This Talent will also ensure Firefly starts every fight with at least 50% Max Energy if she is below 50% when combat starts.
Firefly's Skill consumes 40% Max HP to deal up to 200% ATK to a single target, and recovers up to 60% Max Energy on use. If there's not enough HP, the HP is set to 1. Using this Skill will also Action Advance Firefly by 25%. This is why the aforementioned 240 Energy cost of the Ultimate is less relevant, as it will always take at most 2 Skill uses to regain Firefly's Ultimate, and with the Action Advance she can further expedite the process of getting back into her Complete Combustion state.
While she is in the Complete Combustion state, this Skill is Enhanced. It will now restore 25% Max HP on use, and will apply Fire Weakness to the primary target. It becomes a Blast AoE, dealing... Oh, huh. (0.2 x Break Effect + 200% ATK) to the primary target, and half of this to adjacent targets. The Break Effect taken into account for this attack caps at 360%.
Okay, this is the point at which I have to remind you that Firefly is an entirely Break-focused unit with no inherent CRIT scaling in her kit - you’re hitting for peanuts before an enemy is Broken. Samfly is designed to take advantage of the Weakness Broken state by dealing Super Break DMG, stacking a lot of SPD and Break Effect to maximize the damage you can deal and speed up the process of Breaking foes again. The immense bonuses she gets from her kit make her expertly suited for the task of abusing Broken foes, especially with the guaranteed Fire Implant on her Enhanced Skill, as well as the ATK conversion Bonus Trace.
We'll skip ahead to her Bonus Traces since it's relevant to illustrate her Break focus. Her A2 will allow SAM in Complete Combustion to deal 55% of the original Toughness damage to enemies that are not weak to Fire. This is not always useful since her Enhanced Skill Implants Fire Weakness, but it will affect the adjacent that don't get Implanted. The A4 states that while SAM is in the Complete Combustion state with 200%/360% Break Effect or more, attacking a Broken enemy will convert the Toughness reducing damage of this into a single instance of 35%/50% Super Break DMG. The A6 also has a stat conversion, turning every 10 points of ATK beyond 1800 into an extra 0.8% Break Effect.
So what does all this mean? Samfly is designed to take advantage of the Weakness Broken state by dealing Super Break DMG, stacking a lot of SPD and Break Effect to maximize the damage you can deal and speed up the process of Breaking foes again. The immense bonuses she gets from her kit make her expertly suited for the task of abusing Broken foes, especially with the guaranteed Fire Implant on her Enhanced Skill, as well as the ATK conversion Bonus Trace.
Here's the primary issue: Firefly's intrinsic Super Break is not that strong on its own. It sounds like it'd be quite strong but it's surprisingly weaker than her kit would imply. This is exacerbated by the completely fake damage her upfront multipliers give because, as mentioned before, she is an entirely Break-focused unit. She can very quickly and easily get enemies Broken, but she appreciates some assistance to continue the decimation after they're already Broken.
This means Firefly needs her emotional support raccoon, the Harmony Trailblazer. The immense amount of Break Effect that the Harmony Trailblazer grants alongside the Super Break provided by the Backup Dancer effect is exactly what Firefly needs to destroy enemies. The Super Break from both characters are two separate instances, so it results in a lot of damage after enemies are Broken. The Trailblazer's A6 also results in enemies getting delayed further after allies Break them, giving even more time to deal Super Break.
This is the only truly non-negotiable teammate for Firefly. The difference with and without Harmony MC is staggering, like, Firefly is not the same character without the Trailblazer by her side. To better illustrate this, Firefly’s Super Break is at 50%, while Harmony MC’s Super Break can be as high as 160%. It’s genuinely not close.
The upside is that everyone has the Harmony Trailblazer, so as far as being tied to a single support character goes, it could be much worse. They provide everything that Firefly wants and also contributes a significant amount of both Toughness damage and Super Break damage of their own.
Fugue can also be used instead of Harmony Trailblazer and while you lose on the raw Super Break multipliers if you do so, you gain Exo-Toughness and other fancy tools that Fugue brings to the table. There's no right and wrong with picking either of Fugue of Harmony Trailblazer, as both have their pros and cons - so it's up to you.
In terms of sustain characters, it's also fairly cut and dry as it's just shrimply the best to bring Lingsha or Gallagher, for all the usual reasons: great sustains with massive Toughness damage and bonus team Break damage. That last point is particularly relevant as Firefly is constantly Implanting Fire Weakness onto enemies, meaning Gallagher and Lingsha are also able to exert their full power at every turn. However keep in mind that between Lingsha and Gallagher, Gallagher does a lot of the heavy lifting in terms of regaining SP for Firefly and Lingsha wants to use them more.
You do have other options if Gallagher is occupied by another team or if you don't have him; the usual suite of premium sustains are always good, though due to Firefly's rather exorbitant SP spending, I'd recommend going for the fully SP positive sustain options.
For the last teammate slot, you do have options, but the obvious best choice is Ruan Mei. She is the best choice for this slot. Granting Firefly even more SPD, even more Weakness Break Efficiency, and RES PEN on top of all of that results in the team dishing out frankly absurd damage. Thanatoplum keeps enemies Broken for longer as well, and Weakness Break Efficiency acts as a multiplier on the damage of Super Break. Do note that Ruan Mei's and Firefly's Weakness Break Efficiency bonuses are additive with each other, but it's still extremely potent.
To give some context on the other options for this team slot, there are two other issues that Firefly has at base; the first is that she is extraordinarily fast with additional Action Advance to boot, making her consume substantially more SP than you may be expecting. Ruan Mei is not massively SP-positive, but the damage she provides makes it worth the extra hassle. You really have to carefully consider your SP economy, or you'll end up in a terrible spot without being able to continue your offence right as the enemy gets Broken, leading to a colossal loss of damage.
The second issue is that Firefly's Weakness Implant may make an enemy weak to Fire, but it does not apply the associated RES Down that comes with natural Elemental Weaknesses, meaning if an enemy is highly resistant to Fire, even if they're now taking Toughness damage, they'll still end up reducing Firefly's Super Break DMG once they're Broken; if an enemy has 60% RES to Fire, Implanting Fire Weakness with Firefly will not really do much to alleviate the issue, but Ruan Mei’s RES PEN can greatly assist with this.
To that end, if you do not have Ruan Mei available for the team, the next best choices are the classic debuffing supports of Pela and Silver Wolf. They’re both definitively worse than Ruan Mei, but they are passable alternatives. Both of them provide massive DEF Shred which vastly improves the damage of Super Break and can also alleviate the natural Resistances of an enemy if you are trying to use Firefly to brute force content, and both of them are relatively SP positive, allowing Firefly to stay on the offensive for much longer. In addition to that, since they debuff the enemies, it's not possible for SAM to outspeed the benefits these actions provide.
Some supports that don't really work as well would be Bronya and Asta, primarily because they're too SP hungry and their buffs disappear in a flash on SAM. To illustrate this point, there is a certain SPD breakpoint that SAM can reach to act an extra time in the Complete Combustion state, and it's around 210 SPD. That's... quite a ridiculous amount of SPD, and it does need a certain amount of investment to reach, but with that kind of frequency of attacking, any buffs applied directly to SAM will vanish before you know it, making it largely redundant to even try it. If you are a completely, absolutely new player without access to anything else, Asta may be used, but please endeavour to replace her with at least Pela as soon as you can, it is night and day.
There aren't that many dedicated Break supports at the moment, so the optimal setup for Firefly at this point in time is extremely specific and inflexible, with the only team slot that does have some flexibility being limited to 3 of the most highly coveted support characters in the game. It is not that easy to substitute characters beyond that point, and results in a steep drop off in damage and ease of play. That said, Firefly's kit is so overloaded with fantastic free effects that any new characters that can facilitate this Super Break playstyle will mesh extremely well with what SAM can do.
I've left Eidolons for last, because as usual I don't think they're necessary, but Firefly in particular has a very appealing set for people looking to vertically invest. E1 is the one to go for; when using the Enhanced Skill, the DMG dealt ignores 15% DEF, and more importantly, the Enhanced Skill will no longer consume Skill Points. This alone opens up the possibility for far more SP-heavy support characters like Lingsha, and makes it that much easier to reach 100% DEF reduction with the right setups. E2 is also extremely impressive, making it so that whenever an enemy is defeated or Broken while under Complete Combustion, SAM gets an Extra Turn, with a 1-turn cooldown between triggering this effect. Basically, you get Seele's Resurgence but without the need to worry about SP (since you're already past E1 at this stage).
E3, E4, and E5 are largely filler on the way to E6 (though E4's 50% Effect RES is quite nice). E6 grants SAM 20% Fire RES PEN under Complete Combustion, and provides an additional 50% Weakness Break Efficiency when using either Enhanced attack, for a new total of 100% Weakness Break Efficiency, literally doubling the Toughness damage of the attacks. This is arguably not as impressive as the likes of Acheron E6 or Boothill E6, but factoring in what you got along the way, SAM is basically completely unstoppable at this point.
Light Cone options are also surprisingly cut and dry this time around, as there's only really one choice for you if you're not going for her signature, and that's On the Fall of an Aeon. It just gives her everything that she needs and is completely free for everyone, the only downside is that it's hotly contested so you may need to yoink it from another Destruction character if you want to have the best on Firefly.
The conversation surrounding the choice between E1 and S1 is always tricky because it's really ultimately up to the individual player. Both choices are very good with both providing a great amount of benefit to Firefly. S1 is easier to go for because the odds of pulling it are higher, but for Firefly, E1 is probably the stronger choice overall albeit more expensive on average. By no means do you need either, and we're not evaluating her with these in consideration, it's just for the devoted few. As always 'make a choice you know you won't regret' etc etc, you know the drill by now.
Actually, if you don’t already have Ruan Mei, get Ruan Mei first.
With Firefly's release, we've had back to back to back-banger characters, able to tackle pretty much everything in the game without reprieve. This is one of the best characters to go for and have on hand because, like with Acheron, Feixiao and Boothill, it's borderline impossible to stop Firefly from eviscerating everything. Enemy without Fire Weakness? No problem at all, here's a Fire Weakness. Enemy with really high Fire RES? Ruan Mei sends her regards. Multiple Break bars and shared HP pools? Firefly missed the part where that's her problem.
It would take enemies permanently locking their Toughness bars or having full immunity to Fire for Firefly to be completely put out of commission, and that's unlikely to happen because it'd affect almost every other DPS character as well.
She truly has set the seas ablaze.
Honkai: Star Rail is a game where team building matters most and while our tier list takes the optimal setup into account, a lot of characters can work and do well - even those ranked lower - when you invest into them. Also for story or lower difficulties of Simulated Universe, you don't need to worry about ratings and tiers. You can safely clear that content even with F2P characters as long as you build your team correctly.
Character at 5★ are rated at their Eidolon 0 with their best in slot non-limited Light Cone.
Available ratings:
Build and teams
The numbers show the percentage damage output increase/decrease compared to the Light Cone marked with 100%.
117.76%
Increases the wearer's Break Effect by 60/70/80/90/100%. When the wearer deals Break DMG to an enemy target, inflicts Routed on the enemy, lasting for 2 turn(s). Targets afflicted with Routed receive 24/28/32/36/40% increased Break DMG from the wearer, and their SPD is lowered by 20%. Effects of the similar type cannot be stacked.
Source: Event Warp (limited)
100%
Whenever the wearer attacks, their ATK is increased by 8/10/12/14/16% in this battle, up to 4 time(s). When the wearer inflicts Weakness Break on enemies, the wearer's DMG increases by 12/15/18/21/24% for 2 turn(s).
Source: Herta's Store
98.14%
Increases the wearer's Break Effect by 28/35/42/49/56%. When the wearer uses their Ultimate, increases CRIT Rate by 15/18.75/22.5/26.25/30%, lasting for 2 turns.
Source: Stellar Warp
The percentage numbers showcase the relative DPS increase when you take into account the set bonus only. For some characters there's no DPS (or its equivalent) available and in that case we listed the sets in the order of priority.
100%
Increases Break Effect by 16%.
If the wearer's Break Effect is 150% or higher, ignores 10% of the enemy target's DEF when dealing Break DMG to them. When the wearer's Break Effect is 250% or higher, the Super Break DMG they deal to enemy targets additionally ignores 15% of the targets' DEF.
90.87%
Increases Break Effect by 16%
Increases the wearer's Break Effect by 16%. When the wearer inflicts Weakness Break on an enemy, regenerates 3 Energy.
100%
Increase the wearer's SPD by 6%. When the wearer hits enemy targets with Fire Weakness, the wearer's Break Effect increases by 40%, lasting for 1 turn(s).
96.77%
Increases the wearer's Break Effect by 16%. When the wearer's SPD reaches 145 or higher, the wearer's Break effect increases by an extra 20%.
SPD (Until Breakpoint) > Break Effect% > ATK%
If you want to learn more about the various stats and breakpoints, expand the section below.
Relic Main stats
Body - ATK%
Best in Slot.
Feet - Speed
Best in Slot.
Planar Sphere - ATK%
Best in Slot.
Link Rope - Break Effect%
Best in Slot.
Outside of BREAK EFFECT%, SPEED, and to a lesser extent ATK% (as it grants BREAK EFFECT% thanks to Firefly's bonus ability) traditional damaging stats like CRIT RATE, CRIT DMG or DMG% have very little use for Firefly as almost the entirety of her damage is pure BREAK or SUPER BREAK damage.
SPEED: Speed is an essential stat for Firefly as it enables her to hit an incredibly potent Speed breakpoint within her kit, allowing her to execute 4 Enhanced Skills during her Ultimate as opposed the the usual 3. This is of course on top of all the usual benefits Speed provides. Almost all of Firefly's damage stems from her Enhanced Skills so it goes without saying every Firefly around is going to want the 4th one and fortunately it's not too hard. Here is how much Speed you'll need exactly in a number of different scenarios to get that 4 skill activation:
210 Speed total while in the Combustion state is the goal,
This translates to needing 150 Speed before the Combustion state (you'll get 60 when entering the state),
When using Ruan Mei or similar permanent Speed buffers that grant roughly 10% you can get away with 140/141 Speed (Ruan Mei grants 10% which is 10.4 Speed for Firefly),
165 Speed (or higher) outside the Combustion state guarantees you an extra action in Cycle 0 of Memory of Chaos.
Break Effect%: When playing Firefly outside of stacking enough Speed to hit her 4-skill breakpoint your other main objective is hitting 360% Break Effect (while buffed) to enable her 50% Super Break bonus ability. Also, thanks to the vast majority of Firefly's damage of course being break-related stacking Break Effect % is simply the best way to increase her damage from raw stats. Outside of Speed and ATK% (as it can become Break), Break Effect is the only stat Firefly really has to pursue so don't be stingy when targetting it even at the cost of all other damage sub-stats you might be used to like CRIT.
ATK%: ATK is a funny stat for Firefly as she doesn't gain close to anything from the traditional uses of the stat with all of her damage being from BREAK and SUPER BREAK. The sole purpose of the ATK stat on Firefly is to gain the additional bonuses from having over 1800 of it from her bonus ability Module y: Core Overload granting her 0.8% Break Effect for every 10 ATK over 1800.
This exchange is quite a good one but still doesn't make stacking Attack as good as stacking pure Break Effect - although if you've got a high base Attack Cone equipped, it can get quite close when comparing sub-stats for example (keep in mind though Firefly's signature has low base ATK for a 5 star Cone so Break will still be better). As a general rule Break is generally always the better option when comparing the two but taking 2 ATK% subs over 1 BREAK EFFECT % sub might be something to consider especially with the high base Attack in mind.
HP: 2600+
Speed: 150 (outside Combustion) / 210 (in Combustion)
165 Speed (or higher) outside the Combustion state guarantees you an extra action in Cycle 0 of Memory of Chaos.
Break Effect: 360%
Ultimate > Skill = Talent > Basic
Module α: Antilag Outburst (A2) > Module β: Autoreactive Armor (A4) > Module γ: Core Overload (A6)
Are you wondering whether you should pull for Firefly Eidolons or her Light Cone? Or maybe there's another option? Then this section is for you!
Ruan Mei E0 > Firefly E1 > Firefly E2 >Firefly S1 = Ruan Mei E1
Below you can find a list of some of the stronger synergies between this character and others.
The teams in the section are generated based on the current Memory of Chaos data we have gathered. If you want to see more statistics about the mode, check the MoC/PF/AS Statistics tab.
Rank 4
App. rate: 10.6%
Avg. cycles: 9.12
Rank 9
App. rate: 2.63%
Avg. cycles: 8.9
Rank 35
App. rate: 0.81%
Avg. cycles: 99.99
Rank 56
App. rate: 0.44%
Avg. cycles: 99.99
Rank 149
App. rate: 0.17%
Avg. cycles: 99.99
Rank 198
App. rate: 0.12%
Avg. cycles: 99.99
Rank 211
App. rate: 0.11%
Avg. cycles: 99.99
Rank 238
App. rate: 0.09%
Avg. cycles: 99.99
Rank 262
App. rate: 0.08%
Avg. cycles: 99.99
Rank 330
App. rate: 0.06%
Avg. cycles: 99.99
MoC/PF/AS Statistics
This section contains information about Firefly performance in the latest Memory of Chaos cycle (3.3), latest Pure Fiction (3.3) and the latest Apocalyptic Shadow (3.3), and the commonly used Relics and Cones in both modes. The page has been last updated on 28.06.2025.
If you want to share your clear information with us, you simply need to fill the form below and provide us with your UID and make your Hoyo profile public - we will automatically parse the MoC/PF clear information from your profile after that!
MoC/PF/AS Stats FormCharacters are ranked with appearance rate, which is how often a character was used in Memory of Chaos by the players who we have scanned, regardless of whether they own the character or not. Ownership rate currently cannot be obtained.
16.82%
Characters are ranked with appearance rate, which is how often a character was used in Pure Fiction by the players who we have scanned, regardless of whether they own the character or not. Ownership rate currently cannot be obtained.
8.36%
Characters are ranked with appearance rate, which is how often a character was used in Apocalyptic Shadow by the players who we have scanned, regardless of whether they own the character or not. Ownership rate currently cannot be obtained.
35.67%
This section lists the characters that were most commonly paired with Firefly in the current phase of Memory of Chaos.
9.09
97.54%
9.09
92.28%
9.14
69.3%
8.9
18.96%
10
17.73%
99.99
0.73%
99.99
0.67%
99.99
0.5%
This section lists the characters that were most commonly paired with Firefly in the current phase of Pure Fiction.
23864
95.11%
23913
93.62%
24257
68.66%
21160
17.33%
20944
13.43%
23240
5.72%
0
1.16%
0
0.75%
This section lists the characters that were most commonly paired with Firefly in the current phase of Apocalyptic Shadow.
3324
96.39%
3346
79.7%
3396
60.51%
3239
30.99%
3280
25.99%
3102
1.26%
3098
1.23%
3269
0.68%
Eidolons data comes from players we have scanned who used Firefly in the current MoC cycle (1788), in the current PF cycle (1206) or in the current AS cycle (5622) and had the character placed in their Profile. Use the switcher below to show Firefly Eidolon performance in the endgame modes (Default MoC) - the percentage doesn't change as it takes into account all modes already.
MoC
PF
AS
26.89%
8.88 cyc.Eidolon 0
13.22%
8.67 cyc.When using the Enhanced Skill, ignores 15% of the target's DEF. And the Enhanced Skill does not consume Skill Points.
50.38%
5.91 cyc.When using the Enhanced Basic ATK or the Enhanced Skill in Complete Combustion state to defeat an enemy target or cause them to be Weakness Broken, SAM immediately gains 1 extra turn. This effect can trigger again after 1 turn(s).
1.53%
5.52 cyc.Skill Lv. +2, up to a maximum of Lv. 15. Basic ATK Lv. +1, up to a maximum of Lv. 10.
0.26%
7.8 cyc.While in Complete Combustion, increases SAM's Effect RES by 50%.
0.12%
4 cyc.Ultimate Lv. +2, up to a maximum of Lv. 15. Talent Lv. +2, up to a maximum of Lv. 15.
7.6%
3.45 cyc.While in Complete Combustion, increases SAM's Fire RES PEN by 20%. When using the Enhanced Basic ATK or Enhanced Skill, increases the Weakness Break efficiency by 50%.
Light Cones are ranked with usage rate among the players we have scanned who used Firefly in the current MoC cycle (1788), in the current PF cycle (1206) or in the current AS cycle (5622) and had the character placed in their Profile. Use the switcher below to show Firefly Light Cones performance in the endgame modes (Default MoC) - the percentage doesn't change as it takes into account all modes already.
MoC
PF
AS
72.34%
9.18 cyc.Increases the wearer's Break Effect by 60/70/80/90/100%. When the wearer deals Break DMG to an enemy target, inflicts Routed on the enemy, lasting for 2 turn(s). Targets afflicted with Routed receive 24/28/32/36/40% increased Break DMG from the wearer, and their SPD is lowered by 20%. Effects of the similar type cannot be stacked.
Source: Event Warp (limited)
25.04%
9.33 cyc.Whenever the wearer attacks, their ATK is increased by 8/10/12/14/16% in this battle, up to 4 time(s). When the wearer inflicts Weakness Break on enemies, the wearer's DMG increases by 12/15/18/21/24% for 2 turn(s).
Source: Herta's Store
1.65%
9 cyc.Increases the wearer's Break Effect by 28/35/42/49/56%. When the wearer uses their Ultimate, increases CRIT Rate by 15/18.75/22.5/26.25/30%, lasting for 2 turns.
Source: Stellar Warp
0.26%
99.99 cyc.Increases the wearer's ATK by 24/28/32/36/40%. When the wearer defeats an enemy or is hit, immediately restores HP equal to 8/9/10/11/12% of the wearer's ATK. At the same time, the wearer's DMG is increased by 24/28/32/36/40% until the end of their next turn. This effect cannot stack and can only trigger 1 time per turn.
Source: Stellar Warp
0.11%
99.99 cyc.Increases the wearer's ATK by 16/20/24/28/32%. When the wearer defeats an enemy, the wearer's CRIT Rate increases by 12/15/18/21/24% for 3 turn(s).
Source: Stellar Warp
0.09%
99.99 cyc.Increases DMG dealt by the wearer by 20/25/30/35/40%. The wearer also deals an extra 20/25/30/35/40% of DMG to enemies whose current HP percentage is equal to or higher than the wearer's current HP percentage.
Source: Stellar Warp
0.09%
99.99 cyc.When the wearer uses Basic ATK, Skill, or Ultimate to attack enemies, the wearer gains one stack of Mischievous. Each stack increases the wearer's ATK by 12/15/18/21/24%.
Source: Stellar Warp
0.05%
99.99 cyc.When the HP lost by the wearer during a single attack exceeds 25% of their Max HP, or if the HP they consume is greater than 25% of their Max HP, then immediately heals them for 15% of their Max HP while also increasing the DMG they deal by 25/31/38/44/50% for 2 turn(s). This effect can only be triggered once every 3 turn(s).
Source: Forgotten Hall Store
0.04%
99.99 cyc.Increases the wearer's Max HP by 12/15/18/21/24%. When losing or restoring this unit's HP, increases CRIT DMG by 18/22.5/27/31.5/36%, lasting for 2 turn(s). This effect can only trigger once per turn.
Source: Event Warp (limited)
0.02%
99.99 cyc.Increases the wearer's ATK by 10/12.5/15/17.5/20%, and increases their DMG to enemies afflicted with Burn or Bleed by 16/20/24/28/32%. This also applies to DoT.
Source: Echo of War | Forgotten Hall Store | Mission Reward
Relic Sets are ranked with usage rate among the players we have scanned who used Firefly in the current MoC cycle (1788), in the current PF cycle (1206) or in the current AS cycle (5622) and had the character placed in their Profile. The results are limited to top 5 combinations. Flex means 2 random Relic pieces that don't combine into a Set.
99.06%
Increases Break Effect by 16%.
If the wearer's Break Effect is 150% or higher, ignores 10% of the enemy target's DEF when dealing Break DMG to them. When the wearer's Break Effect is 250% or higher, the Super Break DMG they deal to enemy targets additionally ignores 15% of the targets' DEF.
0.21%
Increases Break Effect by 16%
Increases the wearer's Break Effect by 16%. When the wearer inflicts Weakness Break on an enemy, regenerates 3 Energy.
0.11%
Increases Break Effect by 16%
Increases the wearer's Break Effect by 16%. When the wearer inflicts Weakness Break on an enemy, regenerates 3 Energy.
Increases Break Effect by 16%.
When the wearer uses their Ultimate on an ally, Break Effect for all allies increases by 30% for 2 turn(s). This effect cannot be stacked.
0.1%
Increases Break Effect by 16%
Increases the wearer's Break Effect by 16%. When the wearer inflicts Weakness Break on an enemy, regenerates 3 Energy.
0.08%
Increases Break Effect by 16%
Increases the wearer's Break Effect by 16%. When the wearer inflicts Weakness Break on an enemy, regenerates 3 Energy.
Increases SPD by 6%.
When the wearer uses their Ultimate on an ally, SPD for all allies increases by 12% for 1 turn(s). This effect cannot be stacked.
99.14%
Increase the wearer's SPD by 6%. When the wearer hits enemy targets with Fire Weakness, the wearer's Break Effect increases by 40%, lasting for 1 turn(s).
0.44%
Increases the wearer's Break Effect by 16%. When the wearer's SPD reaches 145 or higher, the wearer's Break effect increases by an extra 20%.
0.06%
Increases the wearer's CRIT Rate by 8%. When the wearer's current CRIT Rate reaches 50% or higher, the wearer's Ultimate and follow-up attack DMG increases by 15%.
0.06%
Increases the wearer's ATK by 12%. When the wearer's SPD is equal to or higher than 135/160, the wearer deals 12%/18% more DMG.
0.01%
Increases the wearer's CRIT Rate by 4%. When an enemy target gets defeated, the wearer's CRIT DMG increases by 4%, stacking up to 10 time(s).
Relic Stats are shown based on the Relics used by the players we have scanned who used Firefly in the current MoC cycle (1788), in the current PF cycle (1206) or in the current AS cycle (5622) and had the character placed in their Profile.
Calculations
Don't use the damage output calculations as an indication on who is worth pulling or investing as those are just simulations and in day-to-day gameplay there's a lot variables. Use the numbers only to supplement your knowledge and treat them as the 'floor' of a character's damage output which you can further scale with proper team and investment.
The simulation showcases characters damage potential in the 5 cycle turn limit of Memory of Chaos against 1 target and 3 targets. The section below has all the rules listed.
General:
Enemies:
Units:
Important! The calculation assume you're pairing Trailblazer (Harmony) with Firefly in the team to allow for Super Break to occur.
Firefly (E6)
Firefly (E5)
Firefly (E4)
Firefly (E3)
Firefly (E2)
Firefly (E1)
Firefly (E0)
Firefly (E6)
Firefly (E5)
Firefly (E4)
Firefly (E3)
Firefly (E2)
Firefly (E1)
Firefly (E0)
And here are the Relics and the Light Cone used in the calculations above:
Whenever the wearer attacks, their ATK is increased by 8/10/12/14/16% in this battle, up to 4 time(s). When the wearer inflicts Weakness Break on enemies, the wearer's DMG increases by 12/15/18/21/24% for 2 turn(s).
Source: Herta's Store
Increases Break Effect by 16%.
If the wearer's Break Effect is 150% or higher, ignores 10% of the enemy target's DEF when dealing Break DMG to them. When the wearer's Break Effect is 250% or higher, the Super Break DMG they deal to enemy targets additionally ignores 15% of the targets' DEF.
Increase the wearer's SPD by 6%. When the wearer hits enemy targets with Fire Weakness, the wearer's Break Effect increases by 40%, lasting for 1 turn(s).
ATK (42.18%), Speed (11.5), Break Effect (81.6%)


Stack Speed until you have enough to achieve Firefly's 210 Speed goal (or higher if you're aiming for 0 cycles) while fully buffed in combat, then stack Break Effect wherever possible while picking up any ATK% you can here and there for additional benefits.