- Chaos Zero Nightmare
- /
- Characters
- /
- Chizuru
Chaos Zero Nightmare (CZN)ChizuruBuild and Guide

Best guide and build for Chizuru from Chaos Zero Nightmare (CZN). Chizuru is a 5✦ character from the Psionic class and Void attribute, who belongs to the Peltion faction.
To learn more about Chizuru check the sections below. Use the tabs to quickly switch to the kind of information you're looking for.
Last review update
Season 2
Last build update
Season 2
Last profile update*
15.03.2026
*Profile update means updates done to reviews/builds/gear within a season - showing the last date we changed anything on this page.
To learn more about Chizuru check the sections below. Use the tabs to quickly switch to the kind of information you're looking for.
Profile
Review
Epiphanies
Gear
Deck & Teams
Profile
Starting Cards:
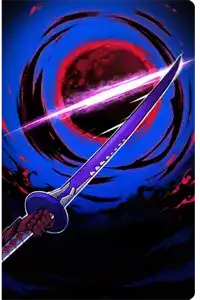
Moonslash

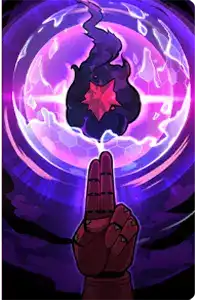
Spiritflame’s Ward

Show Effects

Karmic Flames

[Initiation]
Cursed Shackles: Add 2 Hits.
Show Effects
Epiphany Cards:

Tsukuyomi

Show Effects
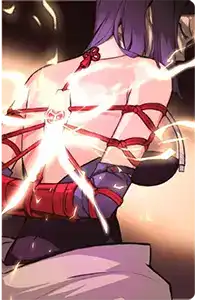
Bound At Dusk

[Initiation][Unique]
Decrease Cost by 1 until 2 random cards of another Combatant is used
Show Effects

Oni Hunt

[Haste]
+80% Damage Amount to the next Bind Card.
Show Effects

Shadow of the Moon

[Bind 1][Retain]
+40% Damage Amount for each Bind stack.
Show Effects
Generated Cards:

Shadow of the Moon+

[Unique][Bind 3][Retain]
Recover 5% of Max HP.
+40% Damage Amount for each Bind stack.
Show Effects

Moonslash (Gen)

Ego Skill:

Moonlight of High Tide
Ego Skill
+50% Damage Amount for each Shadow of the Moon created (max 10)
Epiphany Variants:
Epiphany cards are special evolutions for the cards you can obtain while playing the roguelike mode. Only some cards in the character's deck can get Epiphany effects. Since there's quite a lot of them, we don't display them by default - press the button below to show them. There are also Divine variants of Epiphany cards, but we're still working on gathering them.

Karmic Flames I

[Initiation]
1 Cursed Shackles.
Cursed Shackles: Add 2 Hits.
Show Effects

Karmic Flames II

[Initiation]
1 Cursed Shackles.
Cursed Shackles: Decrease Cost of the next card of this unit used by 2.
Show Effects

Karmic Flames III

[Initiation]
1 Cursed Shackles.
Cursed Shackles: Increase Damage Amount by 150%.
Show Effects

Karmic Flames IV

[Initiation]
Create 1 Shadow of the Moon.
Show Effects

Karmic Flames V

[Initiation][Exhaust]
When a target inflicted with Cursed Shackles is defeated, create this card.
Show Effects

Tsukuyomi I

Show Effects

Tsukuyomi II

Show Effects

Tsukuyomi III


Tsukuyomi IV

Show Effects

Tsukuyomi V

[Unique][Lead]
Show Effects

Bound At Dusk I

[Initiation][Unique]
Decrease Cost by 1 until 2 random card(s) are used.
Show Effects

Bound At Dusk II

[Initiation][Unique]
When Shadow of the Moon+ is used, decrease Cost of the next 1 card(s) by 1.
Show Effects

Bound At Dusk III

[Initiation][Unique]
Activate 2 random card(s) of other Combatants.
Show Effects

Bound At Dusk IV

[Initiation][Unique]
Activate 2 random Lead card(s).
Show Effects

Bound At Dusk V

[Initiation][Unique]
Decrease Cost of the card with the highest Cost by 2.
Show Effects

Oni Hunt I

[Haste]
+100% Damage Amount to the next Bind card used.
Show Effects

Oni Hunt II

[Haste]
+100% Damage Amount to the next Bind card used.
Show Effects

Oni Hunt III

[Haste]
If there are no other Attack Cards in hand Other than Shadow of the Moon, add 2 Hit(s).
Show Effects

Oni Hunt IV

[Haste]
Show Effects

Oni Hunt V

[Unique]
At the start of the turn, 3 Will-O’-Wisp.
Show Effects
Epiphany Bonus
Potential 1
Basic Card Upgrade
Potential 2
Common Card Upgrade
Potential 3
Basic Card Proficiency
Potential 3-1
Unique Card Upgrade
Potential 4
Critical Chance Proficiency
Potential 5
Basic Card Proficiency
Potential 5-1
If Chizuru's Attack is greater than 500, add an additional +5% to the modifier
Divine Epiphany Adaptation
Potential 5-2
Critical Damage Proficiency
Potential 6
Unique Stat Upgrade
Potential 7
For every 40 Attack above 600, add an additional +1% to the modifer (additional +10% max).
Sleeping Memory
Manifest Ego 1
Awakening Memory
Manifest Ego 2
Vivid Memory
Manifest Ego 3
Inner Memory
Manifest Ego 4
Lunarshard: +10% Damage Amount to Chizuru's Attack Cards (max 3 stacks).
Complete Memory
Manifest Ego 5
Liberated Memory
Manifest Ego 6
Chizuru full image isn't available yet. It will be added soon
Review
Performance Profile
ST Damage [2/5]
AoE Damage [1/5]
AP Efficiency [4/5]
Utility [3/5]
Chizuru is a Damage Dealer focused on dealing single-target damage while supporting the team with some AP efficiency and a small amount of healing at the same time. Her kit introduces several unique mechanics to the game and you’re forced to play around them to unleash her full potential - this makes her a bit more complicated to play compared to some other Damage Dealers. If you want to learn about them in detail, check the Key Mechanics section below the review, but here’s the gist of how to play Chizuru: place a debuff on the enemy, attack the enemy either often or with cards that deal a lot of hits (or both) to generate her unique resources and once you manage to convert the base Shadow of the Moon card into its + version thanks to the resource, use the card for a big attack.
Still, you also have to keep in mind that one of Chizuru’s Upgrade card buffs prevents her (and her team) from gaining AP from any source other than Ravaging an enemy. You can opt not to use the card, but you will miss out on some of Chizuru’s damage and one of the most interesting mechanics Chizuru offers that is tied to it - cost reduction of random cards in hand at the start of every turn (1 card at base, but there’s an Epi that increases that to 2 cards). It’s really great in Chaos, turning Chizuru into a ‘reverse Mika’, but in Save modes, it brings less benefits as you have access to better-optimized decks.
Now that you know how Chizuru works, let’s move to the teams you can play her in. And there are two ways you can do it - either by pairing her with another DPS that attacks often without using too much AP, so they can generate a lot of Will-O’-Wisp for her (like Luke or Tressa), which will create a dual DPS team or by pairing her with two supports and leaving the Wisps generation to Chizuru herself. Both are viable in both modes, but dual DPS teams are more reliable in Chaos, while main DPS offer more options in ‘Save’ content.
Another issue Chizuru has is that she’s not really an improvement to existing characters in their teams. Both Luke and Tressa, the teammates she wants to be paired with, work better in their own teams and only reach their full potential there, rather than when played with Chizuru.
Overall, Chizuru continues the trend of introducing characters that aren’t direct powercreep to the release cast and instead she allows for new types of playstyles. She’s not stronger than the current juggernauts when it comes to raw DPS, but instead offers some utility on top of decent single-target damage.
Pros
Combines solid ST damage output with team utility.
One of the few characters offering AP efficiency to the team.
Has some healing in her kit, making survival a little smoother.
Has multiple viable builds, allowing her to adapt to the Epis you receive in Chaos runs.
Can be played as main DPS or sub DPS.
Cons
No AoE capabilities.
Damage Potential is limited by sufficient Wisp generation; without it, her best card loses significant power.
Can suffer from restrictive team building due to the Inhibit mechanic and Wisp generation requirements.
No extreme scaling attacks, skills, or upgrades limited her top-end Save Data Potential compared to other characters.
The ratings below are based on the Season Save Data modes and the Chaos Manifestation mode. Each of the modes values different mechanics, so some characters may shine in one of the, while being underwhelming in the other.
Chaos Mode
Season Save Data
Great Rift
Will-O’-Wisp: Will-O’-Wisp is Chizuru’s unique mechanic and resource, which allows her to generate or enhance her Signature Card, Shadow of the Moon. Will-O’-Wisp is a unique resource trackable under the team health gauge and is stackable up to 5 times. Chizuru can gain them in a variety of ways, but upon reaching 5, all are consumed to generate a Shadow of the Moon card, or if one is already in hand, increase its Bind (power) level by 1.
Note: Exceeding 5 Will-O’-Wisp in a single action doesn’t waste them; they instead overflow, counting toward the next activation.
Cursed Shackles: Cursed Shackles is a special debuff applied by Chizuru’s Karmic Flames card and is one of her primary ways of generating Will-O-Wisp. When hitting an enemy afflicted by Cursed Shackles with an Attack Card from either Chizuru or Allies, it will generate Will-O’-Wisp equal to the hit count, e.g., a 3-hit count Attack Card generates 3 Wisps. Cursed Shackles can only be present on one enemy at a time and applying the debuff on a different one while already active will simply move it.
Note: Cards with Bind (Shadow of the Moon) cannot generate Will-O’-Wisp by hitting Cursed Shackles.
Inhibit: Inhibit is a buff designed exclusively for Chizuru’s kit to act as both a damage increase and a restriction. The only card that grants this buff currency is Chizuru’s Bound at Dusk Upgrade card. After gaining Inhibit Chizuru’s Shadow of the Moon cards gain +1 hit count for the rest of the battle, but as a penalty, she and her team can no longer be influenced by AP gain or loss effects, except for what is given through cards and continuous effects of this unit, at the start of the turn or on Ravage.
Chizuru’s Signature Potentials are a mixed bag, with some being all-around strong, while others are only strong in specific game modes.
3-1: Converts Chizuru’s Basic Attacks from attacks that deal 100% of her attack in a single hit to attacks that deal 60% of her attack twice (2 hits). This is a significant upgrade as not only is the damage higher, but the higher hit count generates more Will-O’-Wisps thanks to Cursed Shackles. A must-have for Chaos, but as basics are usually removed in Save, it's less impactful there.
5-1: Increase the base damage of Chizuru’s Basic Attack, Moonslash, by +5% Base damage and another 5% if her Attack is greater than 500. The gain for Chizuru’s basics from this Potential is significant, thanks to their multi-hit nature, making this a high-priority target to fully activate when using Chizuru in Chaos. Holds less value in Save Data game modes for the same reason as 3-1.
7: Increase the base damage of both Shadow of the Moon Baseline and + by 5% Base Damage, with an additional increase of 1% per 40 attack she has over 600, up to an additional +10% at 1000. A must-have Potential that significantly improves the output of Chizuru in both Save and Chaos game modes, as Shadow of the Moon makes up a huge chunk of her damage.
Base
Ego 1
Improves the base damage of Shadow of the Moon+ by 20% and healing by 3%. A base damage increase to Chizuru’s highest damaging card is a welcome boost; it’s not overwhelmingly powerful due to how high she stacks other additive card multipliers, but it’s still solid (although not a breakpoint to aim at).
Ego 2
Chizuru’s E2 is a transformative Ego unlock which causes her to immediately generate a Shadow of the Moon (Bind 1) after using Shadow of the Moon+. The result of this is that every time you consume Shadow of the Moon+, you essentially immediately gain 5 Will-o-Wisp, meaning if you play Shadow of the Moon+ as soon as it reaches Bind 3, you’ll only ever need to source 10 Will-O-Wisp from Chizuru’s kit and team now instead of 15. This Manifest Ego is less about Potential damage gains and more about ease of use and ensuring you always have quick access to the + version of Chizuru’s main payoff card.
Ego 3
A 150% base damage boost to Chizuru’s Ego skill Moonlight of High Tide. Not a terrible boost to damage, but in longer fights that last multiple turns, where many fully buffed Shadow of the Moon+ can be used, it doesn’t move the needle much, as her Ego skill only becomes a small slice of her overall damage.
Ego 4
Grants a buff that offers a 10% (additive) damage bonus to Chizuru’s Attack Cards every time she creates or upgrades Shadow of the Moon, stackable up to 3 times with no duration. This buff is fairly easy to stack and is a notable damage increase to Chizuru’s overall output, thanks to her high hit count and low base multiplier kit, which favors any additive damage she can get her hands on.
Ego 5
Boosts the base damage increase of Chizuru’s Potentials from 20% to 26%. A small damage increase, but nothing major.
Ego 6
After hitting 3 stacks of the E4 buff, gain a new effect which increases the hit count of Shadow of the Moon+ by 1, improving it from the usual baseline of 2 (3 with Inhibit) to 3 (4 with Inhibit). Just like E4, this is a strong damage boost for Chizuru, offering equal or slightly better damage amplification than it, depending on the deck you’re using for her.

Moonlight of High Tide
Ego Skill
+50% Damage Amount for each Shadow of the Moon created (max 10)
Moonlight of High Tide
Chizuru’s Ego Skill costs 5 EP and deals 350% damage +50% (additive) damage per Shadow of the Moon she creates (or upgrades) for up to 10 stacks, maxing out at 750% damage. This Ego skill is most effectively used partway through a fight when fully stacked after Chizuru has had enough time to cycle through Will-o'-Wisps and her Shadow of the Moon cards with the help of her team.

Moonslash

Moonslash
At base, Chizuru’s standard Basic Attack operates exactly like every other character, but after Potentials, it’s transformed into a 2-hit attack instead, which is relevant for generating Will-O’-Wisp when hitting Cursed Shackles and for damage scaling. Post Potentials, this card isn’t bad, but it’s a strictly worse version of another of Chizuru’s cards, Oni Hunt, meaning it’s still a candidate for removal.
Note: Chizuru starts with 2 Moonslash in her starting deck.

Spiritflame’s Ward

Show Effects
Spiritflame’s Ward
Chizuru’s basic shield is completely standard and doesn't have any extra synergy with her kit. Removed first in almost every Chizuru deck.

Karmic Flames

[Initiation]
Cursed Shackles: Add 2 Hits.
Show Effects
Karmic Flames
The backbone of Chizuru’s Will-O’-Wisp generation in most builds and her only way to apply the Cursed Shackles debuff to enemies. Has [Initiation] ensuring Chizuru always has access to her core mechanic and gains an additional effect when used against enemies that already have Cursed Shackles on them, which, at base, is an additional hit. Not her flashiest card, but a necessary one in almost every build for her to function properly.

Tsukuyomi

Show Effects
Tsukuyomi
Chizuru’s other way to access Will-O’-Wisp. Costs 0 AP and causes the next Attack Card to be used to generate 3 Will-O’-Wisp per hit, e.g., a 3-hit attack generates 9. This card is a solid Wisp generator supplement to Karmic Flames baseline, but gains significant power and alternative effects via Epiphanies, some of which can increase Chizuru’s Attack Card hit count, boosting damage considerably. Whether it’s resource generation or damage amplification, this card is one of Chizuru’s stronger ones.

Bound At Dusk

[Initiation][Unique]
Decrease Cost by 1 until 2 random cards of another Combatant is used
Show Effects
Bound At Dusk
Chizuru’s main Upgrade card, source of AP efficiency and the only way for her to gain the Inhibit buff. This 1 AP upgrade with [Initiation] (so you have it on turn 1) grants Inhibit the turn it’s played on and every turn after that it decreases the cost of 2 random cards in your initially drawn hand by 1. Summed up, this card boosts Chizuru’s Shadow of the Moon damage considerably, grants her team a pseudo 2 extra AP per turn, all in exchange for giving up the ability to gain AP from other sources other than Break/Ravage or by herself. In Chaos, this trade is usually very well worth it; in Save Game modes, the restriction is definitely felt a lot more, something that can be helped through this card's strong Epiphanies, but may still rule out certain strategies, gameplay styles and teammates.

Oni Hunt

[Haste]
+80% Damage Amount to the next Bind Card.
Show Effects
Oni Hunt
Oni Hunt is Chizuru’s highest hit count card without Bind, making it her best tool for leveraging Cursed Shackles to generate Will-O’-Wisp stacks, something she otherwise has to rely on her teammates or Tsukuyomi for. Outside of this, thanks to its high hit count, Oni Hunt can actually deal some solid damage after Chizuru’s buffed up from equipment and teammates. In addition to that, it also has a buffing effect of its own, increasing the damage of the next Bind card used by +80% baseline, with options to boost it higher with Epiphanies. All of this combines to make this card one of Chizuru’s best.

Shadow of the Moon

[Bind 1][Retain]
+40% Damage Amount for each Bind stack.
Show Effects
Shadow of the Moon
The card that the entirety of Chizuru’s kit revolves around. Shadow of the Moon (base version) is a single hit (2 with Inhibit) 80% damage attack costing 1 AP with [Retain]. While in hand every time Chizuru either draws another Shadow of the Moon or generates one via Will-O’-Wisps, the two cards will merge, adding their “Bind” levels together. Shadow of the Moon gains +40% (additive) damage per Bind level and at Bind level 3 will transform into Shadow of the Moon+.

Shadow of the Moon+

[Unique][Bind 3][Retain]
Recover 5% of Max HP.
+40% Damage Amount for each Bind stack.
Show Effects
Shadow of the Moon+
At 3 Bind, Shadow of the Moon becomes significantly enhanced, now dealing 70% of ATK, hitting 2 times (3 with Inhibit), recovering 5% of the team's HP on use, and gaining 20% (additive) damage per bind. Most Chizuru decks and strategies aim to raise Shadow of the Moon to the + version before using it, something which isn’t too hard thanks to both versions having retain. Doing this makes the damage far more AP efficient and allows Chizuru to stack up buffs on the card from Oni Hunt and Tsukuyomi, both of which are more potent when it has a higher hit count and base damage.
Best Epiphanies
Note
We have given a star rating for each Epiphany, showing how strong and useful it is - with 1★ being the lowest rating and 5★ the highest.
Card 1

Karmic Flames I

[Initiation]
1 Cursed Shackles.
Cursed Shackles: Add 2 Hits.
Show Effects

Karmic Flames II

[Initiation]
1 Cursed Shackles.
Cursed Shackles: Decrease Cost of the next card of this unit used by 2.
Show Effects

Karmic Flames III

[Initiation]
1 Cursed Shackles.
Cursed Shackles: Increase Damage Amount by 150%.
Show Effects

Karmic Flames IV

[Initiation]
Create 1 Shadow of the Moon.
Show Effects

Karmic Flames V

[Initiation][Exhaust]
When a target inflicted with Cursed Shackles is defeated, create this card.
Show Effects
Epiphanies:
- Neutral [★★★★★] - Target Neutral Epiphany: 1 AP.
The Neutral Epiphany options on Karmic Flames are quite strong and enable it to circumvent certain downsides in a way equivalent to most Divine options–making them an amazing choice in many decks. - Karmic Flames I[★★] - The additional hit effect on this can be nice additional damage, but it can only be activated on enemies with cursed shackles, meaning it probably won’t get value out of this until Turn 2+ and can lose value if the enemy dies or there are multiple enemies.
- Karmic Flames II[★★] - Now, it allows you to cost-reduce another card up to 2-cost. However, Chizuru herself has no 2-cost cards, meaning it tends not to get its advertised value.
- Karmic Flames III[★★] - Same as Karmic I, this is simply an increase in damage, but it can only be activated on enemies with Cursed Shackles, meaning it probably won’t get value out of this until Turn 2+ and can lose value if the enemy dies or there are multiple enemies.
- Karmic Flames IV[★★] - The effect of this can be changed to be ‘Gain 5 Wisps’, meaning its effect of creating a SOTM (Shadow of the Moon) is equivalent to 5-hits of value. While this can be useful in some scenarios where your build has a clear break-point for hitting SOTM+ (like when your build makes a total of 8 SOTM’s, putting you 1 off 3 SOTM+’s), it often is an awkward card to get value out of because it has very specific break-points that can be quite niche.
- Karmic Flames V[★★★★★] - The card is now a 0-cost [Exhaust] that enables you to make a new one when the enemy dies. This is very valuable for AOE scenarios, thinning her deck, and versus enemies who die and respawn.
Divine Epiphanies:
Which Divine Epiphany to go for will depend on what your team needs and which Epiphany you chose, but here are the main ones to look out for if you have spare Save Data: Draw 1 (Karmic IV), Cost Reduction.
Card 2

Tsukuyomi I

Show Effects

Tsukuyomi II

Show Effects

Tsukuyomi III


Tsukuyomi IV

Show Effects

Tsukuyomi V

[Unique][Lead]
Show Effects
Epiphanies:
- Neutral [★] - Neutral Epiphanies are generally not recommended since the base card of this has different effects than the generally ideal versions for her given builds (Tsukuyomi III or Tsukuyomi V).
- Tsukuyomi I[★] - You double the effect of its base Epiphany (now 4 Wisps per hit of next attack), but this effect generally is around the same value as Tsukuyomi V in most builds, but you need to dupe it 3x to get a similar effect.
- Tsukuyomi II[★★★] - If you can add 1-hit to a strong attack, like Neutral/Monster Cards such as Cyborg Automation, this card has insane potential with certain set-ups. However, Chizuru has no way of capitalizing well within it, in her base kit, relying on Neutral/Monster Cards as mentioned.
- Tsukuyomi III[★★★] - The preferred option for one of her most popular builds, as it allows you to stack her hits on SOTM (Shadow of the Moon) infinitely upon skipping turns. In current content, this playstyle, while fun, tends to be outperformed by more consistent teams and is less generalizable as a recommendation than Tsukuyomi V.
- Tsukuyomi IV[★] - This can give a max of 30 Wisps per use (10-cards in hand), which is equal to 1 full level SOTM+, while this can be situationally nice it has 2 major downsides: First being, it cannot split up your Wisps for level 3 SOTM+ (which is generally its sweet-spot for use) as it will acquire all your Wisps at once and second, the condition is hard to repeatedly use.
- Tsukuyomi V[★★★★★] - This is always a good option as it will average a quite high amount of Wisps compared to alternatives without needing duping and thinning your deck after it is played.
Divine Epiphanies:
Which Divine Epiphany to go for will depend on what your team needs and which Epiphany you chose, but here are the main ones to look out for if you have spare Save Data: Draw 1 (Tsukuyomi III), Morale/Resolve (Tsukuyomi V), 1 AP (Tsukuyomi III) – if you have enough Draw.
Card 3

Bound At Dusk I

[Initiation][Unique]
Decrease Cost by 1 until 2 random card(s) are used.
Show Effects

Bound At Dusk II

[Initiation][Unique]
When Shadow of the Moon+ is used, decrease Cost of the next 1 card(s) by 1.
Show Effects

Bound At Dusk III

[Initiation][Unique]
Activate 2 random card(s) of other Combatants.
Show Effects

Bound At Dusk IV

[Initiation][Unique]
Activate 2 random Lead card(s).
Show Effects

Bound At Dusk V

[Initiation][Unique]
Decrease Cost of the card with the highest Cost by 2.
Show Effects
Epiphanies:
- Neutral [★★★★★] - Target Neutral Epiphany: Morale 1.
Neutral Epiphany can give an additional permanent Morale buff which scales well with Chizuru’s playstyle (multi-hit attacks). - Bound At Dusk I[★★★★★] - It is now a 0-cost, which makes it easier to play in Turn 1, especially since builds that keep bound tend to have a low amount of AP-generation to play cards in Turn 1.
- Bound At Dusk II[★★★] - This can be situationally quite good alongside Moonslash build with Tsukuyomi V, as you can make 3 SOTM+’s quite consistently, which is the point at which you are getting more Cost Reduction than Bound I or Bound Neutral (3 Cost Reductions). However, it can be hard to activate its effect all 3-times without a good setup and Divine Epiphanies to enable all your cards to be played.
- Bound At Dusk III[★★] - Now this card gives you 2 free activations instead of Cost Reductions. While this Epiphany can give a lot of effective value, it is randomized and often requires you to do very fringe decks with very little cards besides Bound (such as Bound III and two 5+ cost cards as your entire deck, guaranteeing free activation of those cards), but the cards you are guaranteeing activation on need to be very high value to justify cutting much of your other cards for the guarantee.
- Bound At Dusk IV[★] - Oftentimes, [Lead] cards are also Upgrades that will be played Turn 1, which means that this card, which can only acquire value after Turn 1, will be lower level of value. However, there are some [Lead] skills like Sadism and Orlea’s Sacred Censer which can get value out of it, albeit inconsistently, as they must be drawn in your starting hand of the turn for value.
- Bound At Dusk V[★★] - This now targets only 1 card, but up to a 2-Cost Reduction on that one card. While this can be situationally superior to Bound Neutral or Bound I, it does little to nothing for Chizuru herself (who generally has no 2+ cost cards) and requires you to draw a 2+ cost in your first draw of the turn (and hit it with the effect) to get its maximum value, while Bound I and Bound Neutral value is practically guaranteed.
Divine Epiphanies:
Which Divine Epiphany to go for will depend on what your team needs and which Epiphany you chose, but here are the main ones to look out for if you have spare Save Data: Morale/Resolve.
Card 4

Oni Hunt I

[Haste]
+100% Damage Amount to the next Bind card used.
Show Effects

Oni Hunt II

[Haste]
+100% Damage Amount to the next Bind card used.
Show Effects

Oni Hunt III

[Haste]
If there are no other Attack Cards in hand Other than Shadow of the Moon, add 2 Hit(s).
Show Effects

Oni Hunt IV

[Haste]
Show Effects

Oni Hunt V

[Unique]
At the start of the turn, 3 Will-O’-Wisp.
Show Effects
Epiphanies:
- Neutral [★★★★] - Target Neutral Epiphany: 1 AP.
The major concerns for Chizuru tend to be: Draw and AP. The Neutral Epiphanies on this card give the equivalent of a Divine for solving one of these issues (that can then be combined with an actual Divine to solve the remaining concern), making it very strong. However, the SOTM buffs for Oni Hunt tend to be lower value than Moonslash Creation for most builds that aren’t SOTM hit-stacking and even then, if your SOTM build utilizes Narja’s Shackle buff, you cannot use Additional Attacks besides SOTM, or you will lose her largest buff on SOTM (as it activates on next attack-use). - Oni Hunt I[★★★] - The SOTM buffs for Oni Hunt tend to be lower value than Moonslash Creation for most builds that aren’t SOTM hit-stacking and even then, if your SOTM build utilizes Narja’s Shackle buff, you cannot use Additional Attacks besides SOTM, or you will lose her largest buff on SOTM (as it activates on next attack-use).
- Oni Hunt II[★★★] - The SOTM buffs for Oni Hunt tend to be lower value than Moonslash Creation for most builds that aren’t SOTM hit-stacking and even then, if your SOTM build utilizes Narja’s Shackle buff, you cannot use Additional Attacks besides SOTM, or you will lose her largest buff on SOTM (as it activates on next attack-use).
- Oni Hunt III[★★] - The card can now do up to 5 hits if there are no other cards. While this has potential for its own build, it has anti-synergy with itself, meaning you can’t copy it to build around Oni Hunt as the main DPS card.
- Oni Hunt IV[★★★★★] - This is an amazing card in nearly any build and the de facto copy for her Moonslash/Basic Attack build, which tends to be her most consistent form of damage.
- Oni Hunt V[★★★★★] - This makes her buff no longer have anti-synergy with Narja’s Shackle buff on next attack use (and other similar effects), along with getting rid of it on use to make your draw easier on future turns. The recommended card for high-investment hit-stacking-based builds that utilize skipping turns with Beryl’s Firepower and/or Narja’s Shackle buffs and is usable in any deck.
Divine Epiphanies:
Which Divine Epiphany to go for will depend on what your team needs and which Epiphany you chose, but here are the main ones to look out for if you have spare Save Data: Draw 1, -1 Cost Reduction, Morale/Resolve (Oni Hunt V).
Gear
The Memory Fragments & Equipment suggestions below are based on calculations we did. If you want to check the damage formula and how scaling the damage works in CZN, check this guide.
Recommended Loadout
[2-PC]: +25% Critical Damage.
[2-PC]: +12% Attack.
The safest of all set combination for Chizuru to use in Chaos and Save data based game modes but which can lose out to more specialised sets under the right circumstances. Check out Chizuru's other two gear options to know which scenarios they beat out 2/2/2 for. However for some builds like Moonslash which deal a significant portion of their damage via Basics 2/2/2 can even be best in slot.
For more damage use 2P Cursed Corpse (if you can keep Agony on targets at all times). Alternatively for stronger Chaos starts or if you're playing Moonslash try 2P Seth's Scarab, or if you want more survivability use 2P Healer's Journey. If none of that appeals, you can use any 2 strong sub/main stat pieces instead of a final 2P set bonus as well.
[4-PC]: +30% Damage Amount to Void cards that hit 2 or more times,
[2-PC]: +25% Critical Damage.
Loses out by a small amount to 2/2/2 and other specialist options in Save Data game modes where Chizuru is playing in teams which offer high amounts of card damage boosts like Morale. Can be compeitive and often the best choice in Chaos based game modes though where card damage is much less consistent and scarce.
Specialist Loadout
[4-PC]: +35% Critical Damage of 1-cost cards.
[2-PC]: +25% Critical Damage.
A specialist set which can pull ahead of 2/2/2 and 4P Orb of Inhibition in Chizuru builds that deal the majority of their damage through 1 cost cards which is most commonly going to be Shadow of the Moon+
In a lot of cases, flat sub-stats are better than percentage ones when it comes to HP, ATK and DEF. The reason behind this is that in CZN the characters stats are pretty low and you get more value from flat bonus rather than percentage one based on calcs.
CRIT Rate% = CRIT DMG% > ATK > ATK%
When playing builds that focus on Chizuru's Bind cards to deal the majority of the damage, try to ensure she has at least 601+ ATK in the character screen to activate the first stage of her Potential 7, but if possible, aiming for even higher ATK amounts is ideal to push Potential 7's bonus even further. For Chizuru's Moon Slash build, the ATK breakpoint is only 501 to activate Potential 5-1's boost to Moon Slash damage, which is quite easy to achieve.
Our best Partner recommendation try to balance both the raw damage boost they provide based on our calculations with the additional utility provided by the skill - combined with how it interacts with the characters's kit. We have rated each Partner based on how much additional damage and the utility they provide. Read the comments under each Partner to better understand our reasoning.
No calculations in Chaos Zero Nightmare are completely accurate for all scenarios, including the ones below. What team, decks, epiphanies, gear, equipment, and enemies you’re facing all impact them. Because of this, take the results as guidelines and combine them with the explanations to make your decisions. Calculations use endgame save data set-ups, including 5 turns of combat using the whole deck with all Ego skills unless otherwise stated.
Passive - Tranquil Marker
Increase the assigned Combatant’s Attack by 16–24%.
Every time the assigned Combatant’s cards stack, increases Damage Amount of Attack Cards by 5/10%. Can stack up to 3 times.
Every time 1 Attack Card used by the assigned Combatant deals 3 Hits, inflicts 30/60% Fixed Damage to the target.
Skill - Moonlit Leisure - 3 EP cost
200% Damage to all enemies. Fierce Winds 1.
Fierce Winds: +50% Damage Amount to Attack Cards of the assigned Combatant for 1 turn.
-
Passive - Clairvoyance
Increase the assigned Combatant’s Attack, Health, and Damage Amount by 12–20%.
When the assigned combatant generates a card, +8/16% attack card damage for 1 turn.
Skill - Scholarly Measures - 2 EP cost
Deal 180% Damage to all enemies. Apply 1 Vulnerable.
-
Passive - Technical Support
Increase the assigned Combatant's Attack by 8/16%.
The combatant's attack card damage increases by 10/20%.
The first time the assigned Combatant either Exhausts a card or gains a Status Ailment card (includes cards that have been changed from Status Ailment cards), increases Damage Amount of Attack Cards by 12/24% for 1 turn.
Skill - Activate Defense Module - 3 EP cost
For 1 turn, when a card is Exhausted, apply 1 Weaken to a random enemy.
-
Passive - Fortune Telling
The assigned combatant's Attack is increased by 8/16%.
When Injured, at the end of battle, recover 4/8% Health.
Skill - Flower of Memory - 2 EP cost
Gain 200% Shield.
-
In the Zero System, it’s incredibly easy to access all items acquirable via the shop thanks to the five free refreshes you get each shop node - that's why the recommendations below are limited to them only. ATTENTION! Area-specific items can sometimes be more powerful than shop items, but are far less consistent to get or require running a specific world or giving up certain event options. Use the shop list as a starting point for building up your deck saves.
The equipment recommendations are based on items obtainable in Season 2’s Chaos - Burning Life. If you’re running content outside of Season 2, it’s possible some options may not be available for acquisition, or that other options not obtainable in Burning Life may be better.

DPS
- Intellect of Discord
![Equipment]()
- Dagger That Tricked the Shadow
![Equipment]()
- RFS-17
![Equipment]()
- Sword Reflected in the Lake
![Equipment]()
- Obsidian Sword
![Equipment]()
Support
- Tentacles of Chaos
![Equipment]()

DPS
- Fairy King's Crown
![Equipment]()
- Mask of Flames
![Equipment]()
Support
- Star-Lit Cloak
![Equipment]()
- Vine Camouflage
![Equipment]()

DPS
- Amorphous Cube
![Equipment]()
- Rage Potion
![Equipment]()
- Quantum Collector
![Equipment]()
Support
- Sphere of Randomness
![Equipment]()
Comments - Weapons
- - Offers a huge 18% Combat Attack passively which for most Attack scalers makes this weapon the defacto best in slot weapon if you're able to acquire it alongside the correct save and don't have another better Mythic equipment options.Intellect of Discord
![Equipment]()
- - 12% Crit DMG is always a competitive option if you can find it in your runs and nothing better turns up or is required for your build.Dagger That Tricked the Shadow
![Equipment]()
- - One of the strongest Legendary Weapons for any combatant that deals the majority of their damage via 0 cost abilities either naturally or as a result of discounts. Note: For Chizuru builds that consistently deal damage through 0 cost attacks like Moonslash Chizuru this becomes one of her best weapons, builds that don't should not use this.RFS-17
![Equipment]()
- - A generic weapon that provides a large 25% (Multiplicative) damage boost but only while you hold 6 cards or more. This is a strong legendary equipment providing you can satisfy its conditions while using the majority of your highest damaging abilities, but this is much easier said than done making it only situationally good in certain decks.Sword Reflected in the Lake
![Equipment]()
- - Very easy to find and grants 12% (Multiplicative) damage to everything. It's never the best, but if you have nothing else you should definitely grab it.Obsidian Sword
![Equipment]()
- - Provides 8% Combat Attack to all operators in the team making it the go-to support weapon for most characters not acting as the main DPS when supporting Attack scaling carries providing the Mythic slot isn't required elsewhere.Tentacles of Chaos
![Equipment]()
Comments - Armor
- - The Crit Rate this armour provides is almost always in demand and a competitive option making it a piece worth seeking out unless you're able to obtain better more specialized options.Fairy King's Crown
![Equipment]()
- - Provides a 35% (Multiplicative) damage boost against enemies which are vulnerable. Powerful on characters that value multiplicative damage boosts (less so on those that don't) but only so long as you can consistently keep Vulnerable applied.Mask of Flames
![Equipment]()
- - A generic defensive option usable by all combatants making it a fine supportive addition if no other options are found. However not generally as enticing as direct damage or more immediate utility options for most builds.Star-Lit Cloak
![Equipment]()
- - An easy to get and nice inclusion for teams that have use for a powerful (but conditional) survival mechanic. Usually not the most optimal choice within the armor slot for most characters but if you miss no all other options is very easy to pick up as a fall-back.Vine Camouflage
![Equipment]()
Comments - Trinkets
- - The go-to generic damage accessory for most characters that is trivially easy to use and always for the most part a solid addition for any character that can make use of additive damage. Wont beat out more specialized options but always a great fallback.Amorphous Cube
![Equipment]()
- - A rare to get Arena exclusive Accessory, but one which is a top option for characters that appreciate Multiplicative damage scaling over additive when played around correctly. Still a usable option for characters that prefer additive scaling, but usually there are better and easier to access alternatives.Rage Potion
![Equipment]()
- - Grants 20% (multiplicative) damage to the wearer any time any combatant uses an upgrade card (no limit) but only for 1 turn. In specific teams targetting low turn count kills this can be the best accessory available, but in longer fights, or low upgrade teams it loses a lot of its appeal.Quantum Collector
![Equipment]()
- - An exceptionally powerful generic support trinket that grants both 1 draw and 1 AP at the start of battle turbo charging your early game. Is a Mythic item meaning it wont be suitable for every character, but on those who can afford to run it and don't need other accessories in this slot is well worth slotting in if it comes up in your runs.Sphere of Randomness
![Equipment]()
Deck & Teams
Build Comments
- Moonslash - Oni Hunt IV is able to give you 2 0-cost Moonslashes on activation, which allows you to do 8 Basic Attacks off Oni Hunt IV, for a total of 16 hits. This can be buffed through various effects like Narja and Rei’s upgrades that give bonus damage to Basic Attacks, and it is probably one of her most consistent builds for turn-to-turn dps.
- Shadow of the Moon Hit-Stacking - This build is typically played via skipping turns after playing copies of Tsukuyomi for a total of +8 hits added to your Shadow of the Moon, per turn, with max dupes. While this can result in quite crazy ‘screenshots’ or clips with no context, it often comes at the cost of losing damage for many turns and might average lower total damage than other builds in most low-turn control contexts. However, it does have extremely high Potential in un-capped turn and infinite boss HP content, so it’s definitely worth considering there.
- Bound Support - This build removes everything but Bound in order to turn Chizuru into your effective AP-battery. This isn’t recommended for most teams, but a few characters can get away with playing all their cards off only 5-6AP a turn (3 base, 2 from Chizuru, 1 from Ravage), such as Mei Lin, who will sometimes run Bound Chizuru as her third with Veronica.
Removal
- Spiritflame’s Ward- This is removed in probably any build you’ll run of hers.
Conditional Removal
- Moonslash- This can be kept for some Chizuru builds built around Basic Attacks (Moonslash), provided you are able to have the AP and Draw to play it.
- Bound At Dusk- If you have the ability or need to make more than 2AP in your team per-turn, it is generally recommended to remove Bound as it’s main benefit of +1 hit on Shadow of the Moon will likely not outscale the benefit of playing more cards. However, Bound can be kept in scenarios where you are able to circumvent its downsides through cost-reductions (like Narja) or through Chizuru’s own AP-generation, which ignores inhibit (like taking Glory Resistance neutral which gives +1AP at the start of every turn).
- Shadow of the Moon- Since you are able to make Shadow of the Moons quickly off her wisps anyway, in most builds, you could consider moving the ‘original’ Shadow of the Moon to free up your turn-1 draw space (if you have turn-1 draw concerns).
Copying
- Oni Hunt- If playing a Moonslash (Basic Attack build), this will be your go-to dupe as it’s the main way of creating moonslashes.
- Err- If playing a hit-stacking build, this will be your go-to dupe as it’s the main way of stacking your hits on Shadow of the Moon.
- Rei can give many different buffs that all work well with Chizuru, including but not limited to: 1-cost and 0-cost card additive buffs, Void card buffs, Basic Attack buffs, 4P Glory Reign and generic additive buffs (Morale).
- Rei’s access to Dark Condensation IV specifically allows her to stack an additive buff over many turns alongside Chizuru’s hit-stacking via Tsukuyomi. This is very synergistic and will scale well in high-turn or uncapped turn content.
- Rei can also offer a strong draw in early turns off Snack-Time, which are generally the hardest turns draw-wise.
- While she gives fewer buffs than Rei, she can similarly buff Basic Attacks and give a few additive buffs like Voracity and Predation.
- Much like Rei’s Dark Condensation IV, Narja has Shackles of Hunger IV, which is also able to stack an additive buff over many turns.
- Narja’s cost-reduction can allow you to effectively gain AP even with inhibition, bypassing its major downside and allowing easier use of Chizuru with the Bound in deck.
- In Moonslash builds, Chizuru will be playing a lot of skills and a decent number of attacks, which is very synergistic with how Hugo’s Commence the Hunt works.
- Hugo is able to supplement her as a draw unit, on top of using her as a driver for his own damage.
- Luke can do many hits and attacks, which can allow you to make more Shadow of the Moons via Chizuru’s wisps.
- Chizuru’s own attacks can also scale Luke’s Dance of the Demon II, which gains a hit for every attack played that turn–including ally attacks.
- Through neutral Morale Epiphanies on cards like Devil Dice or Dice Trick, Cass can give high additive buffing with little cost.
- Cass’ buffing mainly comes through attacks, which means he is also activating Chizuru’s Wisps for her simultaneously.
- However, it’s worth noting that Cass can be difficult to play with her without Divine Epiphanies, as he generally wants cost-reduction on Devil Dice (with neutral Morale 2 Epiphany) so he can act as both draw and buffer together.
Chaos Teams
Generic - Chaos
Save Teams
Moonslash Hyper-Carry
Moonslash Hugo Driver
Tsukuyomi Hit-Stacker
Copyright © 2022 - 2026 Prydwen.gg






Base performance of the character.