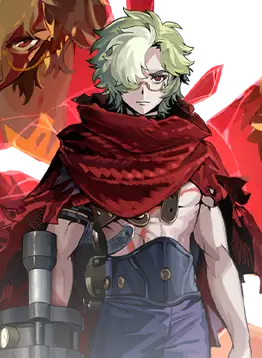


Ikoma is a collaboration character from the series Kabaneri of the Iron Fortress. He is joining as a Defense crew member. His main role is being a berserker in the frontlines; he sacrifices his HP to unleash more damage and apply debuffs to the enemies he faces.
Playstyle and Key Mechanics
Ikoma is a red card focus DPS; his skills are mainly single-target, which can debuff and deal a decent chunk of damage. He has no proper utility, so it's best to pair him or have a team with great draw and cost efficiency. He is also effective with teammates who rely on [Ignite] or apply [Chill]/[Freeze].
Main Cards:
Starting with [Tsuranuki Shot], this is a Red card that does a single-target attack that applies [Corrupt] and [Injure], which will make the enemy take more damage.
Next is [Charge], a simple Red card that buffs his next card damage by another 100% ideally, you will want to use this with his Ultimate or Leader Skill.
Lastly is [Burst Shot] is a great 5 damage instance that applies [Injure] and [Ignite]. It can also [Slash], so 5 additional hits are applied to the target.
Derivatives:
[Black Elixir] - Once used, deals a massive AOE attack to all enemies. This also buffs Ikoma’s DMG Dealt and DMG taken at the cost of chipping his HP away. However, this can only be used once unless you have him at Awakening 5.
Investment
Awakenings for Ikoma are rather underwhelming, hence it is only recommended for pulling duplicates for his awakening 5.
Awakening 5 - This enables him to continuously obtain [Black Elixir] as long as he can maintain his HP above 50%. This is critical for him to consistently do more damage while being able to sustain most hits. with the only downside of increasing the percentage of HP loss every time he re-uses another [Black Elixir].
Resonance
Resonance 1 — Improves his [Charge] card by enabling it to draw his cards
Resonance 2 — [Penetrating Shot] and [Explosive Shot] have a chance to hit additional times, more effective if you have trigger rate affixes.
Resonance 4 — Always have a [Charge] in your hand when the battle begins or the deck is shuffled. Ikoma then drains an Ally's HP for him to gain Final DMG bonus and gain [Berserk] and [Hyperarmor] for 12 seconds. This has a similar effect as Mumei.
Resonance 5 — Enables him to generate [Black Elixir] onto the deck at the start of the battle.
Synergies
❗ ❗ ❗ The Synergies mentioned here are merely samples. Taking their core mechanics as an example, you can use many other characters as replacements or other synergies. ❗ ❗ ❗
Stella - Offers cost reduction and cheap red cards to help activate his leader skill.
Shizuru - Can prioritize drawing red cards while also being able to spam Red cards.
Yer - Applies [Chill] and [Freeze] to maximize the Ikoma’s [Slash] skills.
Aoba - Provides ATK increase to frontline crew members. She also has cheap red cards that are spammable to help reduce Ikoma’s leader skill cooldown.
Gear and Affixes
Some examples of overall good equipment choices for Ikoma. For specific picks, please check the respective teams.
Weapons:
UR Kusa Ryujaku: Each time inflicting [Slash], ATK +0.5%, stackable.
UR Scorching Spike: Whenever [Ignite] is inflicted 8 times or [Blaze] is inflicted 4 times, inflicts [Wildfire].
SSR Unbewusstes Probe: Whenever you play a Red card of cost 3 or more, random enemy receive 3% less healing. This effect stacks up to a maximum of 75%.
SSR Million-Tons Revelation: ATK +80
SSR: Degenerate Blackrock: Increases wearer's final DMG dealt by 10%. This effect stacks.
SR Viscera Collector MK 0: Using [Leader Skill] restores 0.4 Cost. This effect stacks.
R Gardener Multi-Tool: Playing a Red card increases ATK by 0.5%. This effect stacks.
R Mass Projector: Using [Leader Skill] increases ATK by 1.5%. This effect stacks.
Armor:
UR Lucid Dream Fiber: Wearer's Red cards heal the wearer for 2% of the damage dealt.
UR Grandfather Reactive Armor: At the start of battle, convert 5% ATK of the ally with highest DEF to the wearer's ATK. When taking DMG, transfer 25% of the DMG taken to the ally with highest DEF.
SSR Simulated Stars: Using [Leader Skill] restores 5% HP. This effect stacks.
SSR External Memory Matrix: Max damage taken per hit is 33% of Max HP.
SSR Mecha Armor: Whenever [Slash] / [Rend] inflicted by wearer deals damage, restores HP equal to 5% of the damage dealt.
SSR Black Rock Armor: Reduces wearer's final DMG taken by 10%. This effect stacks.
SSR High Dimension Construct: Generating a Black card restores 5% of Max HP. This effect stacks.
SR Resonance Fiber: When own skill card is used, restores 2% of Max HP.
Accessory:
UR Dawncloud Seal: Max Hand Size +1.
UR World Line ß Box: Draws a card whenever you encounter a wave of enemies, prioritizing wearer's skill cards.
SSR Mobius: Cards in your hand are replenished 0.25 seconds faster. This effect stacks.
SSR Divinity Seal: Gains 2 Cost at the battle's beginning. This effect stacks.
SSR Fengshui Tactical Drone: For every 8 cards used, increases ATK or DEF by 2%, up to a maximum of 50%.
SR Magic Spring: Restores 0.02 Cost per second. This effect stacks.
R Harrison Device: Playing a Yellow card restores 0.3 Cost. This effect does not stack.
Affixes
Using [Leader Skill] restores 0.2/0.3 Cost. This effect stacks.
Using [Leader Skill] restores 2/3% of own Max HP. This effect stacks.
Using [Leader Skill] increases own ATK by 0.5/1%. This effect stacks.
Increases own ATK by 1/3%. This effect stacks.
Increases own ATK by 10/30. This effect stacks.
Increases all own trigger rates by 1/5%. This effect stacks.
Restores 0.01/0.02 Cost per second. This effect stacks.
Playing a Red card increases own ATK by 0.2/0.5%. This effect stacks.
Increases final DMG dealt by 2/5%. This effect stacks.
Gains [Hyperarmor] for 1 second when using own skill cards. This effect stacks.
Deals 3/5% more Physical DMG. This effect stacks.