


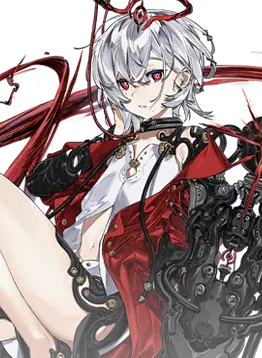
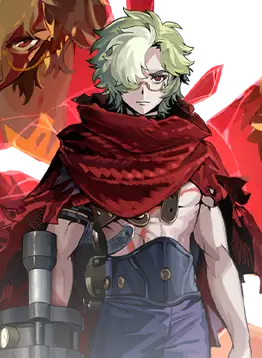
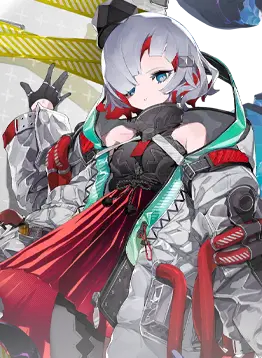
Stella is a fantastic support that can reduce the cost of all cards in your deck while providing offensive buffs and spamming low-cost attack cards. Make sure you give her gear or bring healers, since she’s a frontline but NOT a tank.
Playstyle and Key Mechanics
Stella’s kit revolves around generating low-cost derivatives for her use to do damage; additionally, she can cleanse allies thanks to [Purge] and reduce the Cost of cards by 1. Let's further dive into her kit:
Main Cards:
Starting with her First card [TATAKAE], this generates 3 derivatives of [TATAKAU].
Next is [Elegance], which can generate 2 derivatives of [Selfie].
Lastly, her Ultimate [Stellar], which cleanses allies using [Purge] and reduces the cost of all cards by 1, is really convenient when dishing out combos.
Derivatives:
[TATAKAU] - This card upgrades into 2 stages every time a Red card is used while in hand. For the base [TATAKAU], it deals physical damage and applies [Interrupt] to the target. Next for the 2nd iteration, this now deals 2 hits and can [Stun] instead of [Interrupt] and also [Ignite]. Lastly, for the final upgrade, it can now deal 3 hits and is also able to apply [Electrify].
[Selfie] - Increases all front-line allies' ATK; this can stack infinitely and also can draw a card that prioritizes purple ones.
[Singing] - This card can generate Cost. The Cost generated can bypass the cap (12). Additionally, it [Corrupt] and [Confuse] all enemies to take more damage. Unfortunately, due to the strength of this card, you will only be able to use it once per battle. Unlocks at Resonance 5.
Investment
Further dupes for Stella can be impressive; however, simply for quality of life, it will be nice to have her at Awakening 2.
Awakening 1 - This permanently increases hand cap by 1; this doesn't require having any card of her card in hand, but her simply being part of the team.
Awakening 2 - Increases the duration of [Stellar] for 3 seconds, making it possible to use more cards at a lower cost.
Resonance
Resonance 1 - Heals her whenever you use one of her cards, a great node for survivability, given how squishy she is being in the front.
Resonance 2 - Improves all of Stella’s red card damage by 10% whenever a red card is used this can stack up to 210%
Resonance 4 - Increases Basic Attack speed to the maximum, as an additional effect after using [Selfie].
Resonance 5 - Now generates a [Singing] card on top of your deck whenever you use the Leader Skill. This can only be used once per battle.
Synergies
❗ ❗ ❗ The Synergies mentioned here are merely samples. Taking their core mechanics as an example, you can use many other characters as replacements or other synergies. ❗ ❗ ❗
Ganya - Ganya relies on Stella’s card generation to fuel her leader skill. Stella being able to create 2-3 cards at once makes her a valuable partner for Ganya.
Katas - As another frontline crew member, Katas greatly benefits on most of Stella skill’s starting of with [TATAKAU] the 2nd iteration of this derivative can greatly reduce the cooldown of Katas’ Leader Skill as you can use 3 of these, additionally given that Katas’ cards requires high cost Stella’s Ultimate Skill that reduces the cost, just simply improve the efficiency on using these cards.
Tennie - Tennie and Stella are quite similar when dealing damage, by using the same cards to deal damage at a low cost (referring to [Magnet Wheel] and [TATAKAU]. Thanks to Stella’s Ultimate Skill, she can just spam [Magnet Wheel] without worrying about the cost.
Arcana - A great support making her recover discarded cards, great for fishing [Stellar] for a longer cost reduction buff.
Connor - A great Tank to help Stella live, as we kept mentioning, Stella is too squishy. Connor bringing [Shield] to the table fixes that issue.
Rina Von - Another tank that can help Stella survive in the frontlines, by blocking incoming damage and applying control debuffs to the enemy.
Gear and Affixes
Some examples of overall good equipment choices for Stella. For specific picks, please check the respective teams.
Weapons:
UR Space Tangent: Draws 1 more card at the start of battle prioritizing own Ultimate card.
UR Kusa Ryujaku: Each time inflicting [Slash], ATK +0.5%, stackable.
SSR Ball Lightning: Whenever wearer's skill card is played, unleashes a ball lightning that [Penetrate] enemies, dealing damage once each time it hits enemies in its path and [Electrify] them.
SSR Unbewusstes Probe: Whenever you play a Red card of cost 3 or more, random enemy receive 3% less healing. This effect stacks up to a maximum of 75%.
SSR Electro DS Wood Sword: Whenever wearer inflicts [Slash], also triggers [Electrify].
SR Destroyer Torch: Own skill cards have a 10% chance to release an additional dazzling ray, dealing damage once and [Stun] the target.
SR Viscera Collector MK 0: Using [Leader Skill] restores 0.4 Cost. This effect stacks.
R Gardener Multi-Tool: Playing a Red card increases ATK by 0.5%. This effect stacks.
R Mass Projector: Using [Leader Skill] increases ATK by 1.5%. This effect stacks.
R Magic Wand: Playing a Purple card has a 20% chance to restore 1 Cost. The trigger rate stacks.
Armor:
UR Lucid Dream Fiber: Wearer's Red cards heal the wearer for 2% of the damage dealt.
SSR Simulated Stars: Using [Leader Skill] restores 5% HP. This effect stacks.
SSR External Memory Matrix: Max damage taken per hit is 33% of Max HP.
SSR Black Rock Armor: Reduces wearer's final DMG taken by 10%. This effect stacks.
SSR Mecha Armor: Whenever [Slash] / [Rend] inflicted by wearer deals damage, restores HP equal to 5% of the damage dealt.
SR Resonance Fiber: When own skill card is used, restores 2% of Max HP.
Accessory:
UR Dawncloud Seal: Max Hand Size +1.
UR Hulton Balloon: Draws a card after playing a 3-cost or higher Yellow card.
SSR Mobius: Cards in your hand are replenished 0.25 seconds faster. This effect stacks.
SSR Divinity Seal: Gains 2 Cost at the battle's beginning. This effect stacks.
SSR Fengshui Tactical Drone: For every 8 cards used, increases ATK or DEF by 2%, up to a maximum of 50%.
SR Magic Spring: Restores 0.02 Cost per second. This effect stacks.
R Harrison Device: Playing a Yellow card restores 0.3 Cost. This effect does not stack.
Affixes
Using [Leader Skill] restores 0.2/0.3 Cost. This effect stacks.
Using [Leader Skill] restores 2/3% of own Max HP. This effect stacks.
Using [Leader Skill] increases own ATK by 0.5/1%. This effect stacks.
Using [Leader Skill] increases own DEF by 0.5/1%. This effect stacks.
Increases own ATK by 1/3%. This effect stacks.
Increases own ATK by 10/30. This effect stacks.
Increases all own trigger rates by 1/5%. This effect stacks.
Restores 0.01/0.02 Cost per second. This effect stacks.
Playing a Red card increases own ATK by 0.2/0.5%. This effect stacks.
Increases final DMG dealt by 2/5%. This effect stacks.
Gains [Hyperarmor] for 1 second when using own skill cards. This effect stacks.
Playing a Yellow card restores 0.05/0.1 Cost. This effect stacks.
Playing a Yellow card has a 5/10% chance to draw a card. The trigger rate stacks.


![Shizuru [Summer]](https://cdn.prydwen.gg/images/resonance-solstice/characters/shizuru-summer_card.webp)


![Raziel [The Reminisce]](https://cdn.prydwen.gg/images/resonance-solstice/characters/raziel-the-reminisce_card.webp)