This guide that will help you efficiently clear the Swarm Disaster by giving tips about characters, teams, paths and blessing you should use.
Isekai Train Simulation and Strategy RPG! Conductor, Your Trade Journey Awaits!
Swarm Disaster
Swarm Disaster is an expansion to the Simulated Universe mode available in Honkai: Star Rail that introduces new enemies, Paths and a lot of rewards. You can access the mode in the SU main menu and while the premise of the mode is similar to the base one - with its roguelite nature - it's actually a lot harder and can be considered the hardest content available in the game.
Partially because on the highest difficulty (there are 5) available in the Swarm Disaster you will fight against level 95 enemies. To compare to, in the Memory of Chaos, the last stage features level 90 enemies which translates to them having more HP, but also you doing less damage since the damage formula takes into account the difference between your character levels and the enemy you face.
The Swarm Disaster mode features a separate progression and skill tree that gives your characters free stats for doing various challenges - which is another change compared to the base Simulated Universe skill tree, where you just had to play the mode to unlock the nodes. And we strongly suggest to focus on progressing down the tree, because it will make the mode much easier. You can check all available bonuses you can obtain there further down the guide in section dedicated to them.
On top of great rewards that you can obtain in the mode (including 4500 Stellar Jades) you will also be able to unlock the Path of Propagation in the base Simulated Universe. The Path enhances the Basic Attacks and also helps with Skill Point management which makes it perfect for the recently released Imbibitor Lunae and Qingque.
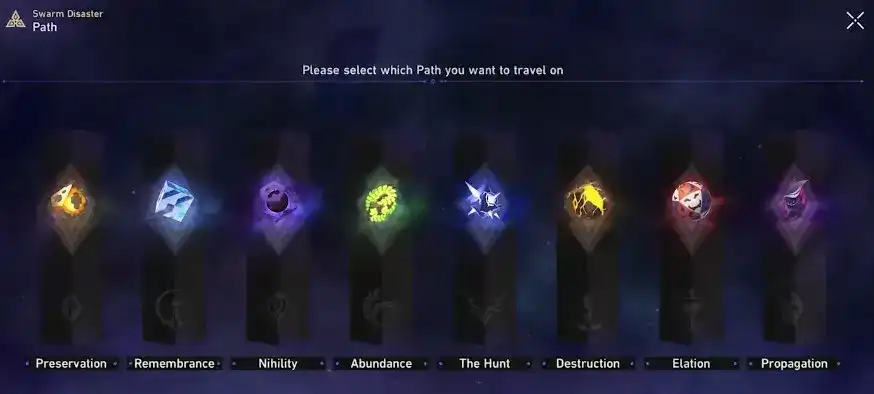
Paths
When you first enter the Swarm Disaster mode, you will have to pick one of the available Paths and similar to the base Simulated Universe not all Paths are unlocked when you start playing the mode and you need to progress through the difficulties and story to gain access to them. At first, you will only have access to the Destruction path (during tutorial) and shortly after you will unlock Preservation, Abundance and Hunt Paths.
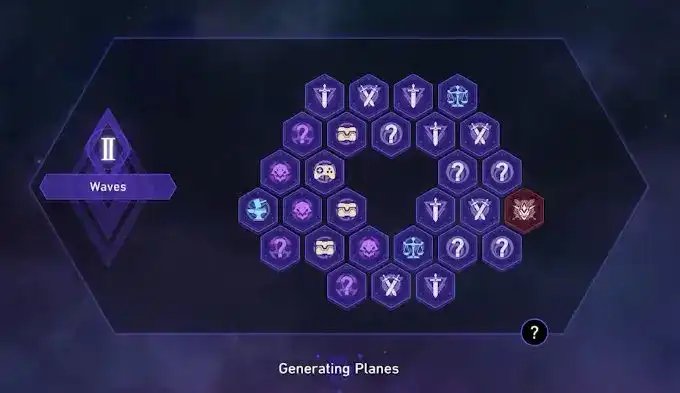
The Path you choose will not only affect the Blessings you will want to focus on and your playstyle, but it will also impact how you interact with the Board and Domains - so the main mechanism of the Swarm Disaster mode.
Available Paths
Here's a list of all available Paths and their bonuses:
Elation
Dimension Effect
When the first or second Plane begins, surprising effects will be applied.
Continuous Effect
When allies enter "Domain - Boss" or "Domain - Boss: The Swarm", obtain 1 random Happiness. For every domain that allies pass through, the Follow-up attack DMG dealt by all allies receive random stat increases.
Our Review
The Elation Path is perfect for characters with Follow-up attacks. Moving through the game board will grant you a permanently stacking Follow-up attack damage bonus - though keep in mind that the amount this bonus increases per movement is random, so there's a RNG element tied to it. Use your Dice to apply Happiness to tiles with undesirable domains - Happiness has a chance to transform tiles positively e.g. into loot domains or negatively e.g. into Swarm Domains.
Characters
Destruction
Dimension Effect
When the first or second plane begins, turns 2 Domain(s) into Domain - Elite.
Continuous Effect
After achieving victory in Domain - Elite, obtain an extra 1 Blessing(s). For every battle won, increases DMG dealt by all allies by 8%.
Our Review
Destruction is generic Path that offers global DMG% increase for your entire team based on how many individual enemies you slay within the entire run. Focus on moving to Combat Domains to stack up your continuous bonus and use enhancement Dice to upgrade Elite Combat Domains you intend to path towards to. When rolling your Legendary Dice use it on an Elite - preferably one that is enhanced saving you time and allowing you to take a different route with more opportunities.
Characters
Any character can work here.
Hunt
Dimension Effect
When the first or second plane begins, generates 1 extra Blessing Trotter and 1 Curio Trotter beacons.
Blessing Trotter: There will be a Trotter with this Beacon in the Domain. Defeat it to obtain additional Blessings.
Curio Trotter: There will be a Trotter with this Beacon in the Domain. Defeat it to obtain additional Curios.
Continuous Effect
Every time allies move to a Domain, all Domains currently with the Blessing Trotter or Curio Trotter will swap their positions with an adjacent Domain. For every Trotter defeated in battle, all allies' CRIT DMG increases by 30%.
Our Review
The Hunt Path is the strongest offensive Path for characters that can utilize critical strikes. Slaying Warp Trotter encounters will grant you stacking Crit DMG bonus, so focus on using your dice to generate, lock down and move towards Warp Trotter domains - but be aware that the little buggers don't like to stay in one place and will teleport around the board.
Characters
Any crit-based character can work here.
Abundance
Dimension Effect
When the first or second plane begins, applies Mercy to 2 random Domain(s).
When using Audience Die: Abundance in domains with Mercy effect applies, the countdown timer will no longer be reduced and have 1 added to it instead. This continuous effect will conclude after triggering Planar Disarray.
Continuous Effect
Countdown is reduced by 2 extra count(s). When entering Domains with the Mercy effect, this effect is changed to adding 1 counter(s) to the Countdown. Every Countdown counter increases all allies' Outgoing healing by 5%.
Our Review
Abundance is a passive path focused on gathering many more Blessings than any other Path thanks to the ability of completely ignoring the countdown. For each stack of countdown remaining, players will obtain increased % Healing, offering a large initial defensive bonus compared to other paths. Focus on spreading as much Mercy as possible and only navigating through domains with Mercy already on them. Be aware that choosing a domain without Mercy will cost 3 countdown but choosing one with Mercy will add 1 countdown to your remaining total.
Due to the nature of the Path, it's a generic path that can work with any damage dealer type as long as you have a Healer in the team (which you will need either way). It's slower than others, but unless your characters will be one-shot, you will - eventually - conquer the mode.
Characters
Nihility
Dimension Effect
When the first or second plan begins, turn 2 random Domain(s) into "Domain - Blank".
Domain - Blank: Nothing will happen in this Domain.
Continuous Effect
A "Domain - Blank" will be replaced with a Domain of a random type when allies enter it. For every "Domain - Blank" that allies pass through, DoT dealt by all allies increases by 18%.
Our Review
The Nihility path is ideal for Damage over Time compositions offering a stacking continuous effect that boosts DoTs massively. Re-roll your Dice aggressively to convert as many domains into Blank Domains with the goal of converting the majority of Domains.
Activating conversion Dice outcomes will remove that option from being rolled and once all of Domains are converted the only remaining Dice options will be your legendary effect and one other granting you massive rewards in which you should priorities moving through blank tiles at this time.
Characters
Remembrance
Dimension Effect
When the first or second plane begins, randomly copy 2 Domain(s) and apply Recollection to it.
Recollection: When using Audience Die: Remembrance, increases the Effect Hit Rate of all allies when passing through any Domain - Recollection.
Continuous Effect
Every time allies pass through 1 Domain with Recollection applied, Effect Hit Rate for all allies increase by 25%.
Our Review
The Path is best for characters that aim to crowd control enemies indefinitely with Freeze, Entangle or Imprison thanks to a stacking Effect Hit Rate buff that will increase your chances of landing these effects in succession.
Use you Recollection Dice effect to copy high value Domains such as Reward, Adventure and Elite to adjacent domains to increase the rewards of your path throughout the plane. Ensure you prioritize moving through Recollection domains to stack your Effect Hit Rate buff.
Characters
Preservation
Dimension Effect
When the first or second plane begins, apply Cornerstone to 2 random Domain(s).
Cornerstone: When using Audience Die: Preservation in Domains with Cornerstone applied, the Domain will not Collapse. However the Cornerstone effect will be removed after entering said Domains.
Continuous Effect
When entering Domain - Boss or Domain - Boss: The Swarm, obtain rewards based on the number of Domains with the Cornerstone effect in the current plane. For every Domain with Cornerstone, increase the amount of Shield Effect received by all allies by 4%. For every 1 different types of Domains with Cornerstone, obtain a Blessing.
Our Review
The Path is the strongest Defensive Path great for pushing content that is incredibly dangerous, but you need to use characters that create Shields. Focus on applying Cornerstones to as many different Domain types as possible using your Dice effects.
When you reach the Boss of the plane, depending on how many different Domains you have applied Cornerstone to you will be granted a number of Blessings as well as a large bonus to total Shielding amount based on the amount of all Cornerstones you built.
Characters
Propagation
Dimension Effect
When the first or second plane begins, turn 2 random domains into "Domain - Combat: The Swarm" and "Domain - Occurrence: The Swarm".
Continuous Effect
When allies enter "Domain - Combat: The Swarm" or "Domain - Occurance: The Swarm", they will receive a special effect of Propagation. For every "Domain - Combat: The Swarm" or "Domain - Occurance: The Swarm" that allies pass through, all allies' Basic ATK DMG increases by 20%.
Our Review
The Path is tailored toward the recently released Imbibitor Lunae and Qingque as it increased the damage done by Basic Attacks.
Focus on navigating toward "Swarm" related Domains on the board - defeat them to stack the Basic ATK DMG % buff as much as possible. Use your Audience Dice to spread Swarm Domains to adjacent Domains to make it easier to gather more of them.
Characters
The best Path
There is no one best Path that will work equally well for everyone. Each account is different and this will dictate which Path you should play - below you will find some general tips for the Path you should choose:
Abundance
A great entry-level Path that will work with any account - and its special mechanic will allow you to gather more Blessings than any other Path, making your team much stronger. And since you only need a Healer in your team to make use of it, it's easy to use and very reliable. We found this Path to be the best one to tackle the dreaded difficulty 5.
Preservation
An alternative entry-level Path that this time focuses on Shielding. While you can make it work with the Fire Trailblazer, it really starts to shine with Gepard as his Shields are simply much stronger - and they will turn this defensive Path into an offensive monstrosity. Its special mechanic also will allow you to gain more Blessings than most other Paths (but less than Abundance).
Nihility
If you have Kafka, this Path is the best choice for you. Nihility Path already is one of the strongest choices for base Simulated Universe because its Blessings are super strong and the same thing can be said about its Performance in the Swarm Disaster. Still, you can try to make it work without Kafka by using Sampo or Serval, but Kafka just elevates it to another level.
Hunt
Offense is best defense is a common saying and it can also work well in the Swarm Disaster - still, while on lower difficulties this Path will allow you to speedrun the planes, on the higher ones its offensive power might not be enough to safely auto and chill. So use this Path cautiously.
Interplay
Interplay is another new feature that allows you to combine two different Paths to make the Resonance skill much stronger.
How to activate Interplay?
First, you need to activate the Resonance for your main Path by gathering 3 Blessings from that Path. Then you need to gather 3 Blessings from the Path you want to interplay with - this will automatically activate the Interplay bonus. Important! Each Path can be combined with two other paths, but the combinations differ based on your Primary Path (and yes, you can activate both Interplay paths in the same run - by simply gathering 3 Blessings from each secondary Path).
The below table showcases all combinations and the bonuses you can obtain.
Primary Path
Secondary Path
Special Interplay Effect
Elation
Remembrance
When Path Resonance: Elation deals Ice DMG, there is a 150% base chance to Freeze the enemy target for 1 turn(s).
Elation
Abundance
When Path Resonance: Elation deals DMG, randomly dispels 1 debuff on 1 ally.
Destruction
Preservation
Using Path Resonance will cause any character with current HP percentage lower than 50% to gain a Shield equal to 40% of their Max HP, lasting for 2 turn(s).
Destruction
Elation
When a character launches a follow-up attack, regenerates 5% Energy for Path Resonance. If the character's current HP percentage is lower than 50%, additionally regenerates 5% Energy for Path Resonance.
Hunt
Abundance
After enemy target(s) are defeated by a Path Resonance, restores all allies' HP equal to 50% of their respective Max HP.
Hunt
Elation
After using Path Resonance, all allies' SPD increases by 25 for 2 turn(s). This effect also applies to units summoned by allies.
Abundance
Nihility
After using Path Resonance, all allies' Weakness Break Efficiency increases by 15% and Break Effect increases by 50%. This effect lasts for 2 turn(s) and stacks up to 2 time(s).
Abundance
Propagation
After a character has their HP restored via Path Resonance and if the healing amount exceeds the maximum HP, recover 1 Skill Point. This effect can only trigger 1 time per Path Resonance use. After triggering this effect, all DMG dealt by all allies is increased by 30% for 2 turns. This effect can stack up to 2 time(s).
Nihility
Hunt
After using a Path Resonance, for every type of debuff (out of Burn, Shock, Bleed, and Wind Shear) the enemy target is currently inflicted with, Advance Forward all allies' actions by 4%.
Nihility
Propagation
A character's Basic ATK can cause all DoTs currently applied on the target via Path Resonance: Nihility to immediately deal DMG equivalent to 40% of these statuses' original DMG.
Remembrance
Hunt
When the Freeze effect caused by Path Resonance is dispelled or resisted by enemy targets, there is a 150% base chance of decreasing the target's SPD by 15% for 2 turn(s).
Remembrance
Destruction
When the Freeze effect caused by Path Resonance is dispelled or resisted by enemy targets, there is a 150% base chance of lowering the target's All-Type RES by 15% for 2 turn(s). For every 1% HP that each ally has lost, the target's All-Type RES is additionally lowered by 0.06%.
Preservation
Nihility
There is a 150% base chance for Path Resonance: Preservation to inflict Bleed on the attacked target for 2 turn(s). Bleeding enemies will take Physical DoT equal to 12% of their Max HP at the start of each turn. This DMG cannot exceed 250% of the total amount of Shield effect currently active on all allies.
Preservation
Remembrance
When attacking Frozen enemy targets with Path Resonance: Preservation, the DMG dealt increases by 80% and the Freeze status on the enemy targets is removed. Dissociation will not be removed by this effect.
Propagation
Preservation
When using Path Resonance, a single target ally gain a Shield equal to 60% of Max HP, lasting for 3 turn(s).
Propagation
Destruction
After using Path Resonance, nullifies all DMG received by a single target ally except DoT. This status is dispelled after being attacked. If the target ally's current HP percentage is lower than 50% when Path Resonance is used, it will additionally recover 1 Skill Point(s).
Communing Trail
Communing Trail is the screen that shows the current bonuses you have already unlocked via the Trail of Pathstrider (the system of challenges in Swarm Disaster). The bonuses are split into 7 Paths and below you can find a list of them and the summary of buffs within a path.
Communing
Description
1
In the Simulated Universe: The Swarm Disaster, all characters' Follow-Up attack damage increases by 16%.
3
In the Simulated Universe: The Swarm Disaster, Path Resonance DMG increases by 6%.
5
In the Simulated Universe: The Swarm Disaster, all characters' CRIT DMG increases by 10%.
7
Every time allies enter the next plane in the Simulated Universe: The Swarm Disaster, gain 1. more chance to re-roll the die.
9
In the Simulated Universe: The Swarm Disaster, all characters' Follow-Up attack damage increases by 16%.
11
In the Simulated Universe: The Swarm Disaster, Path Resonance DMG increases by 6%.
13
In the Simulated Universe: The Swarm Disaster, all characters' CRIT DMG increases by 10%.
16
In the Simulated Universe: The Swarm Disaster, all characters' Follow-Up attack damage increases by 16%.
20
In the Simulated Universe: The Swarm Disaster, all characters' CRIT DMG increases by 10%.
Summary
Follow-Up DMG +48%
Resonance DMG +12%
Crit DMG +30%
Communing
Description
1
In the Simulated Universe: The Swarm Disaster, all characters' ATK increases by 12%.
3
In the Simulated Universe: The Swarm Disaster, increase the current Energy of Path Resonance by 10 every time allies enter battle.
5
In the Simulated Universe: The Swarm Disaster, all characters' receive 5%less damage.
7
If you passed the First Plane in your previous Simulated Universe: The Swarm Disaster challenge, then all enemies will receive a set amount of DMG equal to 99% of their respective Max HP when you enter battle for the first 4 battles (excluding Boss battles) in the First Plane in the current The Swarm Disaster challenge.
9
In the Simulated Universe: The Swarm Disaster, all characters' ATK increases by 12%.
11
In the Simulated Universe: The Swarm Disaster, Path Resonance DMG increases by 6%.
13
In the Simulated Universe: The Swarm Disaster, all characters' receive 5%less damage.
16
In the Simulated Universe: The Swarm Disaster, all characters' ATK increases by 12%.
20
In the Simulated Universe: The Swarm Disaster, all characters' receive 5%less damage.
Summary
ATK +36%
Resonance DMG +6%
Damage Taken -15%
Communing
Description
1
In the Simulated Universe: The Swarm Disaster, all characters' SPD increases by 4%.
3
In the Simulated Universe: The Swarm Disaster, Path Resonance DMG increases by 6%.
5
In the Simulated Universe: The Swarm Disaster, all characters' CRIT Rate increases by 6%.
7
When entering Domain - Boss or Domain - Boss: The Swarm in the Simulated Universe: The Swarm Disaster, all allies regenerate their respective Energy to Max Energy.
9
In the Simulated Universe: The Swarm Disaster, all characters' SPD increases by 4%.
11
In the Simulated Universe: The Swarm Disaster, Path Resonance DMG increases by 6%.
13
In the Simulated Universe: The Swarm Disaster, all characters' CRIT Rate increases by 6%.
16
In the Simulated Universe: The Swarm Disaster, all characters' SPD increases by 4%.
20
In the Simulated Universe: The Swarm Disaster, all characters' CRIT Rate increases by 6%.
Summary
SPD +12%
Resonance DMG +12%
Crit Rate +18%
Communing
Description
1
In the Simulated Universe: The Swarm Disaster, all characters' Max HP increases by 10%.
3
In the Simulated Universe: The Swarm Disaster, increase the current Energy of Path Resonance by 10 every time allies enter battle.
5
In the Simulated Universe: The Swarm Disaster, all characters' HP Recovery increases by 6%.
7
Increase initial countdown counter by 2 in the Simulated Universe: The Swarm Disaster.
9
In the Simulated Universe: The Swarm Disaster, all characters' Max HP increases by 10%.
11
In the Simulated Universe: The Swarm Disaster, increase the current Energy of Path Resonance by 10 every time allies enter battle.
13
In the Simulated Universe: The Swarm Disaster, all characters' HP Recovery increases by 6%.
16
In the Simulated Universe: The Swarm Disaster, all characters' Max HP increases by 10%.
20
In the Simulated Universe: The Swarm Disaster, all characters' HP Recovery increases by 6%.
Summary
Max HP +30%
HP Recovery +18%
Communing
Description
1
In the Simulated Universe: The Swarm Disaster, all characters' DoT dealt increases by 10%.
3
In the Simulated Universe: The Swarm Disaster, Path Resonance DMG increases by 6%.
5
In the Simulated Universe: The Swarm Disaster, all characters' Break Effect increases by 15%.
7
In the Simulated Universe: The Swarm Disaster, the Cosmic Fragments received when giving up the choice of the dice increases by 10.
9
In the Simulated Universe: The Swarm Disaster, all characters' DoT dealt increases by 10%.
11
In the Simulated Universe: The Swarm Disaster, Path Resonance DMG increases by 6%.
13
In the Simulated Universe: The Swarm Disaster, all characters' Break Effect increases by 15%.
16
In the Simulated Universe: The Swarm Disaster, all characters' DoT dealt increases by 10%.
20
In the Simulated Universe: The Swarm Disaster, all characters' Break Effect increases by 15%.
Summary
Break Effect +45%
Resonance DMG +12%
Damage over Time +30%
Communing
Description
1
In the Simulated Universe: The Swarm Disaster, all enemies' Effect RES decreases by 3%.
3
In the Simulated Universe: The Swarm Disaster, increase the current Energy of Path Resonance by 10 every time allies enter battle
5
In the Simulated Universe: The Swarm Disaster, all characters' Effect Hit Rate increases by 5%.
7
Unlock the Cheat Function in the simulated Universe: The Swarm Disaster. Specify a Die Effect and immediately obtain that effect after re-rolling. At the start of the challenge, receive 1 chance(s) to cheat.
9
In the Simulated Universe: The Swarm Disaster, all enemies' Effect RES decreases by 3%.
11
In the Simulated Universe: The Swarm Disaster, Path Resonance DMG increases by 6%.
13
In the Simulated Universe: The Swarm Disaster, all characters' Effect Hit Rate increases by 5%.
16
In the Simulated Universe: The Swarm Disaster, all enemies' Effect RES decreases by 3%.
20
In the Simulated Universe: The Swarm Disaster, all characters' Effect Hit Rate increases by 5%.
Summary
Effect Hit Rate +15%
Resonance DMG +6%
Enemy Effect RES -9%
Communing
Description
1
In the Simulated Universe: The Swarm Disaster, all characters' DEF increases by 12%.
3
In the Simulated Universe: The Swarm Disaster, Path Resonance DMG increases by 6%.
5
In the Simulated Universe: The Swarm Disaster, increase Shield Effects received by all characters by 4%.
7
Increases the cosmic Fragments received at the start of Simulated Universe: The Swarm Disaster by 100.
9
In the Simulated Universe: The Swarm Disaster, all characters' DEF increases by 12%.
11
In the Simulated Universe: The Swarm Disaster, Path Resonance DMG increases by 6%.
13
In the Simulated Universe: The Swarm Disaster, increase Shield Effects received by all characters by 4%.
16
In the Simulated Universe: The Swarm Disaster, all characters' DEF increases by 12%.
20
In the Simulated Universe: The Swarm Disaster, increase Shield Effects received by all characters by 4%.
Summary
DEF +36%
Resonance DMG +12%
Shield Effect +12%
Trail of Pathstrider Missions
This section will give you tips how to the missions you need to obtain Communing Trial buffs and also unlock the Propagation Path.
Mission
Goal
Notes
#1
Obtain 750 Cosmic Fragments
It's pretty simple - you will do this mission by just playing the mode and obtain the necessary amount of CF in 1-3 runs.
#2
Obtain a total of 10 enhanced Blessings
You can either enhance the Blessings manually using Herta or gather them from tiles that have the 'enhanced' icon on them (Combat or Swarm).
#3
Complete a total of 6 Combat domains
Hunt for those Combat domains!
#4
Trigger Planar Disarray 2 times
Difficulty 2 or higher required. Ignore the countdown and let it reach 0 two times to trigger this.
#5
Enter and complete a Transaction domain for a total of 3 times
Difficulty 2 or higher required. Hunt for those Transaction Domains!
#6
Complete a total of 6 domains with any beacon
Difficulty 2 or higher required. Beacon's are shown on the tiles in the bottom right corner. The easiest way to force them is using the Hunt Path as it spawns a lot of Trotter beacon tiles.
#7
Complete domains with the Blessing Trotter beacon or the Curio Trotter beacon for a total of 4 times
Difficulty 3 or higher required. Well, Hunt Path again it is - just pick it and a lot of those domains will spawn for you.
#8
Obtain a total of 10 Curios
Difficulty 2 or higher required. A pretty simple mission. You can obtain Curios in variety of ways: Occurrence Domains, Reward Domains or even just buy them from Herta at Transaction or Respite Domains. You don't need to get 10 curios in one run, so take it slow and you will finish the mission in time.
#9
Complete an Adventure domain for a total of 3 times
Difficulty 3 or higher required. Hunt for Domains that have the gamepad icon on them.
#10
Trigger Emergency for a total of 1 times
Difficulty 3 or higher required. A very annoying and random mission that may take you a few runs to trigger. The easiest way we found to force it is hunting for Swarm Domains and picking the option that will 'greatly increase Swarm activity' - if you do it 2-3 times in one run, it will trigger the Swarm Emergency event.
#11
Complete Simulated Universe: Swarm Disaster 1 time
Difficulty 3 or higher required. Well, it's a both simple and hard mission at the same time. But with the bonuses unlocked so far, the majority of the players should be able to clear the Difficulty. If you're struggling, try the Abundance path and take it really slow by gathering as many Blessings as you can.
#12
Generate 2 Resonance Interplays in the same challenge run for a total of 2 times
Difficulty 3 or higher required. We explained how to activate Interplay in the guide and you can find viable combinations there - basically you need to collect 3 Blessings from your main Path and then 3 Blessings each for the two other Paths you can Interplay with.
#13
Obtain a total of 4 Resonance Formations
Difficulty 3 or higher required. This is actually simpler than the previous mission - Resonance formation are the upgrades to your main Path. So continue gathering Blessing from it to pass this mission.
#14
Consecutively enter Combat, Combat: Swarm, or Elite domains for 3 times, and repeat this action for 4 times
Difficulty 3 or higher required. Path of Destruction is the best Path for this mission as it can force spawn the Domains you need. Then just try to chain them together.
#15
Purchase 3 or more items in the Transaction domain for a total of 2 times
Difficulty 3 or higher required. Save your Cosmic Fragments and only use them in the Transaction Domain - 300 should be enough as this allows you to buy 3x white Blessings from Screwllum.
#16
Complete 1 domain with the Blessing Trotter beacon and 1 domain the Curio Trotter beacon in the same plane for a total of 3 times
Difficulty 4 or higher required. Use the Hunt Path and chase the piggies!
#17
Consecutively enter different types of domains for 4 times, and repeat this operation for 5 times
Difficulty 4 or higher required. This sounds harder than it is - you actually can do this quest by simply playing normally and there's a high chance you will complete it without any issues due to how the planes are generated.
#18
Have the countdown at exactly 0 when entering the Boss: Swarm Domain.
Difficulty 4 or higher required. This one is actually tricky. Try to use Hunt Path as it allows you to teleport across the planes with ease and aim to have the cooldown at 5 or lower when you're finishing the 2nd plane - the 3rd plane is always small and you can manipulate the countdown timer there easier.
#19
Have the average HP percentage of the entire team be at 100% when passing through any domain for a total of 20 times
Difficulty 4 or higher required. You obviously will use a Healer in this mode no matter the Path, but if you pick Abundance on top of it, it will make completing this quest easier - just make sure everyone is healed to 100% before you kill the last enemy in the Domain.
#20
Possess 1,000 or more Cosmic Fragments when entering a Boss: Swarm Domain
Difficulty 4 or higher required. Just play Abundance Path and abuse the Mercy mechanic to step on as many domains as possible.
#21
Enter a Blank domain for a total of 12 times
Difficulty 4 or higher required. Just play the Nihility Path as it allows you to generate the Blank Domains every single turn.
#22
Obtain a total of 1000 Cosmic Fragments through means other than battles
Difficulty 4 or higher required. Abundance Path will again help you here - navigate the domain to travel through as many non-Combat domains to get the CF from them.
#23
Have the Planar Disarray's Disruption Level at level 6 or higher when completing the stage
Difficulty 4 or higher required. Any Path besides Abundance will work here as you actually want to decrease the Countdown really fast.
#24
Use 3 different Paths to complete Simulated Universe: Swarm Disaster at Difficulty V
Difficulty 5 or higher required. Well, good luck!
As for the yellow pillar challenges - they will take you a while to finish as each requires 'siding' with the Aeon who governs the Path 20 times. You can do that after dealing with the Boss of a plane via this screen:
Sadly, there's no way to track how many choices you've already made for each Path, so you will have to do it manually.
Team building
Because the enemies you fight in the Swarm Disaster mode are not only hard mechanic wise, but also their levels can go beyond that what we've fought against so far (up to level 95 at the highest difficulty), we suggest going back to the 'release' team building meta and focus on the defensive side of your team more. This will make your runs much more stable, especially on auto-play.
Furthermore, because the Blessings and passive buffs offer a lot of DMG% or ATK% increases for your team, characters belonging to the Harmony category aren't that needed in this mode - the buffs provided by them get diluted. Instead, we suggest using a character who can provide DEF Shred because that's the only thing you can't gain in an easy way in this mode (this means that Silver Wolf and Pela will shine there).
So the cookie cutter template for your team will look like this:
DPS - the damage dealer of your choice,
Def Shredder - either Silver Wolf or Pela,
Healer - a reactive type support, so a character that will restore the lost Health - Natasha, Bailu, or Luocha,
Shielder/Taunter - a proactive type support that helps the team mitigate the incoming damage via Shields or Taunts, so Fire Trailblazer, March 7th or Gepard.
Keep in mind that the choice of your team will also impact the Path you will use as the additional synergy you will gain will make clearing the Swarm Disaster much easier.
You can also replace the DEF Shredder character with a second DPS - with all the Blessings and Dice effects available in the mode, running double DPS characters actually is very viable:
DPS - the damage dealer of your choice,
DPS - the damage dealer of your choice,
Healer - a reactive type support, so a character that will restore the lost Health - Natasha, Bailu, or Luocha,
Shielder/Taunter - a proactive type support that helps the team mitigate the incoming damage via Shields or Taunts, so Fire Trailblazer, March 7th or Gepard.
This section contains generic Blessings that work with each path and will make your runs smoother:
Regression Inequality of Annihilation (Destruction) - When player characters are hit, DMG taken by the characters is equally distributed among all allies,
Perfect Experience: Reticence (Remembrance) - After an enemy is attacked 6 time(s), they have a 120% base chance to become Frozen for 1 turn(s).
Being of Abundance, Becoming One Mind (Abundance) - When the character provides healing, allies other than the healed target will also gain HP equal to 30% of the Outgoing Healing,
Precious Moon-Like Candlelight (Abundance) - When a character provides healing to allies, increases the ATK of both units by 50% for 1 turn(s),
Aversion to Suffering (Abundance) - After launching attacks, characters deal Additional DMG equal to 36% of their current HP,
Clear Lucite Body (Abundance) - When a character's HP is full, reduces their DMG taken by 36%,
Interstellar Construct: Sanctuary (Preservation) - At the end of the turn, there is 80% fixed chance for characters to gain a Shield equal to 12% of their Max HP, lasting for 1 turn(s),
Battle Against the Old Foe (Hunt) - If a character has higher than 100% CRIT Rate and currently has Critical Boost, for every 1% CRIT Rate that exceeds 100%, CRIT DMG increases by 3%. CRIT DMG can be increased this way by up to 150%,
Auspicious Star (Hunt) - When a character defeats an enemy, regenerates Energy equal to 60% of the character's Max Energy,
Ejecting the Borisin (Hunt) - After every 6 turn(s) conducted by all allies, the current character's action is Advanced Forward by 100%. The effect cannot be triggered repeatedly by the same character,
All Things are Possible (Nihility) - If an enemy is attacked while under any DoT statuses, a random DoT will be triggered, dealing DMG equal to 100% of the DoT.
Twenty-First Military Rule (Elation) - After a character launches follow-up attacks, there is a 65% fixed chance to recover 1 Skill Point,
Reflection (Destruction) - When struck with a killing blow, instead of becoming downed, characters immediately restore HP by 1% of their Max HP. The allied team can only trigger this effect 1 time(s) per battle,
Blessing (Abundance) - After a character provides healing, there is a 30% fixed chance to recover 1 Skill Point. This effect can only trigger once per action.
Tips and tricks
Here's a list of various tips and tricks that will help you along your journey through the Swarm Disaster:
Focus on doing the challenges in the Trail of Pathstrider as the bonus stats they provide will make your life much easier,
You need to play on at least Difficulty 3 to be able to do the challenges in the Trail of Pathstrider (past the initial ones) - with some of them even requiring you to do them on Difficulty 4,
Ensure you check the bonuses you're getting from the Communing Trail to avoid overcapping your stats e.g. if you have close to 100% Crit Rate normally look into switching a Crit piece as the Communing Trail gives you a further 18% at max rank,
Initially, while you will be able to auto Difficulty 3 with a decent team, anything higher will require you to play on manual,
Pick a Path that corresponds to the strengths of your account but also the goal you are trying to achieve. If you are trying to complete a Pathstrider mission that requires you kill Trotters choose Hunt, if you need to slay enemies in succession pick Destruction. All paths are viable so make sure to experiment!
Make sure to use two defensive supports in your team to make your runs safer and smoother - use both a pro-active (Shielder/Taunt) and re-active (Healer) type of support for best effect,
In Swarm Disaster you get massive increases to most of your combat stats like increased DMG, Crit Rate, Crit Dmg and ATK% - for this reason Harmony units are a little less valuable due to diminishing returns. DEF shred, RES shred and causing enemies to take increased damage is rare from Blessings and dice bonuses making Nihility units comparatively a little more valuable. So having a source of DEF Shred can drastically increase the damage output of your team (Pela and Silver Wolf are your options here),
Consider running double DPS compositions. Thanks to the big stat buffs you can obtain from the Communing Trail and a lot of Blessings and Dice that give you a lot of Skill Points it's actually viable to play with two DPS in your team,
Make sure you're on the look out for exceptionally powerful defensive Blessings even if they aren't a part of your Path. The main threat in Swarm disaster is being 1 shot or running out of HP before the enemy falls so they are always worth considering,
Try to enable at least one Interplay bonus as the additional effect added to the Resonance skill will make a huge difference. And you can actually enable both of the Interplays in the same run!
Imbibitor Lunae is the best character to use in the Trotter and vase smashing mini-events - his Technique allows him to zoom through the map effortlessly.
Video guide
For more tips and tricks and a generic overview for the mode we suggest watching these videos: