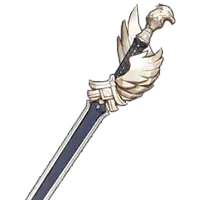
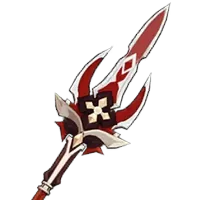
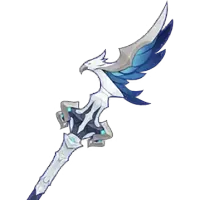
Character stats
Level Stats
Base HP12,613
Base ATK353
Base DEF795
CRIT DMG38.4%

Best Varka build, teams, weapons, artifacts, combos, rotations, and gameplay notes for Genshin Impact.
 5-star
 Anemo
Anemo Claymore
Last updated: September 12, 2026

Varka is a 5-star character from the Anemo element who wields the Claymore weapon. Varka was added to the game with the 6.4 patch.
Grand Master of the Knights of Favonius. Knight of Boreas, protector of Mondstadt.
Talent text and per-level multipliers, straight from the character data.



Passive talents are shown in full as kit cards.




All constellation names and descriptions in full for quick reference.






Keyword and ability definitions referenced across this character's kit.
Easy/accessible damage floor through flexible combos.
Best teammates do not significantly overlap with other archetypes.
Good elemental application and heavy attacks for shieldbreaking.
Inflexible teams.
Lacks in ceiling damage relative to other archetypes.
Varka is a 5-star Anemo Claymore character who is most commonly played as on-field DPS.
His gameplay consists of combining his Normal Attacks alongside special casts of Elemental Skills or Charged Attacks to deal damage, and can further convert a part of his damage to another element based on team composition. Being a Hexerei character, he also benefits from important synergies with others in the faction.
Varka’s Skill is the centrepiece of his kit: it gives access to the elemental conversion, holds the multipliers he scales off of when using these converted attacks, and gives them a special multiplier from his A1 Passive based on his team. Attacks from his left Claymore deal Anemo damage while the other is converted, in the following order of priority, to Pyro, Hydro, Electro, or Cryo (“PHEC” hereon out) depending on the elements in the party.
On top of all this, while the conversion is up, he also gets a special Skill with hefty multipliers. When available, this special Skill can be used either by pressing Skill again or using his Charged Attack - the former is quicker, while the latter packs more damage. Don’t be offput by the lengthy 11s cooldown; each of Varka’s Normal Attacks cuts it down by 0.5s, up to 15 times. If that seems insufficient, having his Hexerei Passive enabled turns this reduction into a full second each. Though not necessary, given many of Varka’s best synergies are with Hexerei characters anyway, it’s not often you won’t see this in play.
While his Hexerei Passive incentivizes certain teammates, his Ascension Passives dictate the structure of his teams. It’s not subtle about it, either: when Varka has 2 Anemo characters (including himself) and 2 PHEC teammates of the same element, every multiplier you see listed under his Skill is given a staggering 2.2x multiplier. He does receive a consolatory 1.4x multiplier if his PHEC teammate elements don’t match, but this is comparatively so meagre it seems to exist purely to draw attention to how punishing not fulfilling the full criteria is!
The rest of his first Passive as well as his second Passive offers Varka a less flashy but still important conditional 25 DMG% each. The first is gained based on Varka’s ATK for running PHEC teammates, capping its buff when Varka has 2500 ATK. The second grants Varka 7.5 DMG% when a Swirl is triggered based on the elements involved, stacking up to 4 times. As long as you’re following the conditions for getting his 2.2x multiplier, these buffs are more or less permanent.

Characters part of the Hexerei faction, after completing their Witch’s Rite Story Quest, unlock special Passive abilities in combat. These are activated when there are 2 Hexerei characters on the team, with Varka themselves counting as one.
Varka’s core gameplay loop can be simplified to the following:
Tap his Elemental Skill
Spam attacks to decrease the cooldown of his Special Skill
Cast the Special Skill through the Elemental Skill or Charged Attack input when ready. At C0, this can be done up to twice in a rotation.
Optimizing Varka’s combos are not a huge improvement over his baseline performance, and thus should only be attempted if you’re confident they can be successfully executed. This can be easier if Varka does not have to worry about getting interrupted, such as during enemy stun phases or with Nicole’s shield.
The notation used to refer to combat inputs in this section will be as follows:
Out of Varka’s various attack strings, N1C offers the highest damage for the time taken; his combos will thus focus on both decreasing the cooldown of his Special Skill/CA and get as much damage out as possible. For example, a simple combo for Varka consists of:
E N1C N4E N4E N1C
If used in a longer 21s rotation, alongside a Nicole using Thrilling Tales, he can instead opt for the following:
E N4C N1E (N1C)x3 N1E N1C N1
Additionally, holding down the walk key (by default W on PC) when performing Varka’s Charged Attack can allow him to cancel it into his following Normal Attack faster. This can help increase the margin of error on his combos. Care should also be taken when using his special Charged Attack or Skill, as they can cancel his Normal Attack animation before both hits from his Claymore land.
Special Skill or Charged Attack?While the above combos indicate usage of his special Skill and it is usually the preferred option, the decision between whether to use it or his Charged Attack comes down to a number of factors. Primarily, despite dealing more damage, Varka’s Charged Attack is slower, lacks AoE, and can be interrupted. It also has to be buffered in advance, meaning its input has to be made preemptively for perfect execution; this is in contrast to his special Skill which can be used immediately, allowing for some more advanced Normal Attack cancels. With very good execution and cancels, however, his Charged Attack can pull out ahead for DPS against a stationary single target - relevant for DPS windows against an immobilized boss. Furthermore, artifacts that confer bonuses specifically to Charged Attack additionally encourage its use over Skill, such as if using Shimenawa’s Reminscience.
It’s worth noting that the N1 C section of the combo puts out more Pyro damage as N1 only deals 1 Pyro hit and can provide marginal advantages when Pyro DMG is buffed or the enemy has Anemo Resistance.
Elemental BurstVarka’s Burst is typically useless and should not be used; however, it does have some niche value. By extending the duration of his field time, paired with the hitlag from his attacks, Varka can somewhat consistently achieve a third cast of his Special Skill - or at the very least, squeeze in some more Normal Attacks. While this is a DPS loss, it does provide more damage within the rotation. Thus, it can prove useful if trying to finish off an encounter without needing to rotate through the team, or to score some more damage before a boss invulnerability phase. It also has a large Area of Effect, meaning it can occasionally help clear up weak mob waves.
 Shimenawa's Reminiscence97.30%DPS - Team96.00%DPS - SoloUse Special Charged Attack instead of Special Skill.
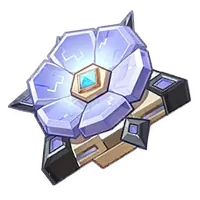 Desert Pavilion Chronicle95.90%DPS - Team94.00%DPS - SoloUse Special Charged Attack instead of Special Skill.
 Sands
Sands Goblet
 Circlet
 CRIT Rate
 CRIT DMG
 ATK%SkillBurstNormal Attack
 Varka
Varka Nicole
 Prune (C6)
 Durin
DurinUsage rates are gathered from player profiles connected to Enka and refreshed periodically. They describe what people are running, not what performs best.
Last statistics update: 04/September/2026
Based on Enka-connected profiles matching this character. Usage rate describes observed profile popularity, not optimality. Characters may have multiple viable builds, and guide recommendations can differ from popularity.
Sample: 126,792 Serpent Spine13.2%
 Tidal Shadow4.9%
 A Day Carved From Rising Winds [2PC] + Rainbow3.7%C083.0%C17.6%C24.4%C31.1%C40.4%C50.1%C63.3%
Varka’s teams should always consist of an Anemo character and 2 matching PHEC teammates, a requirement which is worth prioritizing over most of his synergies. If missing the options listed below, check the example teams for other viable combinations. Varka Pyro teams are his strongest and most synergistic; though Cryo and Hydro teams have some niche value, Electro teams are not worth running.
PruneAnemo SupportHexereiNicole Pyro Support, SustainHexereiDurinPyro Sub-DPS, SupportHexerei
Relative team damage chart. Best listed team is treated as 100%.
Pyro TeamsPremium Pyro is 100% Baseline for all team comparisons100 ER171 ER118 ER136 ER Durin
Durin Durin
Durin Prune
Prune Prune
Prune Nicole
 NicoleVarka
 VarkaVarkaVarkaVarkaVarka100 ER100 ER
 241 ER165 ERNicolePrunePrune
 Bennett
 BennettVarkaVarkaVarkaVarkaVarkaVarka100 ER223 ER163 ER
 180 ERDurinDurinDurinBennett
 Venti
Venti VentiVentiVarkaVarkaVarkaVarkaVarka
 Hydro TeamsPremium Pyro is 100% Baseline for all team comparisons100 ER
 200 ER
 190 ER125 ER
 Xingqiu
 XingqiuPrunePrune
 Mona
Mona MonaMonaVarkaVarkaVarkaVarkaVarka100 ER
 171 ER178 ER
 166 ER
 Furina
 Furina
 Jean
Jean JeanMonaMonaMonaVarkaVarkaVarkaVarkaVarka
 Cryo TeamsPremium Pyro is 100% Baseline for all team comparisons100 ER
 100 ER
 100 ER139 ER
 Escoffier
 ShenhePrunePruneVarkaVarkaVarkaVarkaVarka100 ER100 ER100 ER168 EREscoffierShenheVentiVentiVentiVarkaVarkaVarkaVarkaVarka