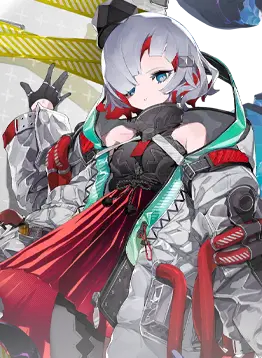
Connor, despite being a Tank, can unleash insane amounts of burst damage if you make her a Leader. You can expect great results as long as you meet the conditions to enable her Third Ultimate iteration that deals massive AOE Damage.
Playstyle and Key Mechanics
Connor’s playstyle revolves around a unique card evolution/transformation system, where basic skills and her Ultimate progressively upgrade into more powerful versions. Her key mechanics include:
[Hold the Line] - Deals damage and inflicts [Stun], permanently increasing Connor’s own defense by +2% (stacks infinitely). Basic and powerful card that will scale her damage, since it’s based on [Shield] and DEF.
[Guardian Angel] - Grants team-wide [Shield] for 10 seconds based on 1000% of Connor’s defense. This card will keep your team safe, and in most cases, it replaces healers to focus on scaling her damage instead.
[Colossal Array] - First Ultimate. Transforms all [Hold the Line] into [Hold the Line II], increases all ally attack/defense by +5%, then transforms this card into [Colossal Array II].
[Colossal Array II] - Second Ultimate. Transforms all [Guardian Angel] into [Guardian Angel II], increases all ally attack/defense by +5%, then transforms this card into [Nova Impact].
[Guardian Angel II] - Enhanced shields that generate [Earthquake] and deal AoE damage when shields break (1000% defense per shield, which you constantly keep scaling with her other cards).
[Earthquake] - Detonates all shields for massive AoE damage. This is Connor's main offensive card.
[Nova Impact] - Third Ultimate. Releases Nova Impact for huge AoE damage while inflicting [Corrupt] debuff.
Connor’s damage focuses on rotating her Ultimate card constantly, so it takes some time to ramp up, but she can nuke most enemies after releasing [Nova Impact]. It’s a pretty safe character to use for people who don’t want to manage complicated mechanics that can be used in the endgame.
Investment
She scales well with investment, though she functions at low investment with proper team support:
Awakening 1 - Makes rotations easier to sustain since it reduces the cost of [Hold the Line II] and [Guardian Angel II], lasting the entire battle.
Awakening 2 - Great damage output increase. Anytime a shield vanishes or explodes, it increases Connor’s DEF by 1%, up to 30%.
Awakening 5 - Another massive damage improvement. After using [Earthquake], it generates [Shockwave] in your hand and also anytime a shield vanishes or explodes, there is a 20% chance to cast 1 [Frost Nova].
Resonance
Resonance 1 - Shield durability +50%. Greatly increases effective shield value from 10,000 to 15,000 HP (at 1000 defense).
Resonance 2 - Damage taken decreases progressively as HP lowers (up to 50%, improving Connor’s survivability).
Resonance 4 - When shields vanish or detonate, heal [Shield] holder 5% HP. Near-constant healing with the Connor + Tennie combo.
Resonance 5 - After using [Colossal Array II], gain an attack equal to 20% of Connor’s DEF. Converts her massive DEF into more offensive stats.
Synergies
❗ ❗ ❗ The Synergies mentioned here are merely samples. Taking their core mechanics as an example, you can use many other characters as replacements or other synergies. ❗ ❗ ❗
Tennie - Tennie's R4 grants team shields when anyone uses cost 2+ Blue cards. Connor has multiple Blue cards. With Tennie + Connor as Leader, every Blue card triggers shields and accelerates the [Nova Impact] counter by 15 seconds per rotation. This means you have near-permanent shield uptime, constant healing from both R4 effects, and rapid [Nova Impact] access.
Stella - Universal cost reduction (-1 to all cards for 12 seconds) addresses Connor's cost hunger. Makes expensive cards (2-4 cost) much more sustainable (1-3 cost).
Nayuta - Deck shuffling prevents hand clog from derived cards, while card draw helps cycle faster.
Arcana - Cheap cost generation and card recovery. Extremely accessible F2P support that works perfectly with Connor.
Any Blue Card Crew Member will synergize well with Connor and Tennie to help rotations, applying shields, healing and dealing damage, all thanks to their passives.
Gear and Affixes
Most of Connor’s kit revolves around scaling DEF, including her [Shield], so that’s the main focus when it comes to both gear and affixes:
Weapons:
UR Space Tangent: Draws 1 more card at the start of battle prioritizing own Ultimate card.
UR Kusa Ryujaku: Each time inflicting [Slash], ATK +0.5%, stackable.
SSR Unbewusstes Probe: Whenever you play a Red card of cost 3 or more, random enemy receive 3% less healing. This effect stacks up to a maximum of 75%.
SSR Electro DS Wood Sword: Whenever wearer inflicts [Slash], also triggers [Electrify].
SSR Anti-Entropy Frost: [Chill] and [Freeze] dealt last for 2 seconds longer. This effect stacks.
SSR Ambition: [Slash] dealt deals 25% more damage. This effect stacks.
SR Viscera Collector MK 0: Using [Leader Skill] restores 0.4 Cost. This effect stacks.
R Gardener Multi-Tool: Playing a Red card increases ATK by 0.5%. This effect stacks.
R Mass Projector: Using [Leader Skill] increases ATK by 1.5%. This effect stacks.
Armor:
UR Lucid Dream Fiber: Wearer's Red cards heal the wearer for 2% of the damage dealt.
SSR Simulated Stars: Using [Leader Skill] restores 5% HP. This effect stacks.
SSR External Memory Matrix: Max damage taken per hit is 33% of Max HP.
SSR Black Rock Armor: Reduces wearer's final DMG taken by 10%. This effect stacks.
SSR Mecha Armor: Whenever [Slash] / [Rend] inflicted by wearer deals damage, restores HP equal to 5% of the damage dealt.
SSR High Dimension Construct: Generating a Black card restores 5% of Max HP. This effect stacks.
SR Resonance Fiber: When own skill card is used, restores 2% of Max HP.
R Standard Defense Fiber: When attacked, have a 5% chance to Block the incoming attack and nullify the incoming damage. The trigger rate stacks.
Accessory:
UR Dawncloud Seal: Max Hand Size +1.
UR World Line ß Box: Draws a card whenever you encounter a wave of enemies, prioritizing wearer's skill cards.
UR Hulton Balloon: Draws a card after playing a 3-cost or higher Yellow card.
SSR Mobius: Cards in your hand are replenished 0.25 seconds faster. This effect stacks.
SSR Chladni Arc: Wearer's [Wave] deals 20% more damage. This effect stacks.
SSR Divinity Seal: Gains 2 Cost at the battle's beginning. This effect stacks.
SSR Fengshui Tactical Drone: For every 8 cards used, increases ATK or DEF by 2%, up to a maximum of 50%.
SR Magic Spring: Restores 0.02 Cost per second. This effect stacks.
R Harrison Device: Playing a Yellow card restores 0.3 Cost. This effect does not stack.
Affixes
Using [Leader Skill] restores 0.2/0.3 Cost. This effect stacks.
Using [Leader Skill] restores 2/3% of own Max HP. This effect stacks.
Using [Leader Skill] increases own ATK by 0.5/1%. This effect stacks.
Increases own ATK by 1/3%. This effect stacks.
Increases own ATK by 10/30. This effect stacks.
Increases all own trigger rates by 1/5%. This effect stacks.
Playing a Red card increases own ATK by 0.2/0.5%. This effect stacks.
Increases final DMG dealt by 2/5%. This effect stacks.
Restores 0.01/0.02 Cost per second. This effect stacks.
Gains [Hyperarmor] for 1 second when using own skill cards. This effect stacks.
Wearer's [Rend] cards deal 3/5% more damage. This effect stacks.
Deals 3/5% more Fire DMG. This effect stacks.
[Chill], [Freeze], and [Megafreeze] dealt last for 1 second longer. This effect stacks.
This character's [Chill] effect has a 1/2% better chance to [Freeze] the target.
Inflicting [Freeze] restores 0.05/0.1 Cost. This effect stacks.
[Electrify] dealt has a 3/5% better chance to trigger. This effect stacks.
[Electrify], [Lightning], [Thunder], and [Bolt] dealt deal 5/10% more Lightning DMG. This effect stacks.
[Slash] dealt deals 8/20% more damage. This effect stacks.
Wearer's [Slash] cards deal 3/5% more damage. This effect stacks.
Playing a Blue card increases own DEF by 0.2/0.5%. This effect stacks.
Playing a Blue card restores 1/1.5% HP. This effect stacks.
Increases own DEF by 1/5%. This effect stacks.
Whenever a Shield is generated, increases own DEF by 0.1/0.3%. This effect stacks.
When own Shield expires, restores 1/2% HP. This effect stacks.