Introduction
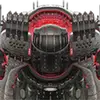
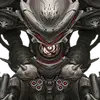
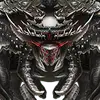
The last boss of Hall 1: Ultra. This boss can be easy and difficult at the same time, depending on how much damage you deal and which Nikke you bring.
This is the damage milestone for ONE TEAM. Combining the total steps from 5 teams will be your final steps.
Step | Damage |
1 | 0 |
2 | 1 472 584 803 |
3 | 2 939 996 223 |
4 | 4 401 638 873 |
5 | 5 856 491 892 |
6 | 7 303 412 852 |
7 | 8 741 164 011 |
8 | 10 168 340 473 |
9 | 11 583 393 678 |
10 | 12 984 632 780 |
11 | 14 355 915 999 |
12 | 15 859 825 201 |
13 | 17 341 446 115 |
14 | 18 797 974 477 |
15 | 20 226 320 534 |
16 | 21 623 098 294 |
17 | 22 984 531 904 |
18 | 24 303 513 239 |
19 | 25 557 540 660 |
20 | 26 756 546 507 |
21 | 29 089 802 845 |
22 | 31 274 038 487 |
23 | 33 224 044 073 |
24 | 36 701 890 513 |
25 | 39 986 752 777 |
26 | 43 291 615 042 |
27 | 46 586 477 306 |
28 | 49 881 339 570 |
As we wrote in our previous introduction, No Limit mode is the game where you maximize your Step while minimizing the resources - which means if you can use 5 non-top-tier Nikkes and still reach a desirable Step, go for it. In exchange, funneling all 5 top-tier Nikkes into 1 team but not reaching the next step means you should distribute 1 or 2 to other teams instead to see whether those teams can reach a higher step instead without compromising the main team’s result.
Teams
Snow White - Ultra
Mode: Museum - Ultra || Element: Iron
Characters





About the team
There's not much to comment about this team except: Fish for the moment 2 parts are spawned and enjoy the huge damage yourself. For this team, you actually want to rush phase 2 as it spawns parts faster. Zwei can repair cover so don't worry
Substitutions
Mari can replace Grave. Or you can use Ade: Agent Bunny too but the outcome will be weaker.
Rapi - Ultra
Mode: Museum - Ultra || Element: Iron
Characters





About the team
This team is sitting duck in phase 1, so you should rush the phase 2 as quick as possible. Don't worry about the shockwave, Crown's shields will take care of it
Substitutions
-
Cinderella - Ultra
Mode: Museum - Ultra || Element: Iron
Characters





About the team
Cinderella SR version hits insanely hard against Ultra. This team has 0 ways to fix cover so you should prolong phase 1 as you can since Eve's just a sub DPS here.
Substitutions
-
Pierce gods - Ultra
Mode: Museum - Ultra || Element: Iron
Characters




About the team
What's Ultra without a little pierce? We present to you 2 heavy hitters in term of piercing: Red Hood and Alice. In fact, this team hits so hard you will probably lose your cover in phase 2 against 1 shockwave. Try to delay phase 2 as long as possible
Substitutions
-
True damage - Ultra
Mode: Museum - Ultra || Element: Iron
Characters





About the team
This team funnels one Nikke - Laplace. Laplace is a piercer: check. Laplace is Iron: check. Laplace deals true damage which ignores defense - This is super helpful against higher steps. You will want Flora burst into Laplace and Takina into Ada.
Substitutions
-
Mechanics explanation:
Ultra is called: Pierce Haven. It’s because when this boss was released, it was catered to one of the strongest piercers: Red Hood B3 back then. The boss has 2 phases, in which you can choose to rush phase 2 or prolong phase 1 depending on how you stall or destroy QTEs phase asap.
Notice the pierce damage of Cinderella: Crystal Wave a is both core shot and body shot (not as awesome as Blacksmith; those 2 are core shots, which are lmao). Still, the damage is meaningful enough that you should bring piercers here to enjoy it to the fullest.
The core is fully exposed in phase 2, but in phase 1, there’s a slight part that blocks the core. Other non pierce weapon may find difficult in shooting the core in phase 1, which leads to 2 types of strategy:
Delay phase 1 as long as you can. This suits piercers the most.
Rush to phase 2 as fast as you can. This suits other weapons the most since core damage contributes a great amount to total damage.
Phase 1 vs Phase 2
Phase 1 starts:
QTEs (lasts around 7.5s)
Shockwave
Spitting
Respawns 2 parts, then minigun shooting on taunt Nikke or highest target ATK Nikke.
QTEs
Minigun shooting
QTEs
Respawns 2 parts, then QTEs
Shockwave
Spitting
Fullscreen QTEs, prepare for Phase 2
Phase 2 starts:
If part(s) are alive, start shooting poison bombs (can’t intercept) randomly. If parts are broken, it just stands there (around 12s)
Spawn 2 parts, then shockwave
Spitting
If part(s) are alive, start shooting poison bombs (can’t intercept) randomly. If parts are broken, it just stands there (around 12s)
Spawn 2 parts, then Fullscreen QTEs
Repeat the whole sequence.
Due to the stalling strategy, you may end up with only 1 Shockwave in phase 2, or it can go up to 3 times.
QTEs
The QTE phase is simple. The boss won’t do anything except jerk like being electrocuted. You will have around 7.5s to finish the 3 Cancel Rings, or you will take huge damage from Ultra.
Shockwave
Ultra thinks it’s Goku or something. It gathers power from the air, then blows a huge shockwave to your face. This step takes around 5.5s, so you will have a bit of time to deal damage to the boss before covering.
Covering will have 0 effect except for the damage on the cover. But taking it directly will damage your Nikke AND STUN them for 3.43s.
Important
There will be some points where you HAVE TO take this Shockwave damage, although it hurts like hell, to retain your cover. This action is spared if you bring an individual shield provider, like Flora (Treasure) or Crown.
Super Important
At higher steps, 1 Shockwave can completely blow your whole cover away. Even your Nikkes, so you will have to find the sweet spot to stall until the shockwave phase is over to keep dealing damage.
Spitting
Now Ultra has become a rapper and spittin’ facts. Both the initial damage and poison damage afterward hurt so much on Nikke, so unless you are in a lower step, covering is advised.
Because spitting damage is way more dangerous than Shockwave, that’s why on some teams without re-covering (you know, recover the cover, tee hee… okay, I know that pun is lame. It's the cover repair), you would rather eat the Shockwave damage to retain your cover at some points, then use the cover to block the spitting damage instead.
Parts Spawning
This is mentioned solely for the sake of Snow White. Other piercers will just blow them under 1s, but for Snow White, those parts will technically x2 her damage.
Time your burst shot for them for the extra juicy damage.
Note that those parts do nothing in phase 1.
Minigun
Ultra will target the taunting Nikke or the Highest ATK one. The gun is not much of an issue, but it may wear off the cover, so if you have healing, tank it.
Fullscreen QTEs
This marks the start of phase 2, and you will have to do this Fullscreen one by a lot if you rush phase 2 too fast.
This phase is very easy yet difficult. There are a total of 5 rings: 1 legit and 4 grey rings. You have to break 2 times, and the circle rings are very vulnerable. A splash from any RL or Rapi: Red Hood will blow them to smithereens, which results in failure. Failure = wipe, so do not fail it.
This phase is the reason you shouldn’t bring  Centi (Treasure) here. It’s because it will take too long for Centi to maintain her buffs; hence, for every fullscreen QTE, she will have to stack her buffs again.
Ultra’s weekly buff is the Pierce damage buff. This buff is superb, which means you should wait till the week has this buff to start sending your results for better steps.