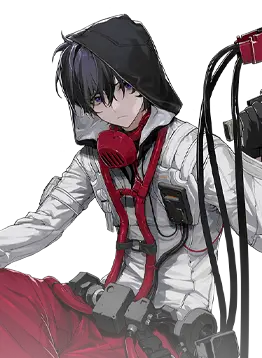


Pelota is an Electro-focused Utility crew member that greatly amplifies [Electrify] damage, applies [Paralysis] to weaken enemies, heals, shields, and reduces Electro damage taken by all allies for a certain duration and unleashes incredible damage towards the enemies or further increases the damage of cards with [Electrify] after accumulating enough Voltage from her Ultimate.
Playstyle and Key Mechanics
As an Electro-focused crew member, Pelota easily replaces Tennie in the main Electro team as she offers more sustain options compared to her. Arguably, you can still put them in the same team, but there are better options than just straight-up having them in the same team. Pelota is also the first crew member to have an Orange card, which will be mentioned as we break down her cards
Main Cards:
First off, we got ourselves a blue card called [Magnetic Trap]. This card creates a magnetic trap that provides shielding to allies and applies [Paralysis] to enemies, making them deal less damage and have less defence, a very incredible tool for sustain, as the main Electro team lacks them.
Next, we have her yellow card called [Magnetic Bait]. Once used, the next Red or Orange card used will draw 2 cards with [Electrify] from your deck or discard pile; afterwards, the next Red or Orange card with [Electrify] will deal an additional 100% damage.
Lastly, her Ultimate card is a purple card called [Em Field]. Once this card is activated, Pelota will begin healing the team and use [EM Waves] to deal damage accordingly. Additionally, at Resonance 5, the field accumulates Voltage from all [Electrify] dealt by allies. Once conditions are met, she can obtain [100K Volts] or [1M Volts], depending on how much accumulated Voltage is obtained within the duration.
Derivatives:
[100K Volts] - Pelota unleashes 100K Volts that deal damage to all enemies over 10 hits. At the same time, there is a 20% chance to inflict [Thunder]. After using it, your cards with [Electrify] deal 2% more damage and this effect stacks.
[1M Volts] - Pelota unleashes 1M Volts that deals damage to all enemies 10 hits. At the same time, there is a 20% chance to inflict [Bolt]. After using it, you can add 5 cards with [Summoning Lightning] from your Deck or Drop Zone to your hand, exceeding your hand limit. [Destroyed] after use.
Investment
Half of Pelota’s awakening, Awakening 1, 2, 5, involves improving allies' defences and damage, and Awakening 3 and 4 mainly for Pelota’s own personal damage upgrade. Now, let's break down how they work.
Awakening 1 - Whenever the [EM field] is in effect, all allies will take less damage; the effectiveness of this damage reduction is determined by how much Volt value is accumulated.
Awakening 2 - Whenever [Magnet Trap] is in effect, backline allies apply [Electrify] on an enemy, they gain ATK bonus, incredible if your main DPS is a backline unit.
Awakening 4 - Pelota’s [EM Field] damage is increased every time she accumulates 100,000 volts. This is only recommended to get if your team can continuously apply [Electrify], as Volt accumulation will be quite hard if you’re gonna use Pelota outside of the Electro team.
Awakening 5 - Improves Volt accumulation and whenever 1M Volts is cast, all cards with [Electrify] will deal more damage.
Resonance
Resonance 1 — Whenever [Magnetic Trap] expires, it will now provide a shield to the ally with the lowest HP; not only that it also reduces Electro DMG received by 50%
Resonance 2 — Enhances [Magnetic Bait] by having an additional card draw, making it draw from 2 into 3.
Resonance 4 — Increases the duration for [Magnetic Trap] and [EM Field] for 2 secs, meaning more time to accumulate Volts and higher sustain.
Resonance 5 — Enables her to obtain Volt Derivatives as she accumulates Volt stacks.
Synergies
❗ ❗ ❗ The Synergies mentioned here are merely samples. Taking their core mechanics as an example, you can use many other characters as replacements or other synergies. ❗ ❗ ❗
Nicola - A backline Electro DPS that can apply tons of [Electrify] stacks thanks to her skills and basic attacks, she’s a great contributor for accumulating Volt.
Caroline - An Electro support, at resonance 5, she is able to generate cost whenever [Electrify] is triggered; not only that she can also double its trigger rate by applying [Magnetize] to enemies.
Stella - Will help with the initial cost to start the combo, and draws a card to help cycle the deck, making it easy to lessen the downtime on [Magnetic Trap] and [EM Field].
Arcana - Helps redraw discarded cards and cost generation, only use if you are missing Caroline.
Gear and Affixes
Some examples of overall good equipment choices for Pelota. For specific picks, please check the respective teams.
Weapons:
UR 2nd Phase Transition: Whenever the wearer uses a 3-cost or lower card with [Electrify], the chance to [Electrify] the target increases by 2%. This effect stacks.
SSR Unbewusstes Probe: Whenever you play a Red card of cost 3 or more, random enemies receive 3% less healing. This effect stacks up to a maximum of 75%.
SSR Spectral Breaker: Deals 15% more Electro DMG.
SSR Prohibited Crafts: [Basic Attack] deals 25% more damage.
SR Thunder Coil MK 1: Have an 8% better chance to [Electrify] the target. This effect stacks.
SR Viscera Collector MK 0: Using [Leader Skill] restores 0.4 Cost. This effect stacks.
R Gardener Multi-Tool: Playing a Red card increases ATK by 0.5%. This effect stacks.
R Mass Projector: Using [Leader Skill] increases ATK by 1.5%. This effect stacks.
Armor:
SSR Simulated Stars: Using [Leader Skill] restores 5% HP. This effect stacks.
SSR External Memory Matrix: Max damage taken per hit is 33% of Max HP.
SSR Black Rock Armor: Reduces wearer's final DMG taken by 10%. This effect stacks.
SSR High Dimension Construct: Generating a Black card restores 5% of Max HP. This effect stacks.
SR Resonance Fiber: When own skill card is used, restores 2% of Max HP.
Accessory:
UR Dawncloud Seal: Max Hand Size +1.
UR Hulton Balloon: Draws a card after playing a 3-cost or higher Yellow card.
SSR Mobius: Cards in your hand are replenished 0.25 seconds faster. This effect stacks.
SSR Divinity Seal: Gains 2 Cost at the battle's beginning. This effect stacks.
SR Magic Spring: Restores 0.02 Cost per second. This effect stacks.
R Harrison Device: Playing a Yellow card restores 0.3 Cost. This effect does not stack.
Affixes
Using [Leader Skill] restores 0.2-0.3 Cost. This effect stacks.
Using [Leader Skill] restores 2-3% of own Max HP. This effect stacks.
Using [Leader Skill] increases own ATK by 0.5-1%. This effect stacks.
Increases own ATK by 1-3%. This effect stacks.
Increases own ATK by 10-30. This effect stacks.
Increases all own trigger rates by 1-5%. This effect stacks.
Playing a Red card increases own ATK by 0.2-0.5%. This effect stacks.
[Electrify], [Lightning], [Thunder], and [Bolt] deal 5/10% more Lightning DMG. This effect stacks.
Increases final DMG dealt by 2-5%. This effect stacks.
Restores 0.01-0.02 Cost per second. This effect stacks.
Grants 5-15% more healing. This effect stacks.


![Shizuru [Summer]](https://cdn.prydwen.gg/images/resonance-solstice/characters/shizuru-summer_card.webp)