Character stats
Level Stats
Base HP11,634
Base ATK263
Base DEF792
CRIT DMG38.4%

Best Mitya build, teams, weapons, artifacts, combos, rotations, and gameplay notes for Genshin Impact.
 5-star
 Electro
 Catalyst
Last updated: November 14, 2026

Mitya is a 5-star character from the Electro element who wields the Catalyst weapon. Mitya was added to the game with the 7.2 patch.
An energy research specialist at the Royal Energy Commission, enstrusted with important, confidential projects. Geniuses tend to be a handful, and he is no exception.
Talent text and per-level multipliers, straight from the character data.



Passive talents are shown in full as kit cards.




All constellation names and descriptions in full for quick reference.






Keyword and ability definitions referenced across this character's kit.
Strongest on-field Electro DPS as of release
Decent Sub-DPS capabilities
Can replace both Yae and Odette in SSC teams
On-field playstyle is easily interrupted without external support
Easily replaceable as a support in Stellar-Conduct teams outside of the Yae+Mitya core
Mitya is a 5-star Electro Catalyst character who can flexibly play as an on-field DPS or off-field support and sub-DPS in the Stellar-Conduct archetype. He gains stacks when the reaction is triggered, and consumes them based on if his Elemental Skill is Tapped or Held; the former allow him to deal damage automatically when overcapping stacks and provide buffs, while the latter allow him to consume them to launch special Charged Attacks.
Stellar-Conduct is a reaction that replaces Superconduct when certain characters like Mitya are on the team. Specifically in his case, however, triggering the reaction allows him to generate Gradient Beacons every 1.5 seconds for 3 seconds; repeated triggers reset the duration but not the cooldown. Mitya can hold up to 4 of these and they last for up to 10 seconds, with stacks gained above this refreshing the duration of all Gradient Beacons. In function, they replace the Starlight Prisms typically formed - still applying all the effects of a Polestar Field the latter would create but moving with the active character.
This means it provides the 40% Physical RES Shred from the base Superconduct reaction while also activating Radiance: Stellar-Conduct effects in kits - many of which allow characters to deal direct Stellar-Conduct damage. It additionally provides a DMG Bonus for the Electro and Cryo DMG and a Base Reaction Coefficient for direct Stellar-Conduct damage based on a tally which counts whenever these elements are applied; this starts at 29% and 1.45 at one stack, and increase by 1% and 0.05 to a maximum of 40% and 2 respectively. These bonuses are granted every 4 seconds, with the tally beginning anew each time. Note that if both Stellar-Conduct and Stellar-Swirl are triggered by the team, Radiance: Stellar-Conduct will take priority.
Similar to damaging reactions, direct Stellar-Conduct damage scales with EM, reaction damage bonuses, ignores DEF, and does not benefit from standard DMG% - unlike typical reaction damage, it can also CRIT. Direct Stellar-Conduct damage is considered to be of the element of the unit dealing it and is based on the multiplier and the scaling stat listed in the ability instead of level, with Stellar-Conduct damage additionally being multiplied by the Base Reaction Coefficient.
Mitya’s Passive enables Superconduct to be converted into Stellar-Conduct and boosts its Base DMG based on his Elemental Mastery, reaching the cap of 14% at 500 EM. This is a separate multiplier to Reaction DMG and Base Reaction Coefficient. As foreshadowed by this Passive, all of Mitya’s meaningful damage scales with his Elemental Mastery.
Beyond this detail of the reaction and the ways he modifies it, his kit itself is fairly simple. His Skill creates a Detection Core for 25 seconds when used which allows him to expend his Gradient Beacons, with the method being decided based on whether his Skill is Tapped or Held; his Skill can be Tapped once every 1.5 seconds within 6 seconds of its use to swap the chosen mode. When Tapped, Mitya instantly detonates any currently held Gradient Beacons to deal a large burst of Stellar-Conduct damage to the enemy; afterwards, any Gradient Beacons generated above the maximum are automatically expended to deal Stellar-Conduct damage. Thanks to his first Ascension Passive, in this mode he can buff the entire party’s Elemental Mastery by 30 for each Gradient Beacon he currently holds.
On the other hand, when his Skill is Held, holding Gradient Beacons instead allows him to use his stamina-free special Charged Attack to fire them one at a time at enemies; these deal higher Stellar-Conduct damage relative to those fired with his Tap Skill. Additionally, his first Ascension Passive is modified so triggering Stellar-Conduct instead allows Mitya to gain a Gradient Beacon every 1.5 seconds for 6 seconds, thus improving his generation capabilities. It is worth noting that when starting fire from 4 Gradient Beacons, it is possible to fire 5 during his Charged Attack if he generates a beacon at the right timing after his 3rd Gradient Beacon is fired.
His second Ascension Passive increases his Gradient Beacons to their aforementioned 10 second duration from the baseline 6 seconds; additionally, each Beacon generates provides Mitya with 5% CRIT Rate for 15 seconds, stacking up to 4 times. As long as the team is consistently triggering Stellar-Conduct, this Passive is essentially a permanent 20% CRIT Rate buff.
Just as straightforward is Mitya’s Burst, which deals Electro damage and generates 3 Gradient Beacons. Due to his kit revolving around them, this ability can be useful for either playstyle - though definitely playing a larger role when he is used as an on-field Main DPS.
His Normal Attacks are unspectacular, used only for their Electro application or to fill time.
As an off-field DPS, Mitya simply needs to use his Tap Skill before swapping. His Burst can be useful to allow him to instantly begin dealing Stellar-Conduct damage and providing his full buff volume, though its ~1.6s cast time can increase rotation time and thus make it undesirable to use. The only note to make is when using Mitya with Cryo Traveler. He highly prefers using R5 Sacrificial Fragments on these teams to shorten his Skill cooldown; however, if it fails to trigger, Mitya’s Burst serves as an effective way to either buy time for it to do so or extend the rotation without losing too much damage and should be saved for this purpose.
As an on-field DPS, Mitya has a few different rotation setups he can use to expend his beacons. Taking a single instance of field time per rotation is the safest and simplest option, swapping in after buffs are set up to use his Hold Skill, followed by a Charged Attack, Burst, then two Charged Attacks interspersed by 2 Normal Attacks in the middle. The final Charged Attack will fire a reduced number of beacons.
Alternatively, he can take two instances of field time per rotation - using one Charged Attack during one, then a Charged Attack, Burst, and Charged Attack during the other; his Hold Skill can be used before either. While generally better, the choice comes down to team, player preference, and ping. In certain cases, Mitya can even use two Tap Skills instead of his Hold Skill, whose cooldown starts later into the animation.
The third option is to flexibly use Mitya Burst as available when buffs are set up and his Skill flexibly as it comes off cooldown, with a more free form rotation. While this can be optimal when done properly — particularly in Energy-starved teams — it is generally inadvisable for the average player.
The notation used to refer to combat inputs in this section will be as follows:
In all the below combos, Mitya fires his Charged Attack until he runs out of beacons. At C0, when starting from 4, this typically results in 4-5 Beacons fired; this inconsistency is due to the new beacon needing to generate after his third Charged Attack but before his fourth is fired. This does not change any of the listed rotations.
At C1, this inconsistency is removed; when starting from 5 stored Beacons, Mitya will consistently fire 6 due to the larger window within which the extra Gradient Beacon can be registered.
hE CA Q CA N2 CA
Mitya’s simplest combo and the least disrupted by high ping due to involving less swaps. The final Charged Attack will typically only fire 1-2 Beacons rather than the usual 4-5.
Opener: Mitya hE -> Swap -> Mitya CA Q CA -> Swap
Rotation: Mitya hE CA -> Swap -> Mitya CA Q CA -> Swap
A slightly more advanced combo, using one of his Charged Attacks in between his teammates’ field time before a more extended field time utilizing his Burst.
Due to relying on his Detection Core already being active for the first rotation, Mitya uses his Hold Skill at the very start of the battle and skips the extra Charged Attack between teammate abilities. From here, Mitya’s Hold Skill can be used before either of his field times at C0R0. Both his C1 and Signature make it so casting it before his first Charged Attack is better.
Opener: Mitya tE -> Swap -> tE Mitya CA Q CA -> Swap
Rotation: Mitya CA tE -> Swap -> Mitya tE CA Q CA -> Swap
Mitya’s Hold Skill has its cooldown start to decrease relatively late into his animation, effectively increasing its time between casts to ~18.7 seconds. Played optimally, this is the limiting factor on his rotation time; one option to circumvent this is to use his Tap Skill twice, making use of his ability to switch its mode.
This comes with some caveats: Mitya has a short cooldown between his skill recasts, and cannot use his special Charged Attack during this time. While this is solved by doing the Skill recast after using an ally’s abilities, it makes the rotation more timing sensitive and increases his ER Requirements due to being unable to catch his own particles.
hE -> Swap -> CA Q CA
At C6, Mitya’s Charged Attack has a chance to refund the beacon it fires. This, in most situations, extends his field time sufficiently to the point he no longer has time to spare for a third Charged Attack, simplifying his rotation.
Mitya’s Hold Skill is cast at the beginning of the rotation to start accumulating stacks and for the sake of his Signature weapon; C1 generally resolves any energy issues not catching his particles would cause.
 Mitya Pull Value
Mitya’s value as a unit depends heavily on the state of your account. Every account already has a freely available (and strong) Stellar-Conduct DPS in the form of Cryo Traveler. If you have neither Yae nor Odette and do not have C6 Valeriy, Mitya’s value as a main DPS is highly questionable, and he should instead only be considered for your account as a support/quickswap sub-DPS for your Cryo Traveler. As a Stellar-Conduct DPS, he performs worse than Sandrone and Wriothesley; however, since he is Electro while they are Cryo, there are opportunities for him to shine where they might not due to the nature of matchups and mechanics in endgame content.
As a support, in a choice between him or Yae Miko, he tends to fall short at C0R0 KQMS investment assumptions. However, the more investment in your carry compared to the rest of the party, the closer Mitya gets to Yae due to his more buff-focused role. If you already have Yae, the value of C0 Mitya as a support is quite low unless you intend to either play multiple Stellar-Conduct teams, need to substitute him for Odette to enable the reaction (i.e., playing Vesna/Mizuki + Wriothesley/Cyno at the same time or do not own Odette at all), or want to use him along with Yae to form a sustainless core for your Stellar-Conduct teams. If you do not have Yae, then Mitya is a very solid pull for your Stellar-Conduct teams.
Things become different when you consider investment, though, as Mitya has significantly better constellations than Yae. If you plan to invest in a Stellar-Conduct team vertically, getting Mitya and his constellations is better value than aiming to pull Yae or any of her constellations. You can consider Nicole vs Bennett for Mavuika teams as a close comparison: Nicole is worse than Bennett at a baseline for that team with some potential benefits but dramatically exceeds him when vertical investment is considered.
While niche, Mitya also has some additional pull value on some accounts due to his ability to perform either role as needed. This is relevant, for example, if the player has a limited premium Stellar roster outside of Yae and Mizuki; since Mizuki would require the Cryo Traveler to be used, Mitya can work well as a Stellar-Conduct DPS when both teams are needed even without Valeriy’s C6 while still being a sizable improvement outside of this.
 Sacrificial FragmentsR1100.00%On-Field Mitya - Team100.00%On-Field Mitya - SoloSame at every Refinement.
 A Thousand Floating DreamsR1103.14%Off-Field Mitya - Team105.95%Off-Field Mitya - SoloAny other 265 EM Catalyst is similar.
 Starcaller's WatchR1103.00%Off-Field Mitya - Team114.72%Off-Field Mitya - SoloAny other 265 EM Catalyst is similar.
 Kagura's VerityR1100.78%Off-Field Mitya - Team103.83%Off-Field Mitya - SoloAveraged over 6 rotations.
 Tome of the Eternal FlowR1100.20%Off-Field Mitya - Team100.97%Off-Field Mitya - SoloAny other 88 CRIT DMG Catalyst is similar.
 Thrilling Tales of Dragon SlayersR599.40%Off-Field Mitya - Team78.64%Off-Field Mitya - Solo50% Uptime.
 Disenchantment in Deep ShadowProvides CRIT Rate and Stellar-Conduct DMG%, but Mitya cannot benefit from the ATK% buff.
 Gilded DreamsGenerally his worst option due to being both difficult to trigger and, in triple Electro teams, providing less useful stats.Gilded DreamsHis best option for personal damage in teams where he is the sole Electro unit, being easy to activate and providing great stats. Can still be optimal for personal damage in Double Electro teams if using a Cryo Main DPS.Disenchantment in Deep ShadowProvides CRIT Rate and Stellar-Conduct DMG%, but Mitya cannot benefit from the ATK% buff. Can be useful for personal damage in some triple Electro teams if struggling to balance hit CRIT Ratio.
 Heart of the FurnaceMitya’s best set when used with a highly invested Odette, or in place of her.
 Tenacity of the MillelithWhile providing nothing for his own damage, this set can be optimal in teams where his own contribution pales in comparison to the rest of the team.
 Sands
 Goblet
 Circlet
 ER
 CRIT Rate
 CRIT DMG
 EM
 LevelNormal AttackSkillBurst
| C0 | C1+ | |
|---|---|---|
| On-Field w/ 3 Electro (Yae Odette Valeriy) | 120-130% | 100% |
| On-Field 2 Electro (Odette Valeriy Sucrose) | 155-165% | 100% |
Mitya (Sac Frag R1) Yae Miko (C1)
 Odette
 Valeriy (C6)
Usage rates are gathered from player profiles connected to Enka and refreshed periodically. They describe what people are running, not what performs best.
Last statistics update: 07/November/2026
Based on Enka-connected profiles matching this character. Usage rate describes observed profile popularity, not optimality. Characters may have multiple viable builds, and guide recommendations can differ from popularity.
Sample: 59,913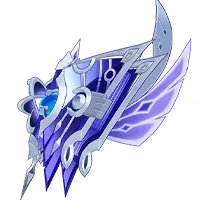 Starsealed Edict 38.5%
 Winter's Heavy Heart13.7%
 The Widsith11.2%
 Dawning Frost8.0%Gilded Dreams6.0%C057.8%C117.9%C216.6%C32.0%C40.7%C50.4%C64.5%
The team should have a Cryo character with consistent application (at least once every 3s) to allow the Stellar-Conduct reaction to be triggered so he can generate Gradient Beacons constantly.
Relative team damage chart. Best listed team is treated as 100%.
Main DPS MityaTeam DPS compared solely within this team groupAs an on-field DPS, Mitya requires another teammate who can provide off-field Cryo application and significantly appreciates shielding and at least one other Electro character for energy. Beyond this, his team is filled out with the strongest combination of buffers and off-field DPS units available - including but not limited to Odette, Yae, Valeriy, and Sucrose. Mitya additionally has trouble with characters who confine allies to a small radius such as Diona.
116 ER100 ER100 ER104 ER Yae Miko
 Odette
 Valeriy
 Valeriy
 ValeriyMityaMityaMityaMityaMityaMitya116 ER100 ER100 ER104 ERYae MikoOdetteValeriyValeriyValeriyMityaMityaMityaMityaMityaMitya156 ER
 100 ER100 ER140 EROdetteValeriyValeriyValeriySucrose
 SucroseMityaMityaMityaMityaMityaMitya109 ER100 ER
 100 ER100 ERYae Miko
 QiqiQiqiValeriyValeriyValeriyMityaMityaMityaMityaMityaMitya
 Wriothesley Teams (Sub-DPS Mitya)Team DPS compared solely within this team group
As a sub-DPS, Mitya has minimal needs outside a steady source of Cryo application to trigger Stellar-Conduct. This makes him a fantastic option for most Stellar-Conduct DPS characters - and due to his ability to enable the reaction, he gains extra value if the player does not have options other than Cryo Traveler if looking to play Wriothesley or Cyno. Mitya’s only downside is that he often needs to be used in place of Yae or Odette, who offer stiff competition, or in sustainless teams. Mitya commonly uses Tenacity of the Millelith in these teams at lower investments, though personal damage options can be considered with vertical investment.
 100 ER100 ER100 ER100 ERYae MikoOdetteMitya
 WriothesleyWriothesley100 ER100 ER
 100 ER100 ERYae Miko
 EscoffierMityaWriothesleyWriothesley100 ER100 ER100 ER
 100 ERMityaOdette
 NicoleWriothesleyWriothesleyCyno Teams (Sub-DPS Mitya)Team DPS compared solely within this team group
 130 ER100 ER100 ER
 100 ERMityaOdette
 Alyosha
 Alyosha
 Cyno
 CynoCynoCynoCyno113 ER100 ER100 ER100 ERMityaYae MikoQiqiQiqiCynoCynoCynoCynoCynoSandrone Teams (Sub-DPS Mitya)Team DPS compared solely within this team group
 137 ER100 ER100 ER122 ERMityaOdetteAlyoshaAlyosha
 Sandrone
 Sandrone128 ER100 ER100 ER100 ERYae MikoEscoffierMityaSandroneSandrone



























 Anemo Support




 Pyro