Loading content...
Last updated: 31/May/2026

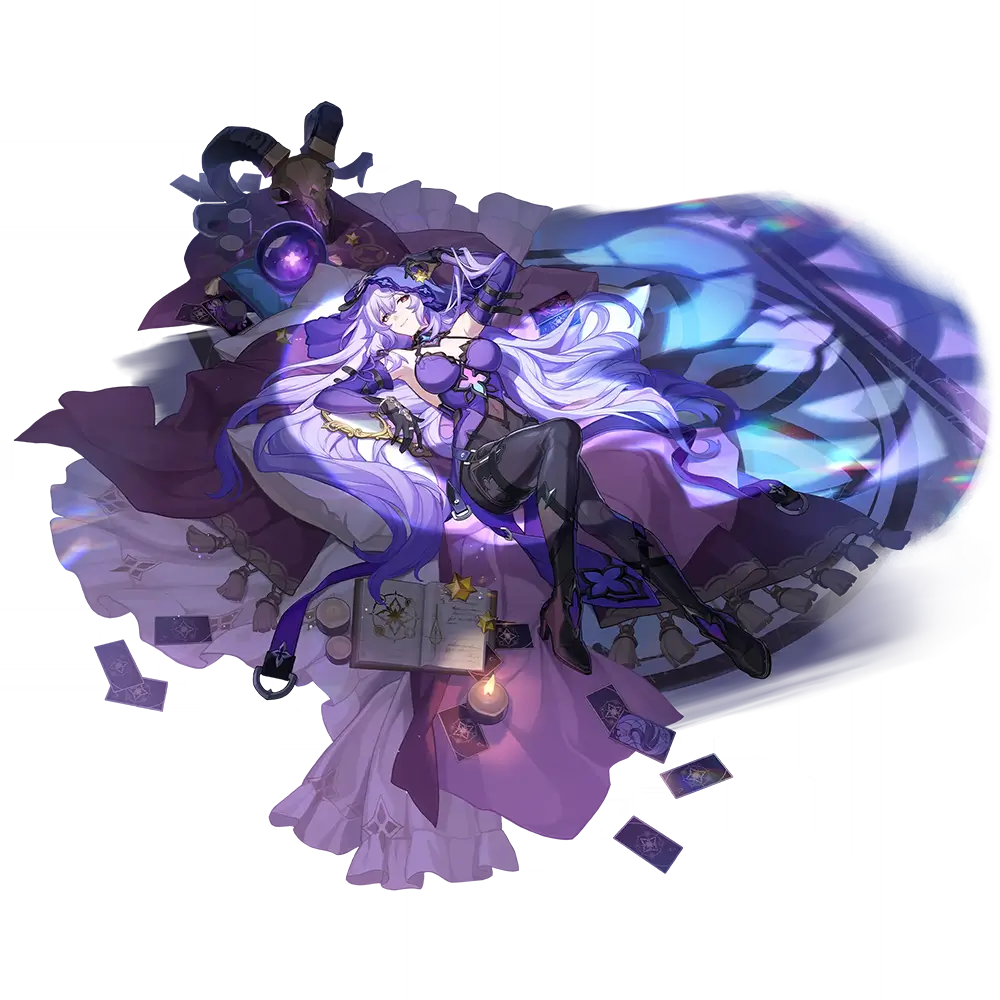
Best guide and build for Black Swan from HSR (Honkai: Star Rail). Black Swan is a 5★ character from the Wind element who follows the Path of Nihility.
A Memokeeper of the Garden of Recollection. A mysterious and elegant soothsayer. Bears a warm smile and is willing to patiently heed the words of another, and thus uses such means as a pretext to enter "memories" and gain a comprehension over the flow of all information. Feels strongly about collecting unique memories, yet the thoughts that guide her are hard to glean.
Black Swan has at least one video available, so if you prefer this sort of medium to learn more about a character, check it out:
Last review update
Patch 4.0
Last major build/calcs update
Patch 4.0
Last profile update*
31/May/2026
*Profile update means smaller edits to relics, stats, synergies or teams that don't require new calculations.
To learn more about Black Swan check the sections below. Use the tabs to quickly switch to the kind of information you're looking for - kit, traces, review or build guides.
Profile
Percipience, Silent Dawn
Single Target
Energy gain: 20
Break: 10
Decadence, False Twilight
Blast
Energy gain: 30
Break: 20 + 10 adjacent
Bliss of Otherworld's Embrace
AoE | 120 energy cost
Energy gain: 5
Break: 20
Loom of Fate's Caprice
Impair
Energy gain: 5
Break: -
From Façade to Vérité
Enhance
Energy gain: 0
Break: -
Viscera's Disquiet
Goblet's Dredges
Candleflame's Portent
Seven Pillars of Wisdom
Eidolon 1
While Black Swan is active in combat, enemies afflicted with Wind Shear, Bleed, Burn, or Shock will have their corresponding Wind, Physical, Fire, or Lightning RES respectively reduced by 25%.
Weep Not For Me, My Lamb
Eidolon 2
When enemy targets enter combat, there is a 100% base chance to inflict 30 stack(s) of "Arcana" on them.
As Above, So Below
Eidolon 3
Skill Lv. +2, up to a maximum of Lv. 15. Talent Lv. +2, up to a maximum of Lv. 15.
In Tears We Gift
Eidolon 4
While in the "Epiphany" state, enemy targets take 20% increased DMG. And at the start of every turn or when they get defeated, regenerates 8 Energy for Black Swan.
Linnutee Flyway
Eidolon 5
Ultimate Lv. +2, up to a maximum of Lv. 15. Basic ATK Lv. +1, up to a maximum of Lv. 10.
Pantheon Merciful, Masses Pitiful
Eidolon 6
The upper limit of stackable "Arcana" increases by 30.
When an enemy target gets attacked by Black Swan's teammates, Black Swan has a 65% base chance of inflicting 1 stack of "Arcana" on the target.
For every 1 stack of "Arcana" Black Swan inflicts on an enemy target, additionally increases the number of "Arcana" stacked this time by 1.
Review
Very high consistent DoT damage that ignores a percentage of enemy DEF,
Provides DEF Shred, DMG Vulnerability, and DMG% to the whole party,
Ramps up extremely quickly and stays ramped up,
Reaches ridiculously high ATK multipliers on Arcana,
Arcana counts as all the DoT types by default for extra synergy with DoT units,
DoT and DEF Shred are automatically applied to enemies entering the field at no extra cost,
Exceptional in AoE and still great in single-target,
Can genuinely be used as a general support now.
Still wants to be paired with Kafka (and Hysilens) for the highest possible performance,
Requires quite a bit of investment to reach maximum performance and max out her A6,
Still freeloading on the Express.
Black Swan is an exceptional DPS and support for the Damage over Time (DoT) archetype. She is able to stack a unique DoT effect on enemies that grows in power as they take DoT damage, dealing DEF ignoring damage, and splashing damage onto adjacent targets when it's the enemy's turn. Black Swan can also provide moderate DEF reduction extremely consistently, as well as a general DMG Vulnerability, and even buffs the team's overall DMG dealt. She is a very reliable damage dealer who ramps up quickly and can stay ramped up relatively easily.
The second round of Novaflare buffs has arrived, and one of the two recipients is Black Swan. This once staple pick of DoT teams was struggling to keep up after Hysilens came out and Kafka received the first round of Novaflare buffs. Then Cyrene appeared and buffed Hysilens DoT even more, leaving people to wonder what shall become of our mysterious Express hitchhiker.
Well apparently what happened is that she absolutely locked in, because these buffs are impeccable, pretty much fixing all the issues she previously had, and going even further to make playing her feel good and rewarding.
Spoiler for the Sparkle buffs, but they also positively slap. This is very reassuring, because the 1st Novaflare buffs had... mixed results, shall we say; Kafka and Silver Wolf were turned into meta-defining units, while Blade and Jingliu, although undeniably improved, were still lagging noticeably behind the competition.
Hoyoverse must have taken the response to this personally because they did not hold back on making Black Swan and Sparkle fantastic with this set of buffs.
If DoT wasn't already back, it's definitely back now.
The big thing about Black Swan is her Arcana and how it interacts with enemies and the rest of her kit.
Her Talent describes Arcana. Every time an enemy target receives 1 instance of DoT, there is a 65% base chance for the enemy to be afflicted with 1 stack of Arcana. While they're affected by Arcana, they are considered to be simultaneously affected by Wind Shear, Shock, Bleed, and Burn.
At the start of the enemy's turn, they will take Wind DoT equal to 240% ATK. Arcana can stack up to 50 times, and each stack will increase the DMG multiplier of the DoT effect by 12%, meaning there is a potential 840% ATK explosion on the enemy's turn. After this, the stacks of Arcana will be reset back to... HALF?
That's right, boisengirls, Arcana will no longer be resetting to 1 stack after the enemy's turn, it'll only be getting halved, an absolutely insane buff that lets Black Swan's damage skyrocket and be extremely consistent, especially as Arcana generation as a whole has also been buffed (stay tuned).
Additionally, DMG dealt from Arcana will ignore 20% of the enemy's DEF, and specifically on the enemy's turn, will also splash Wind DoT damage onto adjacent targets for 180% ATK.
'Specifically' is mentioned because, as a reminder, Arcana can be Detonated much like any other DoT effect can. These additional effects were previously only available when Arcana stacks reached a certain threshold, making them difficult to upkeep, especially as Arcana was constantly resetting to 1.
Now it's simply a part of the intrinsic qualities of Arcana. The same goes for the whole 'counts as all these DoT effects', as that was previously tied exclusively to the debuff applied by Black Swan's Ultimate. This removes much of the hassle of actually making the most of her kit, especially as much of it was outside of the player's control.
Oh, and even better still is that Arcana can now overflow its stacks. Mega. The damage stacking still only counts up to 50, but if you actually do reach the overflow, the excess stacks will be removed after dealing damage with Arcana on the enemy's turn. Once you get going, it's damn n ear impossible for Arcana to drop to low numbers, so Black Swan pretty much can't ramp down once she's ramped up.
Black Swan's Skill and Basic ATK no longer stack Arcana upon use. This is a blatant lie, because the actual Arcana stacking has moved to a Bonus Trace and has been improved substantially. Just don't freak out when you don't see lines about Arcana in those two abilities, it's not gone, just relocated.
You'll be glad to know that the DEF shred from the Skill is still intact, and coupled with the now consistent DEF ignore on Arcana's damage, enemy DEF is merely a suggestion at this point.
Her Ultimate will deal 120% ATK and inflict the Epiphany state onto all enemies for 2 turns. Epiphany will increase the damage that enemies take by 25%. Epiphany will also make it so that every time an enemy receives 1 stack of Arcana, there is a fixed 50% chance for each individual stack of Arcana to stack an additional time.
I'll immediately start with saying that Epiphany is ACTUALLY for 2 turns this time, for real for real, and not this crappy 1 and a half turn bollocks we've been dealing with all this time.
You may also notice that the Vulnerability is no longer exclusively active during the enemy's turn. This addresses one of the biggest issues she had, which is that DoT Detonations simply couldn't make use of Epiphany's Vuln since it had such a restrictive condition, and DoT has very much never been the kind of archetype to wait patiently for its damage to occur.
The doubling of Arcana stacks gained is also hilarious because you can rack up a colossal amount of Arcana in a very short time. This is then made more hilarious by the fact that Epiphany will also prevent the halving of Arcana stacks upon dealing damage in the enemy's turn. A huge glow up for this previously challenging and frustrating Ultimate.
'That's really great, surely there can't be even more...?'
But wait, there's even more! Now now, I can already see your shocked expression and arms behind your head, but it's actually true. Feast your eyes, and your souls.
Her A2 will make it so that any time an enemy target is attacked by Black Swan, there is a 65% base chance of inflicting 5 stacks of Arcana on them. This applies to ALL enemies that are hit, meaning Swan's personal Arcana stacking in AoE is very much improved.
Previously this would only work if the enemy was affected by the Ultimate or you had all the different DoT effects in your party (you didn't). Now, even though Arcana already counts as being all these different DoT effects, it doesn't matter anyway. Excellent boost (this is also where the Arcana stacking from Basic ATK and Skill went).
The A4 is in the running for 'most improved'. When an enemy target enters battle, there is a 65% base chance for it to be inflicted with 1 stack of Arcana, and a 100% base chance for it to be inflicted with the DEF reduction from the Skill which lasts for 3 turns. Using Swan's Basic ATK or Ultimate also has a 100% base chance of applying the Skill's DEF reduction for 3 turns.
This is amazing, not only does it greatly increase the AoE effectiveness of Black Swan as a whole, but it boosts her supportive abilities substantially, making it so that you don't even need to use her Skill to maintain the all important DEF reduction. It literally happens by itself now, meaning her performance in Pure Fiction (where she struggled the most) is incomparably higher.
Previously this Bonus Trace only had the extra Arcana stack chance, and also had the line 'Every time an enemy target receives 1 instance of DoT during a single attack by an ally, there is a 65% base chance for the target to be inflicted with 1 stack of Arcana. The maximum number of stacks that can be inflicted during 1 single attack is 3'.
That got moved to the Talent at base, and had its arbitrary limit of 3 extra stacks completely removed, because good design is in fact not dead and death to arbitrary limitations (though with the rate of Arcana stacking now, even if this was kept in it wouldn't matter at all).
Lastly, the A6. A humble change, but one with significant impact. Previously, this was the stat conversion Trace. 60% of Black Swan's Effect Hit Rate (EHR) was gained as additional DMG%, up to a maximum bonus of 72% DMG. What's changed with this one?
This now applies to all allies.
If that dramatic pause wasn't enough to spell it out, let me do it directly: 72% DMG bonus for the entire team just for building a stat that Black Swan already wants a lot of is just damn good. We have actual support characters that aren't offering this much DMG% to their teammates, just so we're all aware.
This is of course, in addition to the permanent DEF reduction she provides and near-permanent Vulnerability... And to the crazy consistent damage output she now has too... Which also ignores enemy DEF. Apparently Black Swan saw the fraudster memes we had during Amphoreus and really took it to heart, damn, she is done fooling around.
Surprisingly, even Black Swan's Eidolons got a touch up, enough to talk about.
The usual spiel about Eidolons still applies, and surprisingly more so now after this Novaflare since it's addressing quite literally all the issues Swan has had, but even still, if the Eidolons are good, you might consider getting them.
E1 is unchanged, it still reduces the RES of whichever DoT type enemies are afflicted by (Lightning RES Down for Shock, etc.). This is indirectly buffed by the fact that Arcana now always counts as these DoT effects, meaning that simply having Swan in the party will now ALSO reduce the enemy's Lightning, Fire, Wind, and Physical RES by 25%.
E2 massive improvement. Previously gave a 100% base chance for Arcana afflicted enemies to spread 6 Arcana to adjacent foes when defeated. Unimpressive to say the least.
Now the E2 gives a 100% base chance for enemies entering combat to be inflicted with 30 stacks of Arcana. Yes, you read that right. Yes it is as funny as it sounds.
E3 and E5 are, of course, unchanged; they're the Ability Trace levels. As for, E4, it is was reworked from having Epiphany reduce enemy Effect RES to further increase the Vulnerability debuff by 20%. The Energy restoration effect was also uncapped.
Most amusing of all is that E6 actually got updated as well, so if you're a Black Swan enthusiast, you may like this one.
The previous effects are still intact, it still grants a 65% base chance to inflict 1 stack of Arcana when teammates attack enemies, and it will double up the inflicted single attacks of Arcana. However, this is now guaranteed instead of being a fixed chance, and now also increases the stackable limit of Arcana by 30, to a new maximum of 80.
'1200% ATK multiplier!' I say, as I violently slam the desk. 'You weren't even gonna give them a chance, huh?'.
Surprisingly, I think there is very little that needs to be discussed as the kit and the buffs really speak for themselves.
... Oh go on then.
Black Swan is a veritable powerhouse of a unit now, complete with damn near everything that her archetype wants. I think it's fairly unquestionable that she is definitely going to be part of the meta DoT team for a good long while, as she's outperforming Hysilens in terms of raw damage contribution — and if you actually use all three together, then Black Swan shoots off into the distance with how much more damage she is doing by comparison.
Now, of course, unless you're one of the few strange people who are looking forward to using Black Swan as a generalist unit (which you can do, by the way!), you're probably still going to be using her in a DoT setup.
As I have mentioned time and time again, 'The DoT Team™' is comprised of exactly one unit, and that is Kafka. And before you hit me with the 'well actually Cyrene and Hysilens—' yes I am quite aware but Kafka was here first and she'll probably outlast the duo too.
Kafka is just the pinnacle DoT enabler, giving everything the team wants in the form of high ATK boosts and tossing out DoT Detonations like there's no tomorrow. As I said earlier, DoT is not the kind of archetype to wait around for things to fall into place, they'll just grab the damage by the horns and gore the enemies with them manually.
Because of this, the exact same stipulation exists for Black Swan as it did for Hysilens: without Kafka, you will simply not see the extreme heights that Black Swan is capable of.
Arcana always counting as each of the standard DoT effects means that other characters that have Type-specific DoT Detonations will actually still be able to Detonate Arcana, so even if new DoT units come out that are tailored for one specific Element, well then Black Swan will be able to hitchhike just like she did on the Express.
Her generic supporting capabilities are actually also pretty impressive now, I'd even go as far as to say she's a better fill unit than most of our older Harmony units. It feels wrong, and it will raise eyebrows, but I promise you it's actually something to consider for those struggling to build a complete team archetype.
So are there really any negatives left for Black Swan after this Novaflare? Not... really? I mean I guess the Ultimate uptime can still be somewhat suspect if you literally never use her Skill at all, but it's really not that big of an issue anymore and you can circumvent it quite a few ways.
Well, there is actually one thing that may be considered a negative. Because Black Swan offers so very much now, and has so many moving parts, she is someone who will gain increases in performance disproportionately.
For the purposes of investment, you should treat Black Swan as a hypercarry, and as such, you should endeavour to give her the best possible equipment, be it her Light Cone or the highest grade of Relics you have. Even the smallest stat bump can result in a fairly significant performance increase — and I am not saying this to prep you for an 'underwhelming medium investment character' scenario. I'm saying she's great at base, and with some extra effort on YOUR part, she can become even better than that.
If this buff was lore-accurate, I'd be interested to see her tango with Acheron again just to see who'd win this time.
DoT just continues to get better and better, and the true believers amogus are rewarded yet again. I would, however, definitely be lying if I said I was expecting KafkaSwan to be meta again in the great 4.0.
Seriously, if you're still hesitant about DoT, you've probably not been paying attention much, because it's been popping even before Swan got this buff.
And hey, what's that over there? Wow! A 5-star character selector for free? And it has Kafka?? Golly gosh, what are the odds of that timing!
... He said facetiously.
Honkai: Star Rail is a game where team building matters most and while our tier list takes the optimal setup into account, a lot of characters can work and do well - even those ranked lower - when you invest into them. Also for story or lower difficulties of Simulated Universe, you don't need to worry about ratings and tiers. You can safely clear that content even with F2P characters as long as you build your team correctly.
Character at 5★ are rated at their Eidolon 0 with level 80 best in slot 4★ or 5★ Light Cone (including limited Light Cones, but at S1).
Available ratings:
Build and teams
1
2
3
4
1
The percentage numbers showcase the relative DPS increase when you take into account the set bonus only. For some characters there's no DPS (or its equivalent) available and in that case we listed the sets in the order of priority.
1
2
If you can't put together a top recommended 4P set with satisfactory sub/main stats, mix and match the 2P Bonuses from the following instead:


1
2
EHR (Until 120%) > SPD (Until breakpoint) > ATK%
HP: 2800 - 3000+
DEF: 800 - 900+
ATK: 3100+
EFFECT HIT RATING: 120%
SPD: 134/160
Talent > Ultimate = Skill = Basic
Candleflame's Portent (A6) > Goblet's Dredges (A4) > Viscera's Disquiet (A2)
Rank 3
App. rate: 11.67%
Avg. cycles: 8.09
Avg. cycles (E1+): 5.49
Rank 10
App. rate: 4.04%
Avg. cycles: 8.12
Avg. cycles (E1+): 5.87
Rank 35
App. rate: 0.71%
Avg. cycles: 8
Avg. cycles (E1+): 6.32
Rank 66
App. rate: 0.3%
Avg. cycles: 7.6
Avg. cycles (E1+): 6.58
Rank 71
App. rate: 0.29%
Avg. cycles: -
Avg. cycles (E1+): 1.31
Rank 75
App. rate: 0.27%
Avg. cycles: 0
Avg. cycles (E1+): 0.97
Rank 80
App. rate: 0.24%
Avg. cycles: 3
Avg. cycles (E1+): 0.81
Rank 80
App. rate: 0.24%
Avg. cycles: 6
Avg. cycles (E1+): 0.97
Rank 94
App. rate: 0.18%
Avg. cycles: 3
Avg. cycles (E1+): 0.68
Rank 102
App. rate: 0.16%
Avg. cycles: 9
Avg. cycles (E1+): 5.08
MoC/PF/AS Statistics