
Grim Pursuit - Bloodspike Helkid Guide

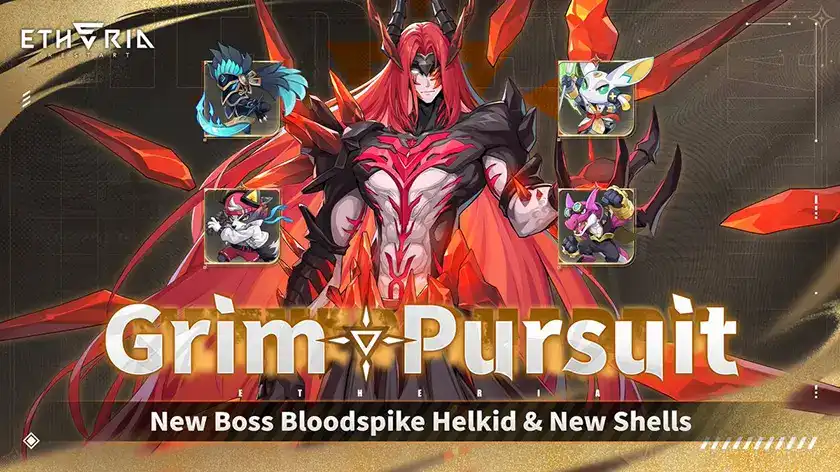
Bloodspike Helkid is one of the Grim Pursuit bosses. In this guide you will find tips how to deal with him!
Bloodspike Helkid Overview
- Boss Name: Bloodspike Helkid.
- Element: Reason.
- Challenge Type: Grim Pursuit.
- Difficulty Tiers: Nightmare → Hell → Inferno.
- Key Threats: High AoE Damage, Damage Reduction, Multiple Strong Debuffs.
- Hollow Units Disadvantaged: Only the generic Affinity disadvantage applies, even on Inferno difficulty.
- Inferno Penalty: The player’s team cannot receive [Immunity].
Shell Drops
Here are the Shells dropped by the boss:


Skills Overview
Passive Immunities
In every difficulty, Helkid is Immune to all Control effects, Turn Meter- effects and [DoT] effects.
How to counter?
- Helkid is fully immune to all Hard CCs, that is any effect that prevents actions. This includes not only Stuns, Freeze, Slumber, but also Taunt, Forgetfulness, Silence and any similar effect that impairs the enemy from acting the way they want to. Accordingly, it’s important to focus more on Stat Debuffs like ATK-, DEF-, etc, as well as various team buffs.
- Turn Meter - effects do not work, and therefore, by extension, Turn Meter Steal is also ineffective. Instead, players should focus on frequently applying [SPD-] and abusing Turn Meter+ buffs for their own team.
- No [DoTs] are effective, so it’s impossible to cheese with Withered Sania and her Acolytes. Thankfully, there is no [ATK-] or [DEF-], so it’s possible to bring multiple kinds of regular DPS to the fight.
Block Immunity
In every difficulty, Helkid is Immune to the [Block] Debuff.
How to counter?
- Since Helkid’s Grim Pursuit battle revolves entirely around the [Giant Shroud] gimmick, it’s impossible to cheese it by preventing Helkid from gaining the Buff.
Immunity Disabled
In Inferno difficulty, the player’s team cannot receive [Immunity].
How to counter?
- You cannot CC the enemy, and cannot gain Immunity, so focus entirely on bringing a hefty amount of AoE Purification.
Giant Shroud
While active, reduces the first hit of damage from enemy Animus skills by 90%. Up to 10 stack(s). Cannot be dispelled. Loses 1 stack(s) after taking skill damage 1 time(s).
How to counter?
- Deceptively easy to play around, Giant Shroud can be countered in multiple ways:
- The regular way, which wants you to use damaging skills + damaging Shells before your DPS attacks, clearing the Giant Shroud stacks entirely.
- The Bursty way, where the player exploits the Giant Shroud’s inability to reduce damage of every hit except for the first one during the Animus’ Turn. In that case, using a Shell that deals damage before the Animus on your Nuker completely nullifies the mechanic.
Fallen Blackbriar
Deals 500% damage to all enemies with a 100% chance to inflict a 2-turn [DEF ] on the targets.
How to counter?
- Bring AoE Sustain (Shields, Healing over time) and plenty of Purification.
Giant Shroud
Deals 600% damage to all enemies with a 100% chance to inflict a 2-turn [SPD ] on the targets and gains 5 stack(s) of [Giant Shroud].
How to counter?
- Same as Fallen Blackbriar, bring AoE Sustain and Purification; the SPD- Debuff is too troublesome to ignore.
Bramble
When Helkid attacks, he has a 50% chance to reduce the target's Turn Meter by 15%, and for each 1 stack(s) of [Giant Shroud] he has, his damage is increased by 10%.
How to counter?
- Bring SPD reduction to prevent Helkid from playing as much as possible, and make sure that your Supports/Debuffers have damaging Skills to reduce the [Giant Shroud] stacks.
Thorn Crystal Minion (Right of the Screen)
Deals 450% damage to all targets with a 100% chance to apply [Vulnerable] for 2 turn(s). After attacking, applies 1 stack(s) of [Giant Shroud] to Bloodspike Helkid.
How to counter?
- Just like Helkid’s own attacks, AoE Sustain coupled with mass Purification is the way to go. Bringing along an SPD reduction Debuffer makes ignoring the minions much more manageable.
Blood Lunge Minion (Left of the Screen)
Deals 600% damage to a single target. After attacking, increases Bloodspike Helkid's Turn Meter by 15% and applies 1 stack(s) of [Giant Shroud].
How to counter?
- This minion’s damage is not all that threatening and if you can heal through the AoE spam, this extra single-target attack shouldn’t pose a threat. As stated previously, SPD reduction is key to relieving some of the pressure.
Team Composition Tips
In this part, we’re going to cover two different types of strategies to beat Helkid on Inferno difficulty. The first one is relevant mostly to newer players and those who are still in the process of optimizing their first few generic builds. The second one focuses on the veteran players’ ability to burst down the Boss by using optimized builds and having access to the traditional Nuke Animuses, Gear and Shells.
Before we head into the recommended Animuses, there is one piece of advice that can be applied to both strategies, regardless of the Animuses you bring with you: Shells that deal damage are extremely helpful in this encounter, even more so if they deal damage before the Animus acts in the case of the damage Dealer. For this reason, outside of bringing Artisan if absolutely necessary, Shells like Jackal Guard, Tiger Yin, Twilight Knight, White Fang and Revelation all help either bypass the Giant Shroud (Tiger, Knight), or remove extra stacks of the Buff. This list is not exhaustive, but hopefully is enough to get the point across.
The Stall Setup
- Pick 1 Debuffer:
- Plume - SPD reduction, Dmg taken+, Dmg dealt-, DEF-, Turn Meter increase for the whole team, Plume once again proves invaluable. If you’ve summoned her as a newer player, not using her is basically a crime.
![Plume]()
- Viper - If you don’t have Plume, Viper is the second best defensive Debuffer. Spamming ATK- and SPD- in AoE takes a load off your Sustain’s shoulders, however it comes at the cost of slowing down the fight. Best used if your DPS has access to offensive Debuffs.
![Viper]()
- Kloss - Since Helkid does not get the usual 200% Dmg Increase vs Weak Affinity, Kloss can be used as a Plume alternative. Be careful, however, as the Affinity Disadvantage still results in her taking more damage and being less accurate.
![Kloss]()
- Pick 1 DPS:
- Rosa - With exceptional multi-hit capabilities, Rosa can largely ignore the gimmick while quickly whittling down the Boss’s HP through chaining her S3 and spamming S1. As a bonus, she gives Crit Rate+ and SPD-, further enhancing the potency of the team at no cost.
![Rosa]()
- Liliam - The queen of nuking strikes again. With Tiger Yin Shell, Liliam can completely ignore Giant Shroud and dish out massive damage as if the gimmick didn’t even exist. If S1 is lvl5, Liliam requires more SPD tuning than other DPS, because the Turn Meter Decrease from the Boss can make her attack before her team plays their first turn. If Speedtuning is too impractical, switch to Diting for a similar gameplay.
![Liliam]()
- Diting - Most budget DPS in the game, Diting is capable of clearing this fight without issues. His damage lags behind the rest, but with proper equipment and Shells Helkid poses no particular threat to him. Keep in mind that Diting is on the more fragile side, even for the DPS role. If survival is difficult, equip Artisan to one of your teammates.
![Diting]()
- Yeli - Similar to Rosa, Yeli has access to plenty of multi-hit attacks, as well as powerful Buffs and Debuffs. What she misses in terms of damage, she makes up for with utility.
![Yeli]()
- The previous options can all clear the fight relatively quickly, but they’re not the only options. In general, clearing this fight slowly depends more on survival and quickly removing the stacks of Giant Shroud. For this reason, many DPS can be used outside of the Hollow Affinity, which would require better gear than the rest to not underperform, and even then, they’re at risk of dying. Just make sure to have the proper Shells equipped.
- Pick 1 Support:
- Lily - If we can only pick one Support for this fight, Lily gets our vote. Cycling turns as fast as possible, reducing the CDs of your DPS’ skills and Shell, having access to spammable assists, Lily makes the encounter much easier than any other alternative. She’s also free to obtain for every starting player, thanks to the Gala Selector. Very difficult to replace without tanking your clear time and making the fight harder.
![Lily]()
- Pick 1 Sustain:
- Lingluo - This fight requires Heal over time and lots of AoE Purification, both of which are provided by Lingluo. She’s also completely free to obtain and requires very little investment, Skill Level-wise. Very difficult to replace in a slow setup.
![Lingluo]()


The Burst Setup
- Pick 1 or 2 Debuffers:
- Plume - SPD reduction, Dmg taken+, Dmg dealt-, DEF-, Turn Meter increase for the whole team, Plume once again proves invaluable.
![Plume]()
- Dinah - Vulnerable, DEF-, Erosion. Since we’re aiming to finish the fight in as few turns as possible, Dinah’s extremely offensive Debuffing kit fits very well in the game plan.
![Dinah]()
- Heinrich - Even with Block nullified, Heinrich’s ability to boost Crit-related stats and damage keeps him relevant.
![Heinrich]()
- Raymerry - Raymerry can apply Vulnerable and faces little to no threat from the Boss, thanks to her bulky nature. Best paired with a second Debuffer.
![Raymerry]()
- Pick 1 DPS:
- Liliam - The queen of nuking strikes again. With Tiger Yin Shell, Liliam can completely ignore Giant Shroud and dish out massive damage as if the gimmick didn’t even exist. If S1 is lvl5, Liliam requires more SPD tuning than other DPS, because the Turn Meter Decrease from the Boss can make her attack before her team plays their first turn.
![Liliam]()
- Rosa - With exceptional multi-hit capabilities, Rosa can largely ignore the gimmick while quickly whittling down the Boss’s HP through chaining her S3 and spamming S1. As a bonus, she gives Crit Rate+ and SPD-, further enhancing the potency of the team at no cost.
![Rosa]()
- Pick 1 or 2 Supports:
- Lily - SPD+, Turn Meter+, CD reduction, extra attacks. Lily’s kit is fully exploitable in this encounter, so there’s really no reason not to bring her.
![Lily]()
- Turandot - With awakening, Turandot now sports one of the highest Buffing potential for pure offense and Teamwide Turn Meter+, while even providing DEF+. Can be played as a single Support, or paired with either an offensive or defensive teammate.
![Turandot]()
- Ninfoniel - Similar to Turandot, Ninfoniel makes strong offenses even stronger. Her ATK+ potential is still amazing, and she even offers protection with Shields and Heals. Best paired with Lily, but can be used solo.
![Ninfoniel]()
- The Lumiwarden Diting - Even though Lumi Diting offers no offensive support, his S3 alone is enough to protect the team for a couple of turns, which is more than enough to burst down the Boss. Bring an offensive Support along with him.
![The Lumiwarden Diting]()
- Fiamelia - Similarly to Lumi Diting, Fiamelia offers excellent survivability and Purification, making it easier to focus on pure offense with the rest of the team. Bring an offensive Support along with her.
![Fiamelia]()
- Santik - Mostly used to cap Crit Rate and get CDMG+ at the same time, Santik works well as an offensive Support when paired with other offensive options. Prefers Liliam over Rosa due to the latter having access to Crit Rate+ on her own.
![Santik]()


Best Teams
If you don't have some of the characters visible in the teams, you can replace them with another one that fulfills the same role (check the section above).
Helkid Inferno #1
Content: Grim Pursuit || Team type: Generic || Time: 0-1m


Other Grim Pursuit Boss Guides
Below you can check all Grim Pursuit Boss guides: