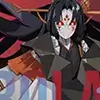
DokiDoki Boss Guide
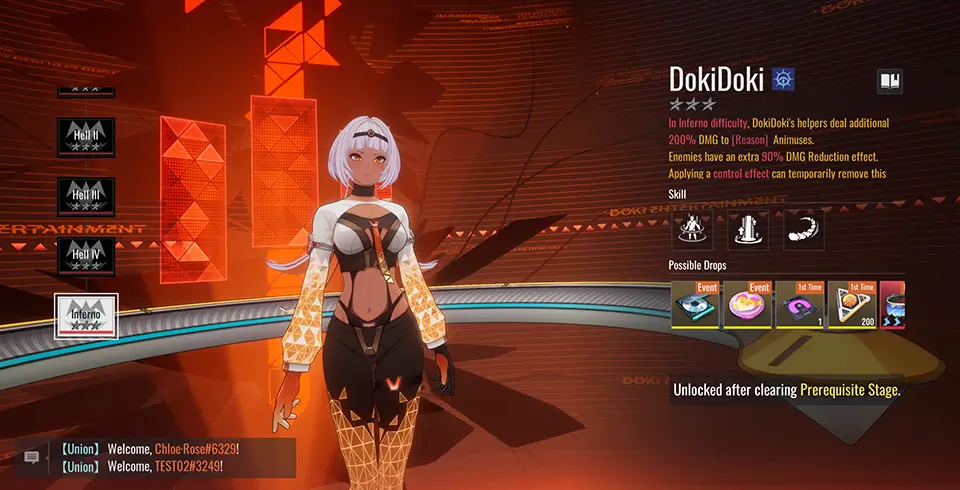
DokiDoki is the second Threshold boss in Etheria: Restart, and her battle is a pure test of wave management, crowd control, and burst AoE damage. Unlike most bosses, DokiDoki never attacks your team directly. Instead, she takes full control of the battlefield by summoning waves of mutated minions that do the fighting for her. These adds appear in two distinct phases and are protected by a passive 50% damage reduction up to 90% on harder difficulty making them highly resistant to casual damage unless managed properly.
The key to overcoming this fight is understanding the core mechanic: Spotlight Focus. This ability allows DokiDoki to mark specific enemies and gradually “evolve” them into extremely dangerous Meltdown Monsters. If these units mutate, they gain devastating AoE attacks and can quickly wipe unprepared teams. Fortunately, there’s a counter -applying crowd control (CC) like Stun or Freeze strips their damage reduction and interrupts the mutation process, giving your team a critical window to burst them down. Focus any adds that are crowd controlled, as they become vulnerable and much easier to eliminate.
Throughout the fight, DokiDoki forces you to juggle multiple threats at once: waves of mobs, escalating mutations, and overlapping damage reduction mechanics. Bring strong AoE damage dealers to handle the packs efficiently, along with reliable CC and support units that can keep the board in check. The longer adds stay alive, the more likely they are to mutate and spiral out of control so speed, timing, and control are everything. With the right setup and precision, DokiDoki’s chaos becomes manageable, and the encounter turns into a battle of clean execution over brute force.
DokiDoki Overview
- Boss Name: DokiDoki.
- Element: Odd.
- Challenge Type: Threshold Final Boss.
- Difficulty Tiers: Normal → Hard → Nightmare → Hell → Inferno.
- Key Threats:
- Crazed Gathering: 50% - 90% damage reduction on all summons.
- Spotlight Focus: Marks and mutates (or Frenzy-stacks) enemy units.
- Wave Summons: Two waves - first light adds, then Meltdown Monsters.
- Reason Units Vulnerable: On Inferno the boss deals 200% bonus damage to Reason affinity units - using them will most likely result in failure. Before the Inferno difficulty the bonus damage is lower.
Skills Overview
DokiDoki’s abilities can catch you off guard if you’re not prepared. Here’s a detailed breakdown of his abilities and how to counter them.
Crazed Gathering
Every summoned unit gains 50% to 90% damage reduction.
How to counter?
- Control Effects: The damage reduction can be temporarily removed by inflicting control effects - plan to use control skills on each wave before bursting.
DokiDoki - Best Characters
In this section we will showcase the characters you can bring to deal with the boss - focusing more on ease of clearing the boss (rather than doing it super fast) and also to use as many SR characters as possible.
- Main DPS (Pick 1):
 Rilmocha - the best DPS choice for DokiDoki who makes farming the boss easy mode,
 Yeli - Excellent AoE and ST DPS that covers the DEF- debuff on top of her damage. Best used with the Revelation shell,
 Xiada - a great DPS that becomes stronger with buffs and who can reduce the cooldown of her S3. On max stacks, she will basically just spam her S3, dealing a lot of damage and reducing the DEF of all enemies. Use her with Revelation shell!
 Massiah - a Light DPS who can work against any boss due to how universal his kit is,
 Tiamat - she will work great early on, but with the difficulty increase, she will start slowing down more and more. She still can clear Inferno (so highest difficulty), but it will be way slower than other DPS - though if you play her manually, she still works well. She also helps the team with Shields/Healing and Taunt,
 Rahu - Although slow, Rahu’s excellent performance in long fights allows him to clear Doki Inferno, thanks to his frequent FUA and his team-wide DEF+.
- CC character (Pick 1):
- You need a character that can consistently apply Crowd-Control effects to the enemies to remove the damage reduction buff. Otherwise you will have a bad time here,
![Kazuyo [The Reverie]](https://cdn.prydwen.gg/images/etheria-restart/characters/kazuyo-the-reverie_icon.webp) Kazuyo [The Reverie] - while Kazuyo doesn't have a hard-cc, but rather she forces enemies to sleep (and they wake up after getting hit), she can apply the status more often than other since she can do it both via her S3 and S1 skills. Another advantage she has is the ATK- debuff that drastically reduces the damage the monsters do,
Kazuyo [The Reverie] - while Kazuyo doesn't have a hard-cc, but rather she forces enemies to sleep (and they wake up after getting hit), she can apply the status more often than other since she can do it both via her S3 and S1 skills. Another advantage she has is the ATK- debuff that drastically reduces the damage the monsters do, Kraken - the best alternative with a hard-cc on his S3 that freezes the monsters and prevents them from moving. No ATK- debuff here, so you need to build your team tankier if you want to use him.
 Celince - Celince Forgetfulness debuff actually counts as CC, so she can also remove the DMG Reduction buff from enemies. On top of that, she also has a passive team-wide shield, helping with survival.
 Mio- another CC option, but you most likely won't run her solo, but together with either Kazuyo or Kraken. She also helps the team with buffs and turn meter boosts.
- Additional Supports (Pick 3):
 Marvell - Marvell not only can slow enemies down and steal their Turn Meter, but also reduce their Effect RES, allowing your CC character (and debuffers) to land their debuffs more consistently,
 Kloss - another debuffer that has pretty insane combination of debuffs: DEF-, DMG Taken+, DMG Dealt- and Speed down. On top of that, she can steal turn meter from enemies and give it to her allies.
 Gray- a DPS/Buffer/Debuffer hybrid that buffs your team's CRIT Rate and reduces enemies DEF while at the same time dealing decent damage,
 Freya - a Buffer/Debuffer hybrid that provides ATK+ and DEF+ buffs to allies, increases the damage taken on enemies and boosts allies Turn Meter (while reducing enemy turn meter when they are debuffed),
 Lily - a top-tier buffer who provides SPD+ to all allies and additional buffs to one marked ally (the main carry),
 Tsukiyo Mi - another great buffer that provides ATK+ and SPD+ buffs to the whole party,
 Nell - great source of SPD+, Vulnerable, and Healing + Turn meter for your carry makes her an amazing budget option even at the highest difficulties.
 Sania or
  Valerian - both are great Sustain characters that can keep the team alive. Sania offers heals and revives, while Valerian is more shield-focused and also can provide additional buffs to the team. Once you obtain
  Lingluo you can use her instead.
 Fuqiu - Heal Spam, frequent Turn meter boosting, big shields and a SPD buff make Fuqiu a great addition to most teams seeking more safety and consistency.
DokiDoki Best Teams (Overall)
If you don't have some of the characters visible in the teams, you can replace them with another one that fulfills the same role (check the section above).
The teams for the section are targeted for the highest difficulty - Inferno - but obviously they will also work in the lowers one. Those aren't the only teams that work against the boss - only the ones we found to be optimal ones without overloading the team with Light/Dark characters.
DokiDoki Hell #1
Content: DokiDoki || Team type: Generic || Time: 4-5m
DokiDoki Hell #3
Content: DokiDoki || Team type: Generic || Time: 4-5m
DokiDoki Hell #4
Content: DokiDoki || Team type: Generic || Time: 4-5m
DokiDoki Hell #5
Content: DokiDoki || Team type: Generic || Time: 4-5m
DokiDoki Hell #6
Content: DokiDoki || Team type: Generic || Time: 4-5m
DokiDoki Hell #7
Content: DokiDoki || Team type: Generic || Time: 4-5m
DokiDoki Inferno #1
Content: DokiDoki || Team type: Generic || Time: 1-2m
DokiDoki Inferno #10
Content: DokiDoki || Team type: Generic || Time: 1-2m
DokiDoki Inferno #11
Content: DokiDoki || Team type: Generic || Time: 1-2m
DokiDoki Inferno #12
Content: DokiDoki || Team type: Generic || Time: 1-2m
DokiDoki Inferno #13
Content: DokiDoki || Team type: Generic || Time: 0-1m
DokiDoki Inferno #14
Content: DokiDoki || Team type: Generic || Time: 0-1m
DokiDoki Inferno #15
Content: DokiDoki || Team type: Generic || Time: 0-1m
Comments
Massiah can replace yeli, and RC-77 can replace Nahor
DokiDoki Inferno #16
Content: DokiDoki || Team type: Generic || Time: 0-1m
DokiDoki Inferno #17
Content: DokiDoki || Team type: Generic || Time: 0-1m
Comments
Can replace Massiah with Rilmocha.
DokiDoki Inferno #19
Content: DokiDoki || Team type: Generic || Time: 0-1m
DokiDoki Inferno #2
Content: DokiDoki || Team type: Generic || Time: 2-3m
DokiDoki Inferno #20
Content: DokiDoki || Team type: Generic || Time: 0-1m
DokiDoki Inferno #3
Content: DokiDoki || Team type: Generic || Time: 2-3m
DokiDoki Inferno #4
Content: DokiDoki || Team type: Generic || Time: 2-3m
DokiDoki Inferno #5
Content: DokiDoki || Team type: Generic || Time: 2-3m
DokiDoki Inferno #6
Content: DokiDoki || Team type: Generic || Time: 2-3m
DokiDoki Inferno #7
Content: DokiDoki || Team type: Generic || Time: 2-3m
DokiDoki Inferno #8
Content: DokiDoki || Team type: Generic || Time: 2-3m
DokiDoki Inferno #9
Content: DokiDoki || Team type: Generic || Time: 2-3m
Module Drops
Each of the three Threshold bosses drops different gear sets (called Matrix Effects here), and below you can find a list of Matrix Effects dropped by DokiDoki.
Bramble
Type: DEF / Shield
Source: DokiDoki
4/8: DEF +10%
8/8: DEF +10%. Upon hit, Animuses have a 25% chance to counterattack with a basic attack.
Evolguard [INFERNO ONLY]
Type: HP / Healing
Source: DokiDoki
6/6: Healing Effect +12% & Effect RES +20%
Harvest
Type: ATK
Source: DokiDoki
4/8: ATK +10%
8/8: ATK +10%. When Attacking, if the target's HP is above 50%, additionally ignore 30% of their DEF.
Swiftraid [INFERNO ONLY]
Type: SPD / Skill CD
Source: DokiDoki
6/6: SPD +15% & ATK +20%
Swiftrush
Type: SPD / Skill CD
Source: DokiDoki
4/12: SPD +8%
8/12: SPD +20%
12/12: SPD +35%
Timeweave
Type: SPD / Skill CD
Source: DokiDoki
6/12: Effect ACC +18%
12/12: Effect ACC +18%. At the start of the turn, there is a 35% chance to reduce CD of all Animus skills by 1 turn.
Unbreakable
Type: DEF / Shield
Source: DokiDoki
4/12: DEF +10%
8/12: DEF +25%
12/12: DEF +45%