Disk 4
ATK% > CRIT Rate%
Disk 5
ATK% > Ice DMG%
Disk 6
Energy Regen = ATK%
Last updated: 14/June/2026
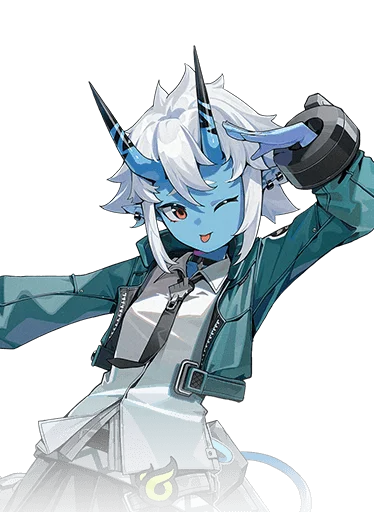
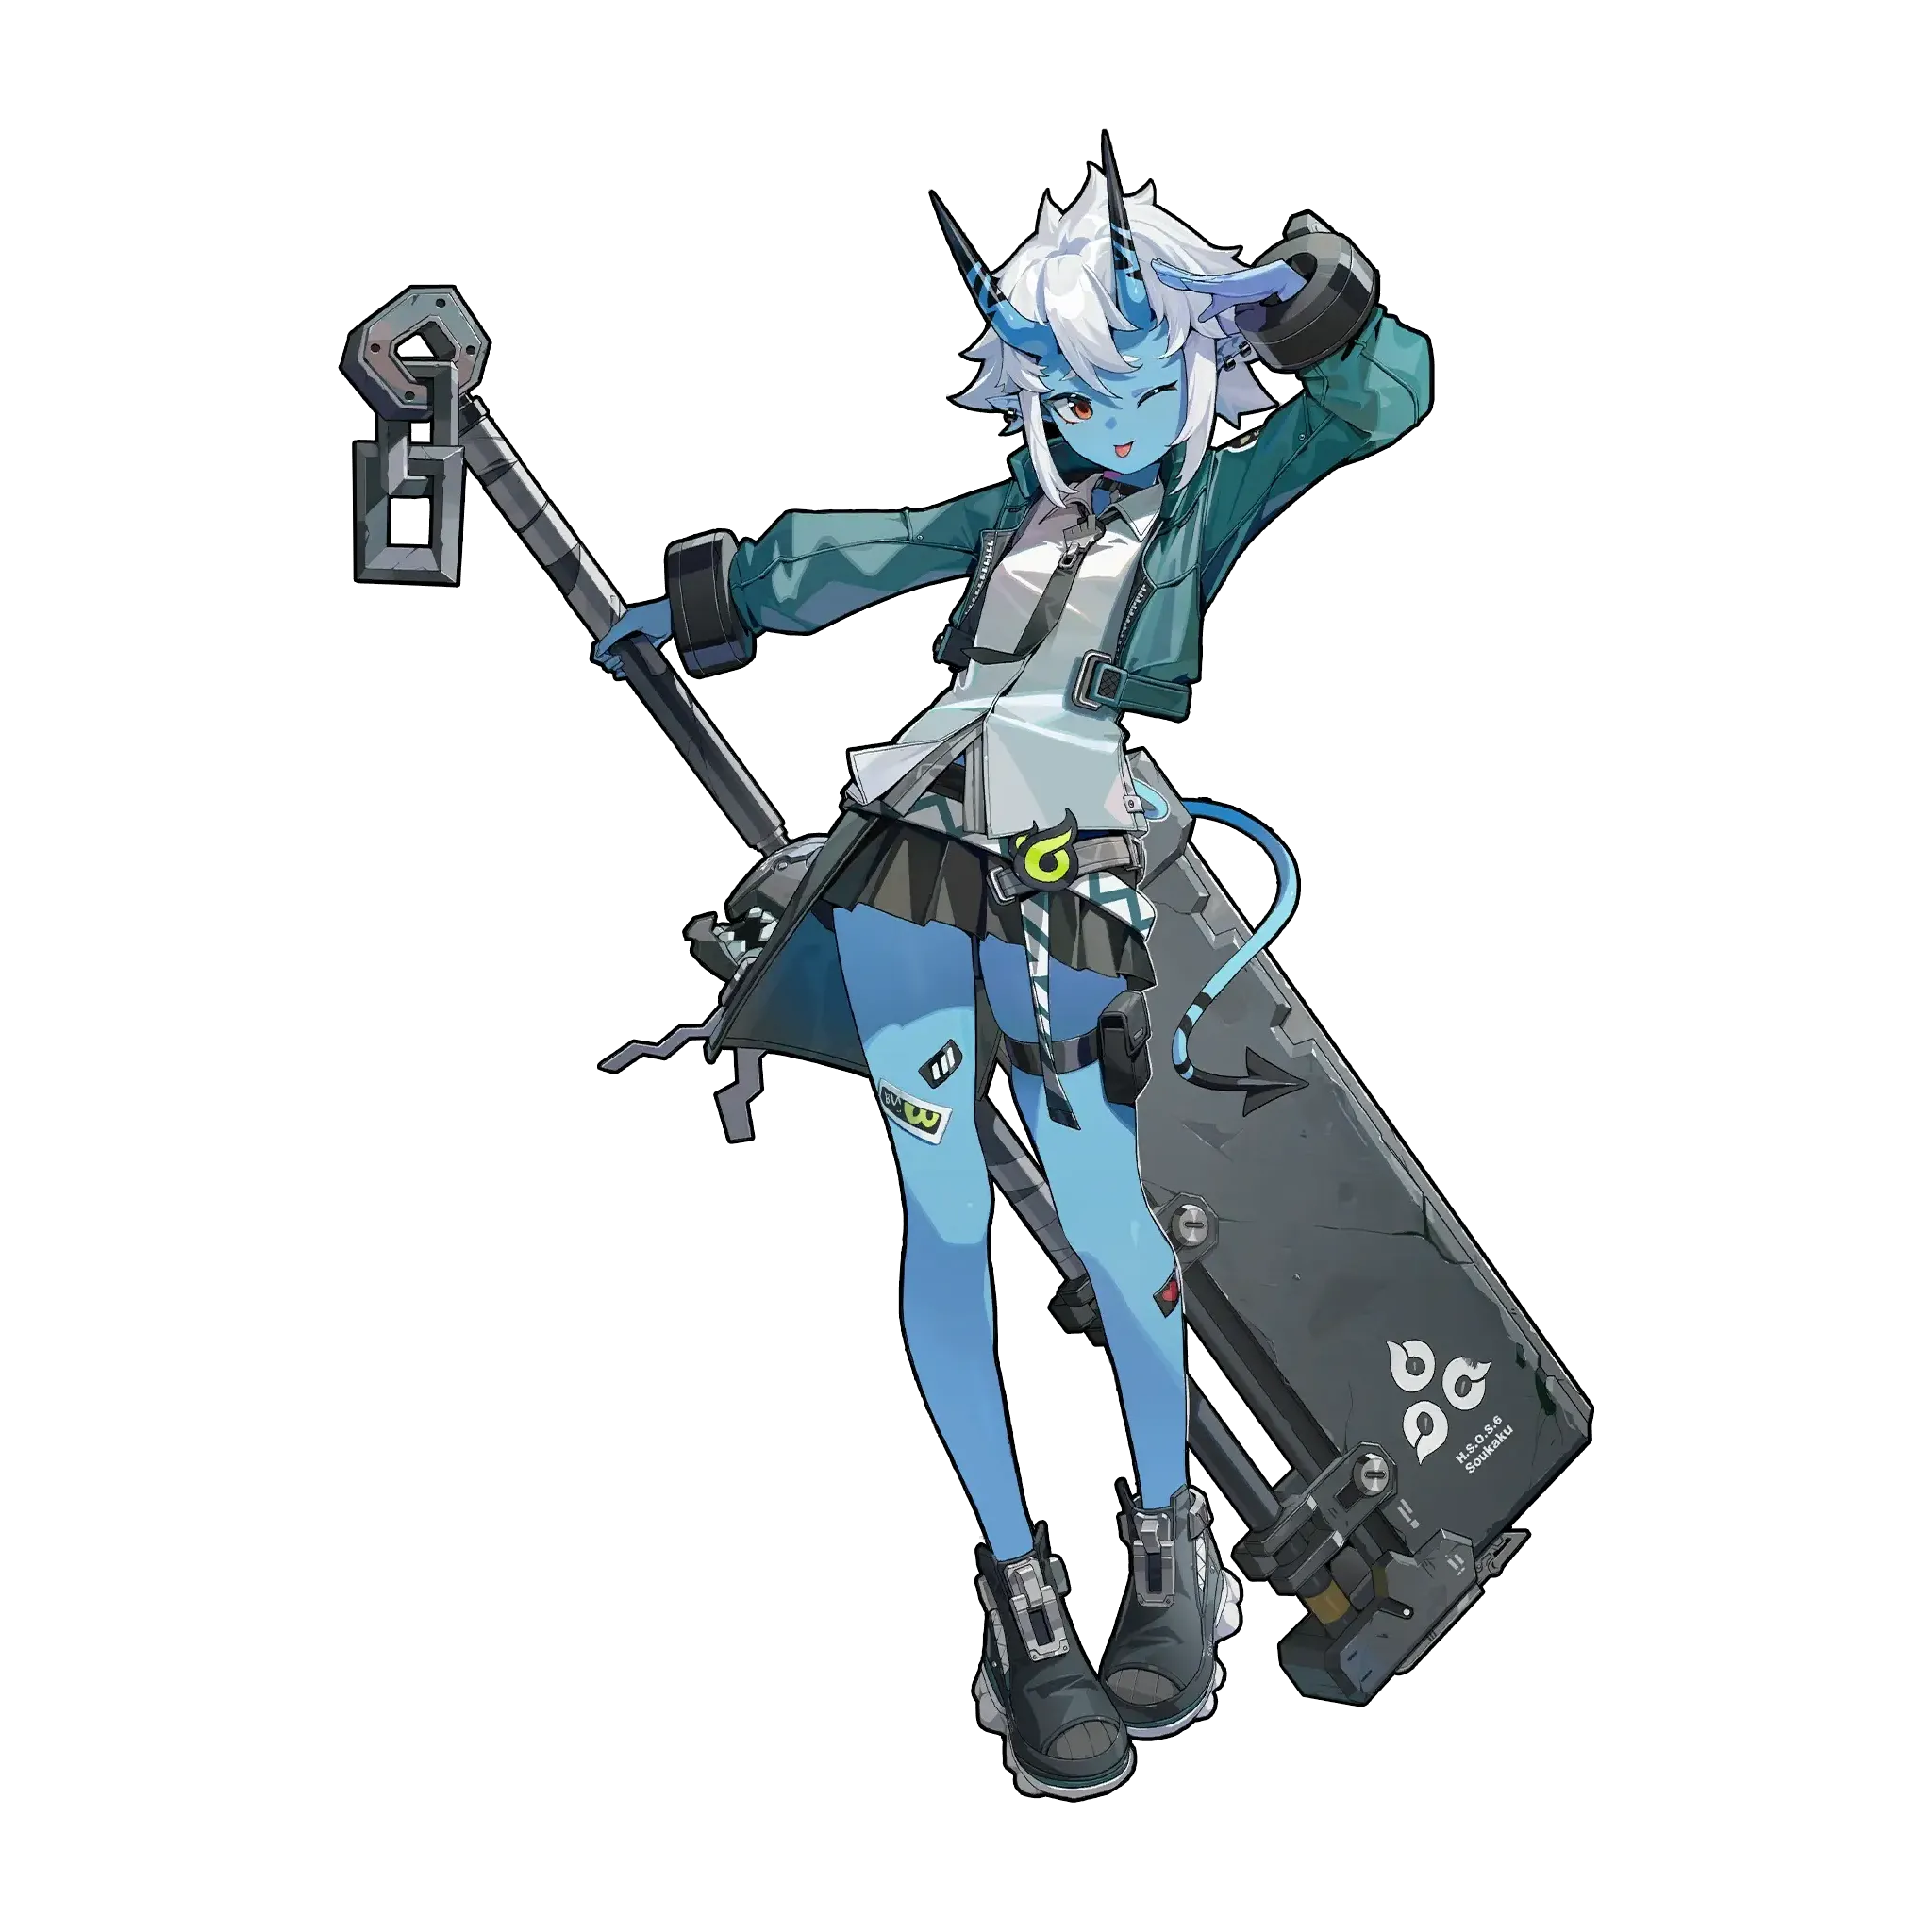
Best guide and build for Soukaku from ZZZ (Zenless Zone Zero). Soukaku is an![]() rank character with the Ice attribute who belongs to the
rank character with the Ice attribute who belongs to the![]() Support Specialty and who is part of the
Support Specialty and who is part of the![]() Section 6 faction.
Section 6 faction.
Soukaku, Deceptively Strong in Combat. Not only a member of Section 6, but also one of its "assets." Enemies who underestimate her have a tendency to vanish from existence. Totally. Not Picky, Hates Wasting Food. She loves to eat, and gets angry when seeing others waste food. Totally. Trouble With Words. Due to certain reasons, she's somewhat uneducated, and often mispronounces words, which results in some cute blunders. Totally. A Pure & Innocent Child. Though only an immature kid, much like the boy in "The Emperor's New Clothes," she often uncovers the simple truths. Totally.
Soukaku has at least one video guide available, so if you prefer this sort of medium to learn more about a character, check it out:
Last review update
Patch 2.0
Last build update
Patch 2.2
Last teams update
Patch 2.5
Last profile update*
14/June/2026
*Profile update means smaller edits to disk drives, stats or other things that don't require new calculations.
To learn more about Soukaku check the sections below. Use the tabs to quickly switch to the kind of information you're looking for.
Profile
Core Passive Blade Flurry
When Soukaku launches Fly the Flag, her ATK is increased by 10% up to 500, for 22s. When consuming Vortex during Fly the Flag, the ATK increase is doubled, up to a max 1000. This buff given can be passed along to characters switching in via Quick Assist or Chain Attacks triggered by Fly the Flag, and it refreshes the duration of the buff.
Base Energy Regen 0
BASE ATK: 0
Additional Ability Group Set Meal
When another character in your squad shares the same Attribute or Faction:
When Soukaku consumes Vortex to activate Fly the Flag, the Ice DMG of the squad is increased by 20% for 22s..
Basic Attack: Making Rice Cakes
Basic Attack: Making Rice Cakes (Frosted Banner)
Dodge: Grab a Bite
Dash Attack: 50/50
Dodge Counter: Away From My Snacks
Dash Attack: 50/50 (Frosted Banner)
Special Attack: Cooling Bento
EX Special Attack: Fanning Mosquitoes
Special Attack: Rally!
Chain Attack: Pudding Slash
Ultimate: Jumbo Pudding Slash
Assist Follow-Up: Sweeping Strike
Defensive Assist: Guarding Tactics
Quick Assist: A Set for Two
Uplifting Current
Mindscape 1
Experimental Charging Module
Mindscape 2
Attendance Meal Allowance
Mindscape 3
Hypothermia
Mindscape 4
Late-Night Snacks
Mindscape 5
Northern Wind
Mindscape 6
Soukaku Stats at level 60 (including Core passive bonuses).
Review
This tier list assesses Agents (characters) based on their combat potential in Zenless Zone Zero's most demanding contents - Deadly Assault (DA) and Shiyu Defense (SD). Please keep in mind Zenless Zone Zero is a skill-based game and each character has a different playstyle, difficulty level and even special tricks and combos. Zenless Zone Zero is also a team based game and it's only by combining both these factors to the highest level a character can reach optimal performance.
Gives herself an absurdly high Flat ATK buff, which she can transfer to the next character in the party via Quick Assist or Chain Attack with permanent uptime if managed properly;
Grants the team an Ice DMG Bonus after consuming her Vortex charges, which is doable quickly and easily with permanent uptime if managed properly. Also shreds Ice RES for a short period of time with M4, leading go high Ice-specific buffing potential;
Surprisingly high damage potential with Mindscapes and a good build, not to be ignored on top of solid Ice Anomaly application. Overall one of the rare Supports who scale well with high investment;
She’s free!
Cannot benefit off-field attackers/secondary DPS Agents in a significant way, due to only transferring her Flat ATK buff to 1 Agent on the team. Leads to restricted teambuilding options;
Kit is definitely Ice-centric. Difficult to justify her use over other easily accessed general buffers such as Nicole and Lucy outside of Ice teams, even though she’s still definitely usable beyond the scope of Ice teams there’s just little reason to do so;
The infamous Slowkaku. Chain Attack, Ultimate, EX Special and Fly The Flag (all of her main abilities) take a long while to execute in spite of the high buffing and personal damage, which makes rotations a lot rougher around the edges with her on the team.
Soukaku is an A-Rank Ice Support Agent whose primary role is to buff Ice Main DPS Agents to amplify the party’s overall damage while dealing good damage of her own. The core of her kit lies in her “Fly the Flag” and “Vortex” stack mechanics, so we’ll detail those first.
Vortex stacks are a consumable resource that Soukaku can use to buff the party’s damage and cast Enhanced Basic/Dash Attacks (although this latter feature is rarely used). They stack up to 3 times and she gains them in 3 ways:
1 Vortex stacks per use of her EX Special (low cost, easy to chain 3 together);
1 Vortex stack when using her Chain Attack (rarely used);
3 Vortex stacks when using her Ultimate.
Tapping Soukaku’s Special with enough Energy causes her to use her EX Special which releases wind currents in succession if pressed repeatedly. The low Energy cost makes it possible to use them 3 times one after the other to get max Vortex stacks without the aid of her Ultimate or Chain Attacks. A finishing move can be executed if not interrupted by Fly the Flag, however it is slow to execute and deals relatively low damage and as a result, using this finishing move is not favourable.
Vortex stacks are consumed when launching Fly the Flag, which is done by holding Special. Consuming Vortex stacks allows Soukaku to buff the party’s Ice DMG by 20% for 22s via her Additional Ability. Additionally, launching Fly the Flag buffs Soukaku’s ATK by up to 1000 points for 22s, scaling directly with her own ATK. When launching Fly the Flag, she can activate a Quick Assist to the next character in the squad. Doing so will transfer the Fly the Flag ATK buff to the next Agent who entered via this Quick Assist, and in very rare cases this can also be done via a Chain Attack (although this basically never sees use). 1000 flat ATK is a massive buff, however it has the weakness of only applying to 1 Agent at a time, meaning it’s completely incompatible with secondary DPS characters. This causes Soukaku to see teambuilding restrictions, like with Vivian in a Miyabi team for example, where the two are better off paired with other Support Agents who benefit the whole party at once such as Lucy and Nicole instead of Soukaku.
With that being said, Soukaku has massive ATK and Ice DMG buffs that last for 22s. It’s really easy to guarantee full uptime on both so long as she is managed properly. Using her EX Special 3 times, or an Ultimate if available, into Fly The Flag is enough to activate all of her buffs in relatively quick succession. Granted, Soukaku carries a heavy weapon and has rather slow execution wielding it. To her credit however, the sheer buffing potential she holds for Ice Agents in particular is enough to justify her a solid position in several Ice teams.
So in short, Soukaku’s primary Support gameplay sums up to the following:
Use EX Special 3 times OR Ultimate;
Launch Fly the Flag and Quick Assist into your Main DPS to guarantee high damage buffs.
Generally speaking, her Enhanced Basic Attacks and Chain Attacks are too slow to justify their damage potential. While Soukaku does deal higher damage than most Supports, to where some dedicated players even go as far as using her as a Main DPS, generally speaking the average player is better off solely investing into her ATK to guarantee Fly the Flag’s buff provides the full 1000 ATK to a Main DPS Ice Agent like Miyabi or Ellen in order to deal damage with them as the spotlight instead. This makes logical sense considering Soukaku’s class as a Support Agent.
Soukaku also accesses a small 10% Ice RES Shred for 8s when hitting an enemy with Fly the Flag via her Mindscape 4. While the uptime on this is low, it is entirely possible to quickly burst down enemies hit with a high-damaging attack such as an Ultimate or Miyabi’s max charge Shimotsuki attack. Overall, it only enhances her supportive potential for Ice Agents. Additionally, her Mindscape 1 increases the uptime on her main buffs (Ice DMG boost, Flat ATK) from 22s to 30s, which pretty much guarantees permanent uptime. These vertical upgrades justify Soukaku’s position as a strong Ice Agent buffer even better, not to mention her personal damage remains non-negligible compared to other Support Agents. In the meta, while she’s often overshadowed outside of Ice teams by other A-ranks like Lucy and Nicole, via her specialization towards buffing Ice Agents she finds herself a viable niche for when premium Supports like Astra Yao are unavailable to use, or even in some specific synergies like the Miyabi - Lycaon - Soukaku trio that can reach the highest of heights when fully optimized.
In conclusion, Soukaku is a dedicated Ice Support who finds some niche uses outside of Ice teams but is generally overshadowed. However, to support Ice Main DPS Agents, there is rarely any Support who can match her level of damage increasing capabilities. Her ability to scale well off of high investment thanks to her high personal damage, in spite of her low attack speed, cements her position as one of the prime Ice element buffers in Zenless Zone Zero.
Build and teams

For ZZZ calculations we worked alongside Rivyn Elowen. Any other content such as comments on W-Engines, Disks, etc are our own.
The W-Engines are listed in order of priority. Sometimes the percentages appearing near them won't reflect their performance as pure damage or Stun output isn't the only thing we're looking at - the utility of the W-Engine might be more important than the calculations imply.
1
2
3
4
5
6
1
Best supportive set for supports aiming to increase Anomaly damage of characters of their same element. Particularly useful for Soukaku due to her amazing Anomaly application and tendency to belong in Ice teams (such as Miyabi's). Causes all EX Special Attacks to apply a 20% Anomaly Buildup Resistance reduction to the same element as the wearer for 8 seconds to all enemies hit. This set is a huge boon for Anomaly-based teams and is a top priority to have on at least one character in the team if it can be used.
Best combined with your choice of 2-PC Set:

Phaethon's Melody

Astral Voice

Hormone Punk

Chaos Jazz
2
Gives 20% Energy Regen on the 2-piece, and most importantly the 4-piece is the best set for every Support-class Agent. This is because it provides not only more DMG Bonus than both Proto Punk and Swing Jazz (18%), but the duration of the buff is also much longer than both of them as well (25s), while the condition is also much easier to fulfill (it only requires casting an EX Special or Ultimate). It makes this set the best choice for all Supports and is only superceded by a fully stacked Astral Voice, which is not consistently upkept by most Agents.
Best combined with your choice of 2-PC Set:
Phaethon's Melody
Astral Voice
Hormone Punk
Chaos Jazz

Freedom Blues
3
Best generalist buffing set outside of Moonlight Lullaby, providing a useful 10% ATK on the 2-piece but most importantly buffing DMG dealt by characters entering the field via Quick Assists by upwards of 24%, the biggest buff provided by Disc Drives in the game. However, note that this buff may not be fully active all throughout a battle.
Best combined with your choice of 2-PC Set:
Phaethon's Melody
Hormone Punk
Chaos Jazz
Freedom Blues
Substats: ATK% (top priority until ability cap) = CRIT RATE = CRIT DMG > PEN = ATK
ATK: 2777 (Lvl 4 Core Passive) - 2500 (Lvl 6 Core Passive)
HP: 10000+
DEF: 800+
CRIT RATE: 50% - 60%+ (Optional)
CRIT DMG: 100% - 120%+ (Optional)
Special Attack
Chain Attack
Basic Attack
Assist
Dodge
Teams & Synergy
Below we list only the most important synergies for Soukaku. The character can work with others if you know what to do and how to use them.
 Miyabi
  Ellen - Soukaku stands out as an amazing F2P option for both Miyabi and Ellen as she's able to buff the Ice DMG of allies and she reduces the Ice RES of enemies, all the while providing a big ATK buff. Fully accessible by F2P players, Soukaku is a clear-cut buffer for all Ice DPS Agents and sure enough, she's one of the best F2P options for both Miyabi and Ellen, and she's even able to activate both of their Additional Abilities on her own. The pairing is viable, F2P-friendly and shockingly effective.
 Lycaon - Soukaku stands out as an amazing F2P option for Ice teams with Lycaon, as she's able to provide him with his Additional Ability, and she's able to buff the Ice DMG of allies and reduce the Ice RES of enemies even further with Lycaon, all the while providing a big ATK buff. The pairing is definitely not to be underestimated.
This section lists most popular teams featuring Soukaku in the current phase of Shiyu Defense.
Rank 34
App. rate: 0.96%
Avg. time: 32006
Rank 44
App. rate: 0.71%
Avg. time: 27966
Rank 51
App. rate: 0.63%
Avg. time: 27825
Rank 90
App. rate: 0.21%
Avg. time: 29055
Rank 131
App. rate: 0.1%
Avg. time: 25926
Rank 158
App. rate: 0.07%
Avg. time: 30397
Rank 158
App. rate: 0.07%
Avg. time: 33355
Rank 191
App. rate: 0.05%
Avg. time: 33222
Rank 295
App. rate: 0.02%
Avg. time: 27503
This section lists most popular teams featuring Soukaku in the current phase of Deadly Assault.
Rank 77
App. rate: 0.21%
Avg. score: 22900
Rank 141
App. rate: 0.06%
Avg. score: 22471
Rank 167
App. rate: 0.04%
Avg. score: 21460
Rank 213
App. rate: 0.02%
Avg. score: 0