
Credits
This guide is based on another guide that was created by the Lunar Crescendo alliance cluster - big thanks to oncewasblind, arisante and r3minder. You can find the original guide here and if you're interested in joining the Lunar Crescendo alliance, check their Discord below.
Lunar Crescendo DiscordHow To Start Strong
To guarantee yourself a strong start, we suggest Rerolling an account and aiming for one of the LD (Light & Dark - so the 'rarer' elements) characters. The goal will be to pull on the Standard RGB (Red, Green & Blue) banner and aim to pull an LD character (yes, you can still get them there). Every time you pull an SSR character from the Standard RGB banner, you have a 25% chance it will be an LD character instead - so the rates are pretty good. You can also further increase your chances by using all your post-tutorial Hydra Crystals on the Beginner LD Banner to obtain ![]() Plume, one of the best characters to date.
Plume, one of the best characters to date.
With the starter rewards and codes, you should be able to do 55~75 pulls on a fresh account and that's almost enough to pity an SSR from the standard banner.
You should ignore the Rate-Ups and Targeted Banners for the first few days/weeks because:
- During the first few days, you will do roughly 300 pulls, so that's a lot of random SSR - if you use your 'Selector' (the Targeted Banner) early and get a dupe, you will feel bad
- The rate-up characters are added to the Standard Banner on the same day. So you might pull one of them randomly from there and feel terrible about it.
Sadly, there are no guest accounts and you have to reroll using a new email (or the salt method) every time. And each reroll takes roughly 15-20 minutes too.
For a detailed reroll guide, go here:

Final Beta Rebate
If you're a rebate user from the Final Beta, sadly you can't reroll. Instead just pull on the standard banner to get as many characters as you can can - skip Rate-up and Selector.
Important Progression Tips
- Spend 10x on stamina refills for the first 4 days. Doing this, you'll hit account level 35 by the end of the fourth day, which is when you can start farming Mythic modules.
- Yes, even if you're a F2P player. It's better to use Gems for refills rather than on pulls.
- Save your Targeted Banner for later after pulling on standard to see what you actually need - probably wait a week or more to see what you actually need or have gotten.
- If you're stuck around day 3-4, you can pull on the Targeted Banner, but if you reroll and follow our tips, this should not happen,
- Only roll on Limited banners if the character is a must have for you. Limited banners do not have a soft pity, but the hard pity is the same - set at 80,
- Save your LD tickets for Rate up LD for a guarantee instead of using on Extre-Affinity if you have a LD unit already.
- It's recommended to always be using Continuous Battle simultaneously while playing to spend down your stamina faster.
- Make sure to auto battle the highest stage you can currently beat.
- Avoid building too many units at a time. Invest in units that can be used in a lot of contents.
- Most of your power comes from Modules and Shells. But they're costly to level, so try to avoid leveling modules past +12 until you reach Epic (yellow) tier. For Shells, you’ll have to level a few for Hyperlink Charter, since rerolling passives for Yellow Shells take the same as Red Shells, we recommend just a few Yellows and a few Purples until you hit Red Mythic Shells!
- The best early-game Shells are without a doubt and
 Black Flag. Black flag can be used on both DPS and Supports and it provides permanent SPD+ buff and turn action advance, while Twilight Knight provides high damage and big DEF reduction for a turn.
 Twilight Knight
 - Be aware that Hyperlink Charter requires you to level a few for the missions, that is fine.
- Your primary objective should be to reach end game content. End game starts at NicoNana (Shells), or Hell III (Modules).
- If you want Speed and Counter gear, build a team to beat DokiDoki. This is recommended as these sets are useful in all modes. If you want pure HP or ATK sets, farm Terrormaton first.
- If you invest a lot of resources into a Shell or Module, do not use it as fodder. Recycle it. You can get a lot of your invested resources back.
- Not all matrixes (module effects) are available on all shells. Plan your builds out in advance.
- End game shells do not drop until account level 50 in Inferno levels - you can tell because they have 6 slot matrix mods (eg. Swiftraid).
- End game modules do not drop until Hell III levels - you can tell the difference because they have 3 matrix slots.
- Shadowprints can drop in Animus Exp stages to craft up to yellow/red.
For more tips and tricks, go here:

Early Game Progression
In this section you can find information what to do during the first few hours of playing the game.
- Progress story first priority
- You can use stamina in the background while doing story
- Skip as many battles in the story as possible - takes 5 stamina per fight and the rewards are not worth it
- FOCUS ON HYPERLINK CHARTER AND 7 DAY COMMISSION (Progression Tutorial Missions for
 Lingluo and
  Lian - both give a lot of freebies, including pulls)
 - End of Prologue: Level 2
- Summon to get free Lian
- Need to complete 1-3 to unlock challenges
- End of Chapter 1: Level 4
- End of Chapter 2: Level 5
- Modules unlocks at Chapter 2-3
- End of Chapter 3: Level 6
- End of Chapter 4: Level 6
- Unlock Unions at Chapter 4-3 (Make sure to do check-ins and Union Boss Daily/Content)
- Anima EXP unlocks at Chapter 4-3
- After beating Chapter 4, farm Animus Exp until Level 10 to unlock the next story Chapter
- Chapter 5 - Required Level 10
- Prowess Mats unlock at Chapter 5-3
- You can switch here to farming the Prowess mats to level your account
- Chapter 6 - Required Level 13
- Arena unlocks at Chapter 6-3
- In challenges, get the first time bonus for every fight.
- If you're stuck on Chapter 4 farm these:
- Can farm Terrormaton or DokiDoki for Onslaught / Swiftrush gear in the background while doing story.
- Can farm Hard Jacques for Swift Shell to combine with DokiDoki’s Swift Modules for 8 Set effect Swiftrush.
Day By Day Guidelines
Important! The daily guidelines are only achievable if you refresh stamina 10 times a day.
Day 1 - Aim to reach level 17
- Remember to Continuous Battle to burn through your stamina while going through content (Arena/Story/Guild).
- At level 13 Arena unlocks - make sure you do AI Arena and RTA for capped resources.
- Start farming GP Outpost for Prowess for skill upgrades continuously (exp/shell/modules as needed, but primarily GP Outpost).
- At Level 13 you also unlock Purple-rarity Shells that you want to keep - don't overinvest into Yellow-rarity shells due to upgrades costing the same material as Red-rarity Shells till you unlock Red-rarity Shells. Feel free to reconfigure/reroll passives for Purple shells, as they don’t use the same mats as Yellows and Reds.
- Farm and Utilize early game DokiDoki gear and Terrormaton gear as needed for your supports and DPS.
- Farm Shells as needed for Hyperlink Charter and upgrade.
Day 2 - Aim to reach level 24 (26 is possible if you also use Stamina Pots)
- Remember to Continuous Battle to burn through your stamina while going through content (Arena/Story/Guild)
- Story Chapter 7 Unlocks at Level 20
- Story Chapter 8 Unlocks at Level 23
- Once you unlock Febian Shell boss, focus on using your stamina on them:
- Farm for everyone in the team. It can be used on both DPS and Supports and it provides permanent SPD+ buff and turn action advance.Black Flag
- Farm also drops from Febian, you can get one upgraded copy for your main DPS if you have access to SPD buffers like Nell, Lily, etc.Twilight Knight
- For ,Black FlagandSwiftrush [12/12]
 set rolls are what you’re aiming for. ForBramble [8/8]
 , look forTwilight KnightOnslaught [12/12]
- GP Outpost REA-07 unlocks at Level 21
- After each Story Chapter, unlocks new Animus EXP Stages and GP Outpost Skill Upgrades.
- Threshold Nightmare Difficulties Unlocks at Level 25
Day 3 - Aim to reach level 28 (31 is possible if you also use Stamina Pots)
- Story Chapter unlocks at Level 27
- Story Chapter unlocks at Level 30
- GP Outpost REA-10 unlocks at Level 28
Day 4 - Aim to reach level 32 (35 is possible if you also use Stamina Pots)
- Threshold Hell Difficulties Unlocks at Level 35
- NicoNana Farming - work on building a team that can reliably clear this in 25 seconds or less. You’ll be farming this a lot on continuous play in the background, so you want it to clear quickly.
- Your goal here is to get at least one upgraded copy of , and one to two upgraded copies of
 White Fangand
 Artisan.
 Gigabyteis useful in PvP but doesn’t take priority over the others.
 Alicorn
 - Progress towards unlocking Hell III DokiDoki for triple set Mythic Modules. Artisan is good for support units.
Day 5 - Aim to reach level 37
- Just continue farming NicoNana and Threshold Hell difficulty.
Day 6 - Aim to reach level 40
- Unlocks Module Shop. Late game sets (Fury, Strive, Bulwark, Momentum, and Bloodbath) unlock in the Module Shop only at lvl 45.
- Unlocks Ethernet Rally. This resets every 3 weeks so it is worth it to make some early progress to collect rewards. This mode requires 3 teams - one for each element, but you can fill the holes with LD characters.
After that, your goal is to reach level 50 that unlocks Inferno difficulty for both Shells and Modules.
For early gearing tips (so before you reach red Modules/Shells), go here:

Threshold Bosses Teams
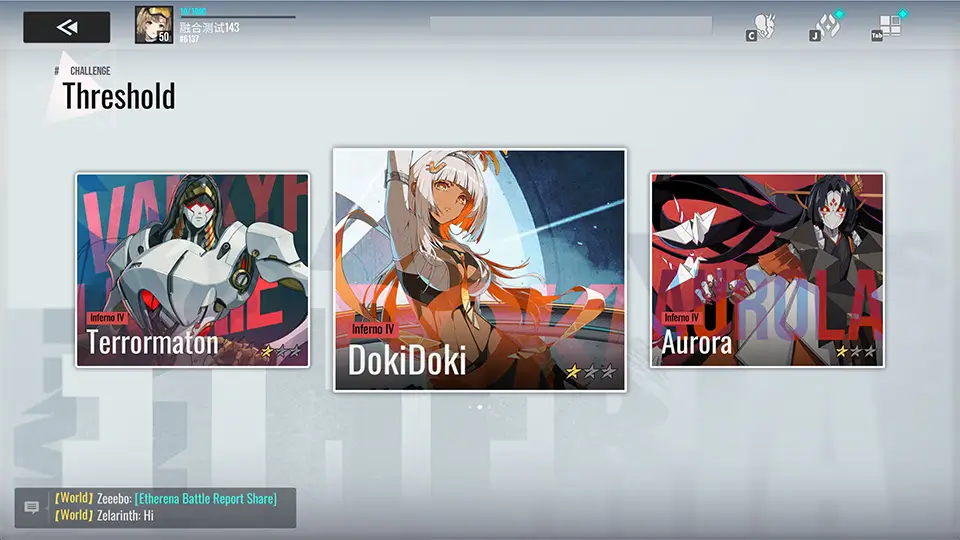
As we already mentioned, there are three bosses that drop different Module sets: DokiDoki, Terrormaton and Aurora. Aurora unlocks at level 30, so you can't farm her early on.
Trying to farm all three bosses early is hard to do, as each of the bosses not only has a different element, but also requires different approach to easily kill them. Still, picking two out of the bosses is possible as you can overlap most of the characters. DokiDoki is non-negotiable as a pick, as she drops various Speed sets and you will need them. So then you either have to choose between Terrormaton or Aurora - and we suggest Aurora as her sets are pretty unique and overall stronger than what Terrormaton drops.
The teams below aren't the best/fastest possible teams you can run on the bosses, but the lowest entry ones . that allow you to reach and clear Inferno. That's why there's a lot SR characters present that are easier to obtain.

DokiDoki (Speed and Counter sets)
- Main DPS (Pick 1):
 Rilmocha - the best DPS choice for DokiDoki who makes farming the boss easy mode,
 Xiada - a great DPS that becomes stronger with buffs and who can reduce the cooldown of her S3. On max stacks, she will basically just spam her S3, dealing a lot of damage and reducing the DEF of all enemies. Use her with Revelation shell!
 Yeli - Excellent AoE and ST DPS that covers the DEF- debuff on top of her damage. Best used with the Revelation shell.
 Massiah - a Light DPS who can work against any boss due to how universal his kit is,
 Tiamat - she will work great early on, but with the difficulty increase, she will start slowing down more and more. She still can clear Inferno (so highest difficulty), but it will be way slower than other DPS - though if you play her manually, she still works well. She also helps the team with Shields/Healing and Taunt,
 Rahu - Although slow, Rahu’s excellent performance in long fights allows him to clear Doki Inferno, thanks to his frequent FUA and his team-wide DEF+.
- CC character (Pick 1):
- You need a character that can consistently apply Crowd-Control effects to the enemies to remove the damage reduction buff. Otherwise you will have a bad time here,
![Kazuyo [The Reverie]](https://cdn.prydwen.gg/images/etheria-restart/characters/kazuyo-the-reverie_icon.webp) Kazuyo [The Reverie] - while Kazuyo doesn't have a hard-cc, but rather she forces enemies to sleep (and they wake up after getting hit), she can apply the status more often than other since she can do it both via her S3 and S1 skills. Another advantage she has is the ATK- debuff that drastically reduces the damage the monsters do,
Kazuyo [The Reverie] - while Kazuyo doesn't have a hard-cc, but rather she forces enemies to sleep (and they wake up after getting hit), she can apply the status more often than other since she can do it both via her S3 and S1 skills. Another advantage she has is the ATK- debuff that drastically reduces the damage the monsters do, Kraken - the best alternative with a hard-cc on his S3 that freezes the monsters and prevents them from moving. No ATK- debuff here, so you need to build your team tankier if you want to use him.
 Celince - Celince Forgetfulness debuff actually counts as CC, so she can also remove the DMG Reduction buff from enemies. On top of that, she also has a passive team-wide shield, helping with survival.
 Mio - another CC option, but you most likely won't run her solo, but together with either Kazuyo or Kraken. She also helps the team with buffs and turn meter boosts.
 Nahor - AoE Freeze, DEF- and even RES-, all in one skill and on a relatively short CD, allows Nahor to perform the roles of CCer + Support, with the RES- compensating for weaker gear during progression.
- Additional Supports (Pick 3):
 Plume - Increases Damage taken by the enemy, reduces their SPD and DEF, and even Dispels (not the Yellow Icon Buffs!) + reduces the Damage the enemy deals. For a progressing player, Plume is the most valuable addition alongside Lily, after your chosen CCer.
 Marvell - Marvell not only can slow enemies down and steal their Turn Meter, but also reduce their Effect RES, allowing your CC character (and debuffers) to land their debuffs more consistently,
 Kloss - another debuffer that has pretty insane combination of debuffs: DEF-, DMG Taken+, DMG Dealt- and Speed down. On top of that, she can steal turn meter from enemies and give it to her allies.
 Gray - a DPS/Buffer/Debuffer hybrid that buffs your team's CRIT Rate and reduces enemies DEF while at the same time dealing decent damage,
 Freya - a Buffer/Debuffer hybrid that provides ATK+ and DEF+ buffs to allies, increases the damage taken on enemies and boosts allies Turn Meter (while reducing enemy turn meter when they are debuffed),
 Lily - a top-tier buffer who provides SPD+ to all allies and additional buffs to one marked ally (the main carry),
 Tsukiyo Mi - another great buffer that provides ATK+ and SPD+ buffs to the whole party,
 Nell - great source of SPD+, Vulnerable, and Healing + Turn meter for your carry makes her an amazing budget option even at the highest difficulties.
 Sania or
  Valerian - both are great Sustain characters that can keep the team alive. Sania offers heals and revives, while Valerian is more shield-focused and also can provide additional buffs to the team. Once you obtain Lingluo you can use her instead.
 Fuqiu - Heal Spam, frequent Turn meter boosting, big shields and a SPD buff make Fuqiu a great addition to most teams seeking more safety and consistency.

Aurora (endgame sets - Immunity, Turn Meter boost etc)
- Main DPS (Pick 1/2):
 Rosa - great damage dealer that also can delay Aurora with her basic (and when you unlock Aurora, she already should work well),
- Xiada - while she's an AoE beast, her single target is actually decent enough too for her to work well on Aurora,
- Yeli - a hybrid DPS that can deal some AoE damage while doing great single target damage with her FUA attacks. Her burst damage is great, allowing her to easily deal with Aurora,
 Diting the hardest hitting SR character who can one-shot the boss even at Inferno level (but it requires a team build for that). His Mark is a bit annoying on auto, so you need to build the team around that,
- Massiah - a Light DPS who can work against any boss due to how universal his kit is.
 Liliam - exceptional Burst makes her an amazing Boss buster.
- Other viable options (but weaker than the ones above):
- Required Sustain (Pick 1-2):
- Lingluo - she's the best Healer to use against Aurora as she can provide Immunity buff to allies, cleanse debuffs and heal a lot. Other healers will struggle here, especially in Hell and Inferno. Thankfully, Lingluo is free for everyone (you will get her from 7-day starter event)
- Other options you can use together with Lingluo (she's a must use):
 Chiaki
  Mia Valerian
 - Required Dispeller (Pick 1):
- Plume - Increases Damage taken by the enemy, reduces their SPD and DEF, and even Dispels (not the Yellow Icon Buffs!) + reduces the Damage the enemy deals. For a progressing player, Plume is the most valuable addition, working great with most of the options in the list, notably Viper for more survivability, or with more offensive options like Lily/Beyontin.
 Viper - the best option for the Dispel slot for Aurora,
 Heinrich - a Dark DPS/Debuffer hybrid who also provides you with dispel source (to get rid of Immunity),
 Turandot - if you're not using Heinrich, Turandot will act as the dispeller for you. She also provides the team with DEF+ and ATK+ buffs. Just keep in mind on auto, she will use her S3 first, but dispel is tied to S2 - so you start the battle manually and then switch to auto after using S2,
 Yang - a dispeller that is very similar to Gray, as in you stack Crit Rate on him to trigger both Dispel and Turn Meter boost for all allies. On top of that, he also provides ATK+ and CRIT Rate+ buffs,
 Obol - another alternative for the dispel slot. He's also great in PVP. Just keep in mind on auto, he will use his S3 first, but dispel is tied to S2 - so you start the battle manually and then switch to auto after using S2.
- Best Supports (Pick 1/2):
 Beyontin - a Support who provides ATK+ and CRIT DMG+ to all allies and can also 100% turn meter push one ally and reduce their cooldown. Also can revive fallen allies.
- Lily - a top-tier buffer who provides SPD+ to all allies and additional buffs to one marked ally (the main carry),
 Dinah - a top-tier debuffer that amplifies the damage dealt to enemies. She can not only inflict DEF- and DMG Taken debuffs on them, but also inflict a unique debuff that causes them to receive additional True Damage,
 DokiDoki - another great Support options who provides buffs and turn meter boost - also works as a cleanser,
- Tsukiyo Mi - another great buffer that provides ATK+ and SPD+ buffs to the whole party and can 100% turn meter push one ally.

Terrormaton (HP and ATK sets)
- Main DPS (Pick 1/2):
- Diting - the hardest hitting SR DPS character, but his Mark is pretty annoying at times. That's why you often run him in dual-dps team - for example with Victor,
![Sania [Vengeful Thorn]](https://cdn.prydwen.gg/images/etheria-restart/characters/sania-withered-shadow_icon.webp) Sania [Vengeful Thorn] - DoT-focused DPS who can just ignore DEF+ buffs that Terrormaton constantly throws on himself as DoT deals 4% Max HP damage. Make sure to pair her with
Sania [Vengeful Thorn] - DoT-focused DPS who can just ignore DEF+ buffs that Terrormaton constantly throws on himself as DoT deals 4% Max HP damage. Make sure to pair her with  Fangus so she has more DoTs to trigger with her S3,
- Liliam - exceptional Burst makes her an amazing Boss buste.
- Yeli - great sustained single target damage and DEF- allow Yeli to perform really well against most PVE bosses, Terror included.
 Khloros - a great DPS who is used as FUA attacker, allowing him to attack more often than other DPS.
- Massiah - a Light DPS who can work against any boss due to how universal his kit is.
- Dispel source (Pick 1):
- Plume - Increases Damage taken by the enemy, reduces their SPD and DEF, and even Dispels (not the Yellow Icon Buffs!) + reduces the Damage the enemy deals. For a progressing player, Plume is once again the most valuable addition, the defensive parts of her kit shining against the huge Burst of Terrormaton.
- Heinrich - a Dark DPS/Debuffer hybrid who also provides you with Dispel source (to get rid of Immunity and DEF+),
 Mizuki Makoto - with dispel available on both S1 and S3, Makoto is a great addition to the team - especially that she also has DEF+ to help the team surive.
- Turandot - a dispeller who provides the team with DEF+ and ATK+ buffs. Just keep in mind on auto, she will use her S3 first, but dispel is tied to S2 - so you start the battle manually and then switch to auto after using S2,
 Veronika - another dispeller who steals the buffs and shares them with her allies - she also applies a shield to them, helping them survive Terrormaton attacks.
- Mia - she has dispel on S2, but on auto she uses S3 first - so you have to use her on manual at the start of the battle,
- Best Supports (Pick 2/3):
- Lily - a top-tier buffer who provides SPD+ to all allies and additional buffs to one marked ally (the main carry),
- Beyontin - another buffer who is used in Victor one-shot teams as she can provide a lot buffs to him and also push his turn meter by 100%,
![Chiaki [The Echo]](https://cdn.prydwen.gg/images/etheria-restart/characters/chiaki-the-echo_icon.webp) Chiaki [The Echo] - another turn-meter pusher, but for the whole team who provides allies with ATK+ buff,
Chiaki [The Echo] - another turn-meter pusher, but for the whole team who provides allies with ATK+ buff, Helkid - a shielder/DPS hybrid who can also debuff enemies with ATK-,
- Gray - a DPS/Buffer/Debuffer hybrid that buffs your team's CRIT Rate and reduces enemies DEF while at the same time dealing decent damage,
- Dinah - a top-tier debuffer that amplifies the damage dealt to enemies. She can not only inflict DEF- and DMG Taken debuffs on them, but also inflict unique debuff that causes them to receive additional True Damage,
- Freya - a Buffer/Debuffer hybrid that provides ATK+ and DEF+ buffs to the enemy, increases the damage taken on enemies and boosts allies Turn Meter (while reducing enemy turn meter when they are debuffed),
- Kloss - another debuffer that has pretty insane combination of debuffs: DEF-, DMG Taken+, DMG Dealt- and Speed down. On top of that, she can steal turn meter from enemies and give it to her allies,
- Sania or Valerian - both are great Sustain characters that can keep the team alive. Sania offers heals and revives, while Valerian is more shield-focused and also can provide additional buffs to the team,
- Mia - a healer/shielder who also can dispel enemies (but on a long cooldown, so you can't rely on her for that) and extend buffs on allies/shorten debuffs.
For detailed guides for each boss, check here:


Recommended Characters To Build
Recommended SSR characters
The order the characters are placed matters - left is most used/more important.
- Light/Dark: Lily Plume Liliam Yeli Sania [Vengeful Thorn] (PVE only) DokiDoki Massiah (PVP) Heinrich Mio
- Red:
 Holden Beyontin
  Santik Khloros
 - Green: Kloss Freya Fuqiu RahuRilmocha (for DokiDoki only)
- Blue: Lingluo
 Ninfoniel Rosa
  Batsby XiadaTsukiyo Mi
Recommended SR characters
Build them first as they're versatile and used in multiple teams/content (or required for a specific content).
- Valerian - great shielder/buffer who can be used in all content due to her Light element. Also great in PVP.
- Diting - excelent DPS for PVE content.
- Viper - the best dispeller who also provides great debuffs, helping you survive in harder content.
- Sania - an alternative to Valerian. She is a great healer/reviver who can be used in DokiDoki and Terrormaton. Also good in PVP. Though Lingluo will just replace her anywhere (outside of content where her Blue color makes it an issue).
- Nell - if you don't have Lily, she's the best alternative for the SPD buffer position.
- Dinah - best overall DEF break and debuffer. Also able to steal turn meter with S1.
- Kazuyo [The Reverie] - you need her for DokiDoki.
Other Recommended SR characters
Other SR characters that are worth investing into - but they're less versatile.
- Chiaki [The Echo] - a Support who can boost whole team's turn meter and boost their ATK. Can be used instead of Lily/DokiDoki if you don't have either of them.
- Obol & Fangus - if you plan to build the DoT team, invest into both of them. Obol is also great in PVP due to his ability to convert buffs into DoT.